
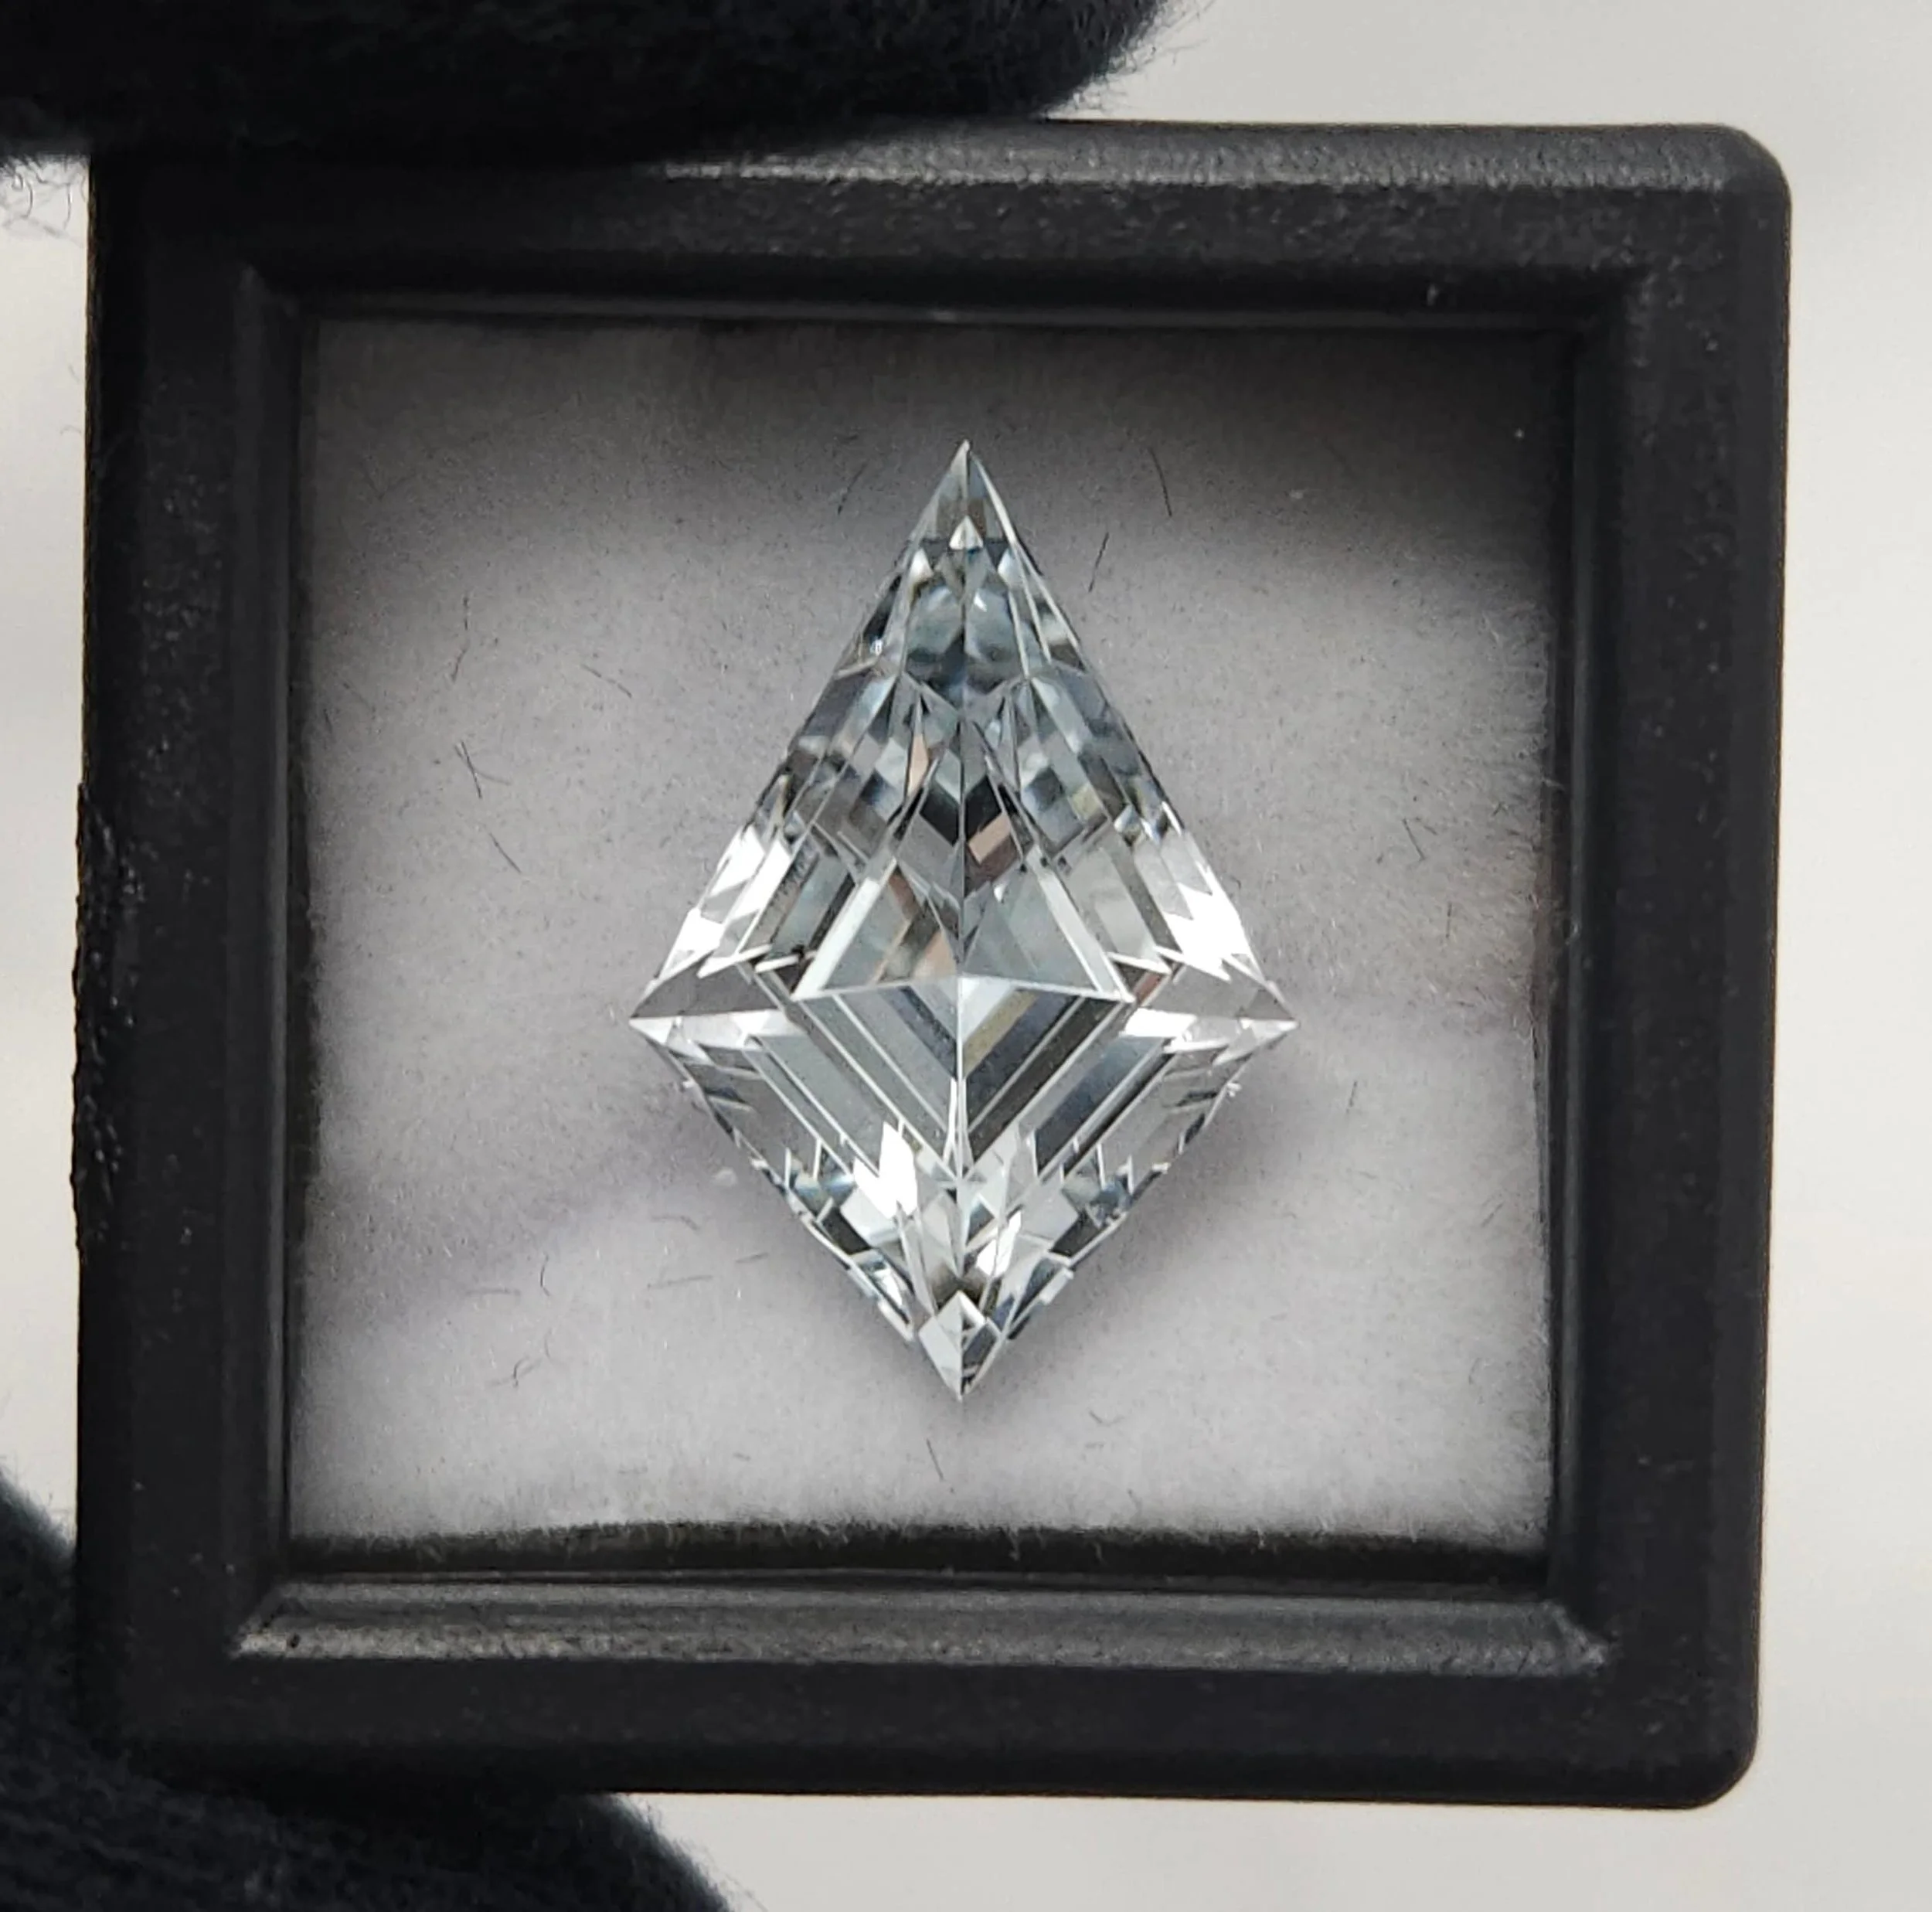
Natural Topaz Of Doom! Or is it?
In gem cutting, shortcuts always come back to haunt you. When a hidden inclusion and stubborn cleavage planes threatened to ruin a beautiful 6-carat Tucson find, a quick pivot turned a lapidary disaster into a custom, frosted-edge masterpiece. Here’s how I worked with the stone to turn a major problem into a stunning design opportunity.
Turning Challenges into Brilliants: Cutting a Custom 6-Carat Light Blue Topaz
Every gemstone tells a story, but some require a little more negotiation than others. If you’re a gem cutter, you know the exact feeling: that moment when a rough stone challenges your design, forcing you to pivot from your original blueprint.
That is exactly what happened with this stunning piece of natural light blue topaz. Here is the journey of how a tricky piece of rough from the Tucson tents became a unique, custom-cut masterpiece.
The Find and the Blueprint
It all started at the 2025 Tucson Gem and Mineral Show. If you’ve ever been, you know how overwhelming the rows of rough material can be. I managed to score a beautiful piece of natural, pale blue topaz. While I can't quite recall its exact geographic origin, the clarity and soft color screamed potential.
Back at the studio, I sat down with Gem Cut Studio to map out something unique. I settled on a striking, geometric kite-inspired design with sharp, dramatic keels to maximize the stone's brilliance and show off that crisp, icy blue hue.
Hurdle #1: Navigating the Inclusion
The trouble—and the fun—began during the initial blocking and cutting phases. As I started shaping the stone, a hidden inclusion reared its head.
Leaving it in wasn't an option if I wanted a clean stone, so I had to grind it out. The catch? Removing that flaw ate into my yield and left me with an incredibly tight margin for error. Suddenly, every single facet needed to be absolutely precise; one over-cut meant ruining the symmetry of the entire design.
Hurdle #2: The Battle with Topaz Cleavage
With the inclusion gone, I thought I was in the clear. But topaz is notorious for a specific physical property: perfect basal cleavage. This means the atomic structure of the crystal has weak planes where it wants to split cleanly.
When I went straight to initial polishing, those razor-sharp keels began to chip badly.
The Lesson: Shortcuts in lapidary always come back to haunt you. I realized I had skipped my crucial pre-polish step.
To fix it, I stepped back a few paces:
I took the stone back to a zinc lap with an 8k pre-polish compound.
After a careful pre-polish, I brought it back to the final 60k polishing lap.
This solved the macro-chipping, but under magnification, stubborn micro-chipping was still visible along those ultra-sharp edges. The cleavage planes were just too weak to sustain such a sharp, brittle meeting point.
Turning a Problem into a Feature
Instead of fighting the physics of the stone, I decided to work with it. To eliminate the micro-chipping and stabilize the edges, I opted to break the sharp lines by adding very fine, frosted facets directly onto the vulnerable edges.
To ensure the new additions didn't look like an accidental fix, I leaned into the aesthetic and added four extra facets to the design to tie it all together.
The frosted borders beautifully contrasted against the mirror-polished, step-cut facets, creating a framing effect that I hadn't originally planned for.
The Final Reveal
The resulting gem weighs in at a beautiful 6 carats. What started as an exercise in damage control turned out better than my original digital design. The frosted accents give the stone a modern, architectural look that makes the icy blue color absolutely pop.
In gem cutting, mistakes and material flaws happen. But sometimes, those limitations force us to think outside the box, turning an unexpected problem into a stunning, one-of-a-kind opportunity.
What’s the trickiest material you’ve ever had on your master lap? Let me know in the comments below!