
Faceting Service
Welcome to The Lapidary Office
Ever wonder what happens to your stone once it leaves your hands? At The Lapidary Office, we treat every rough specimen and worn gem with the master-level precision it deserves. From the moment your stone arrives at my studio, it goes through a meticulous, step-by-step transformation designed to maximize its natural fire, brilliance, and value.
Step 1: Secure Arrival & Master Assessment
Upon arrival at The Lapidary Office, your stone is formally logged with its unique identifying characteristics to ensure absolute chain of custody. Next, it undergoes a rigorous gemological inspection. I carefully map the stone’s internal structure—evaluating inclusions, stress points, and natural color zoning—to determine its optimal cutting viability and plan a design that yields the maximum possible brilliance and yield.
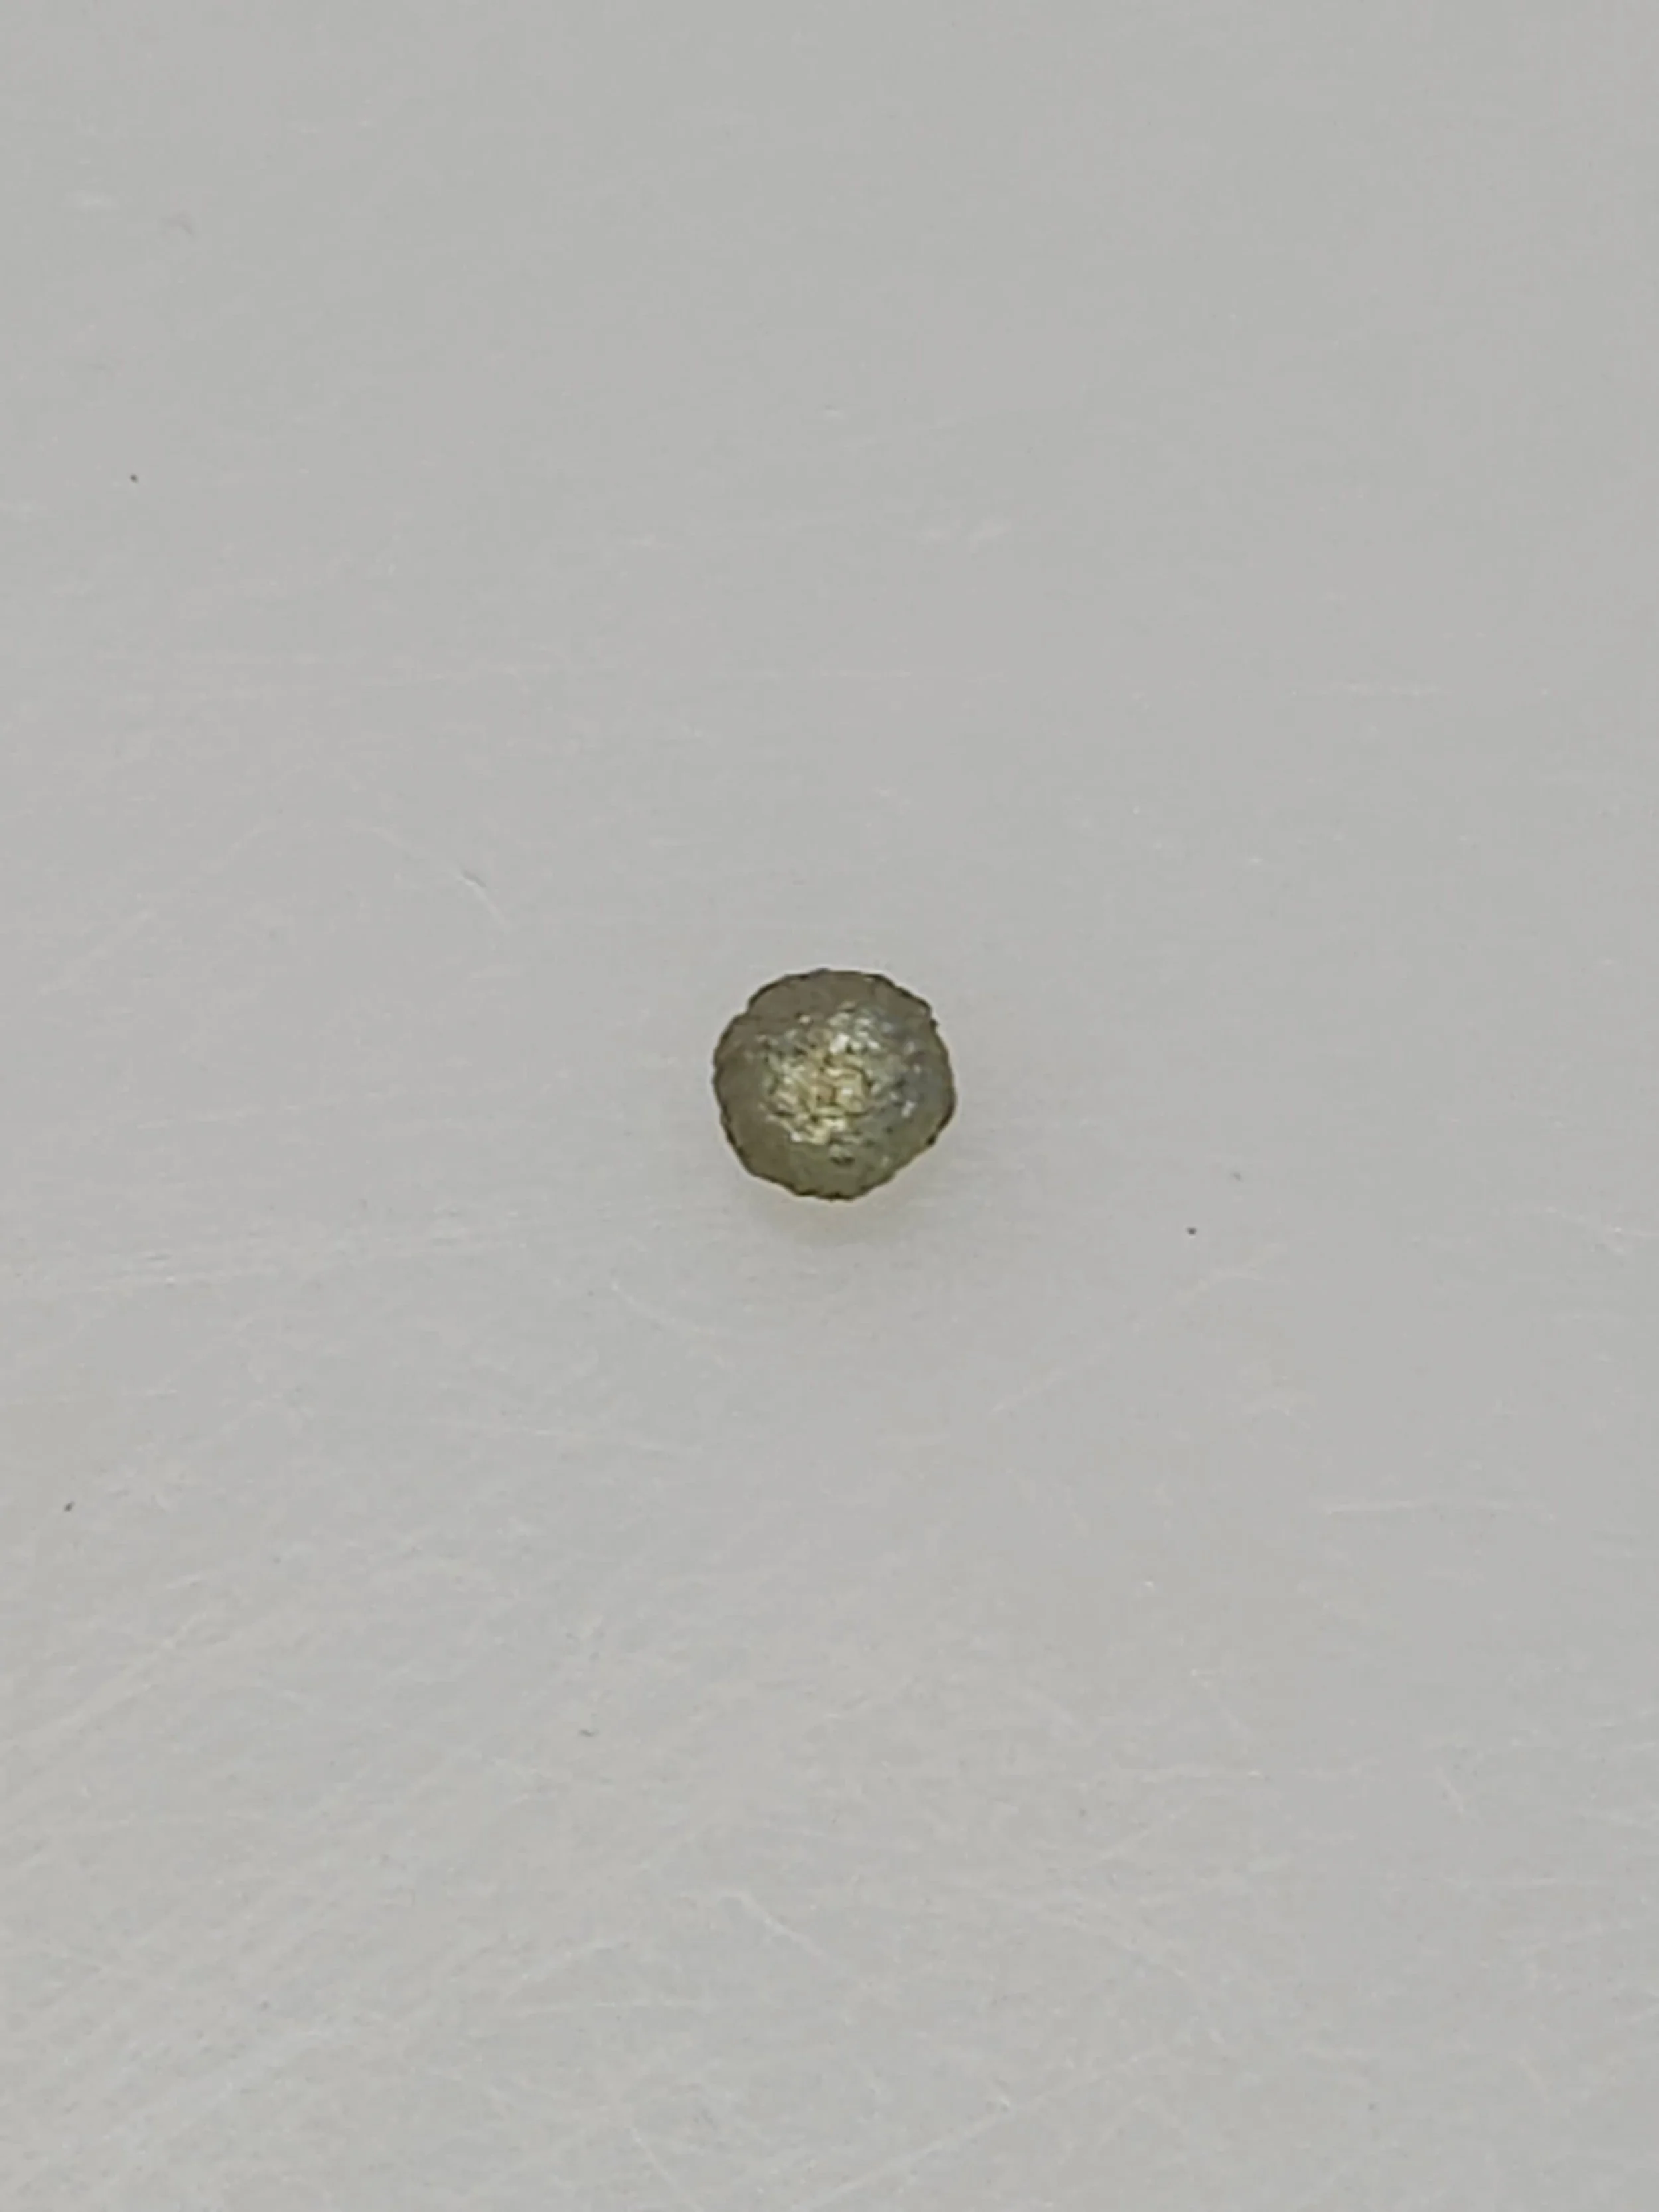
Your stone has arrived!
lets get it on the light table for initial inspection
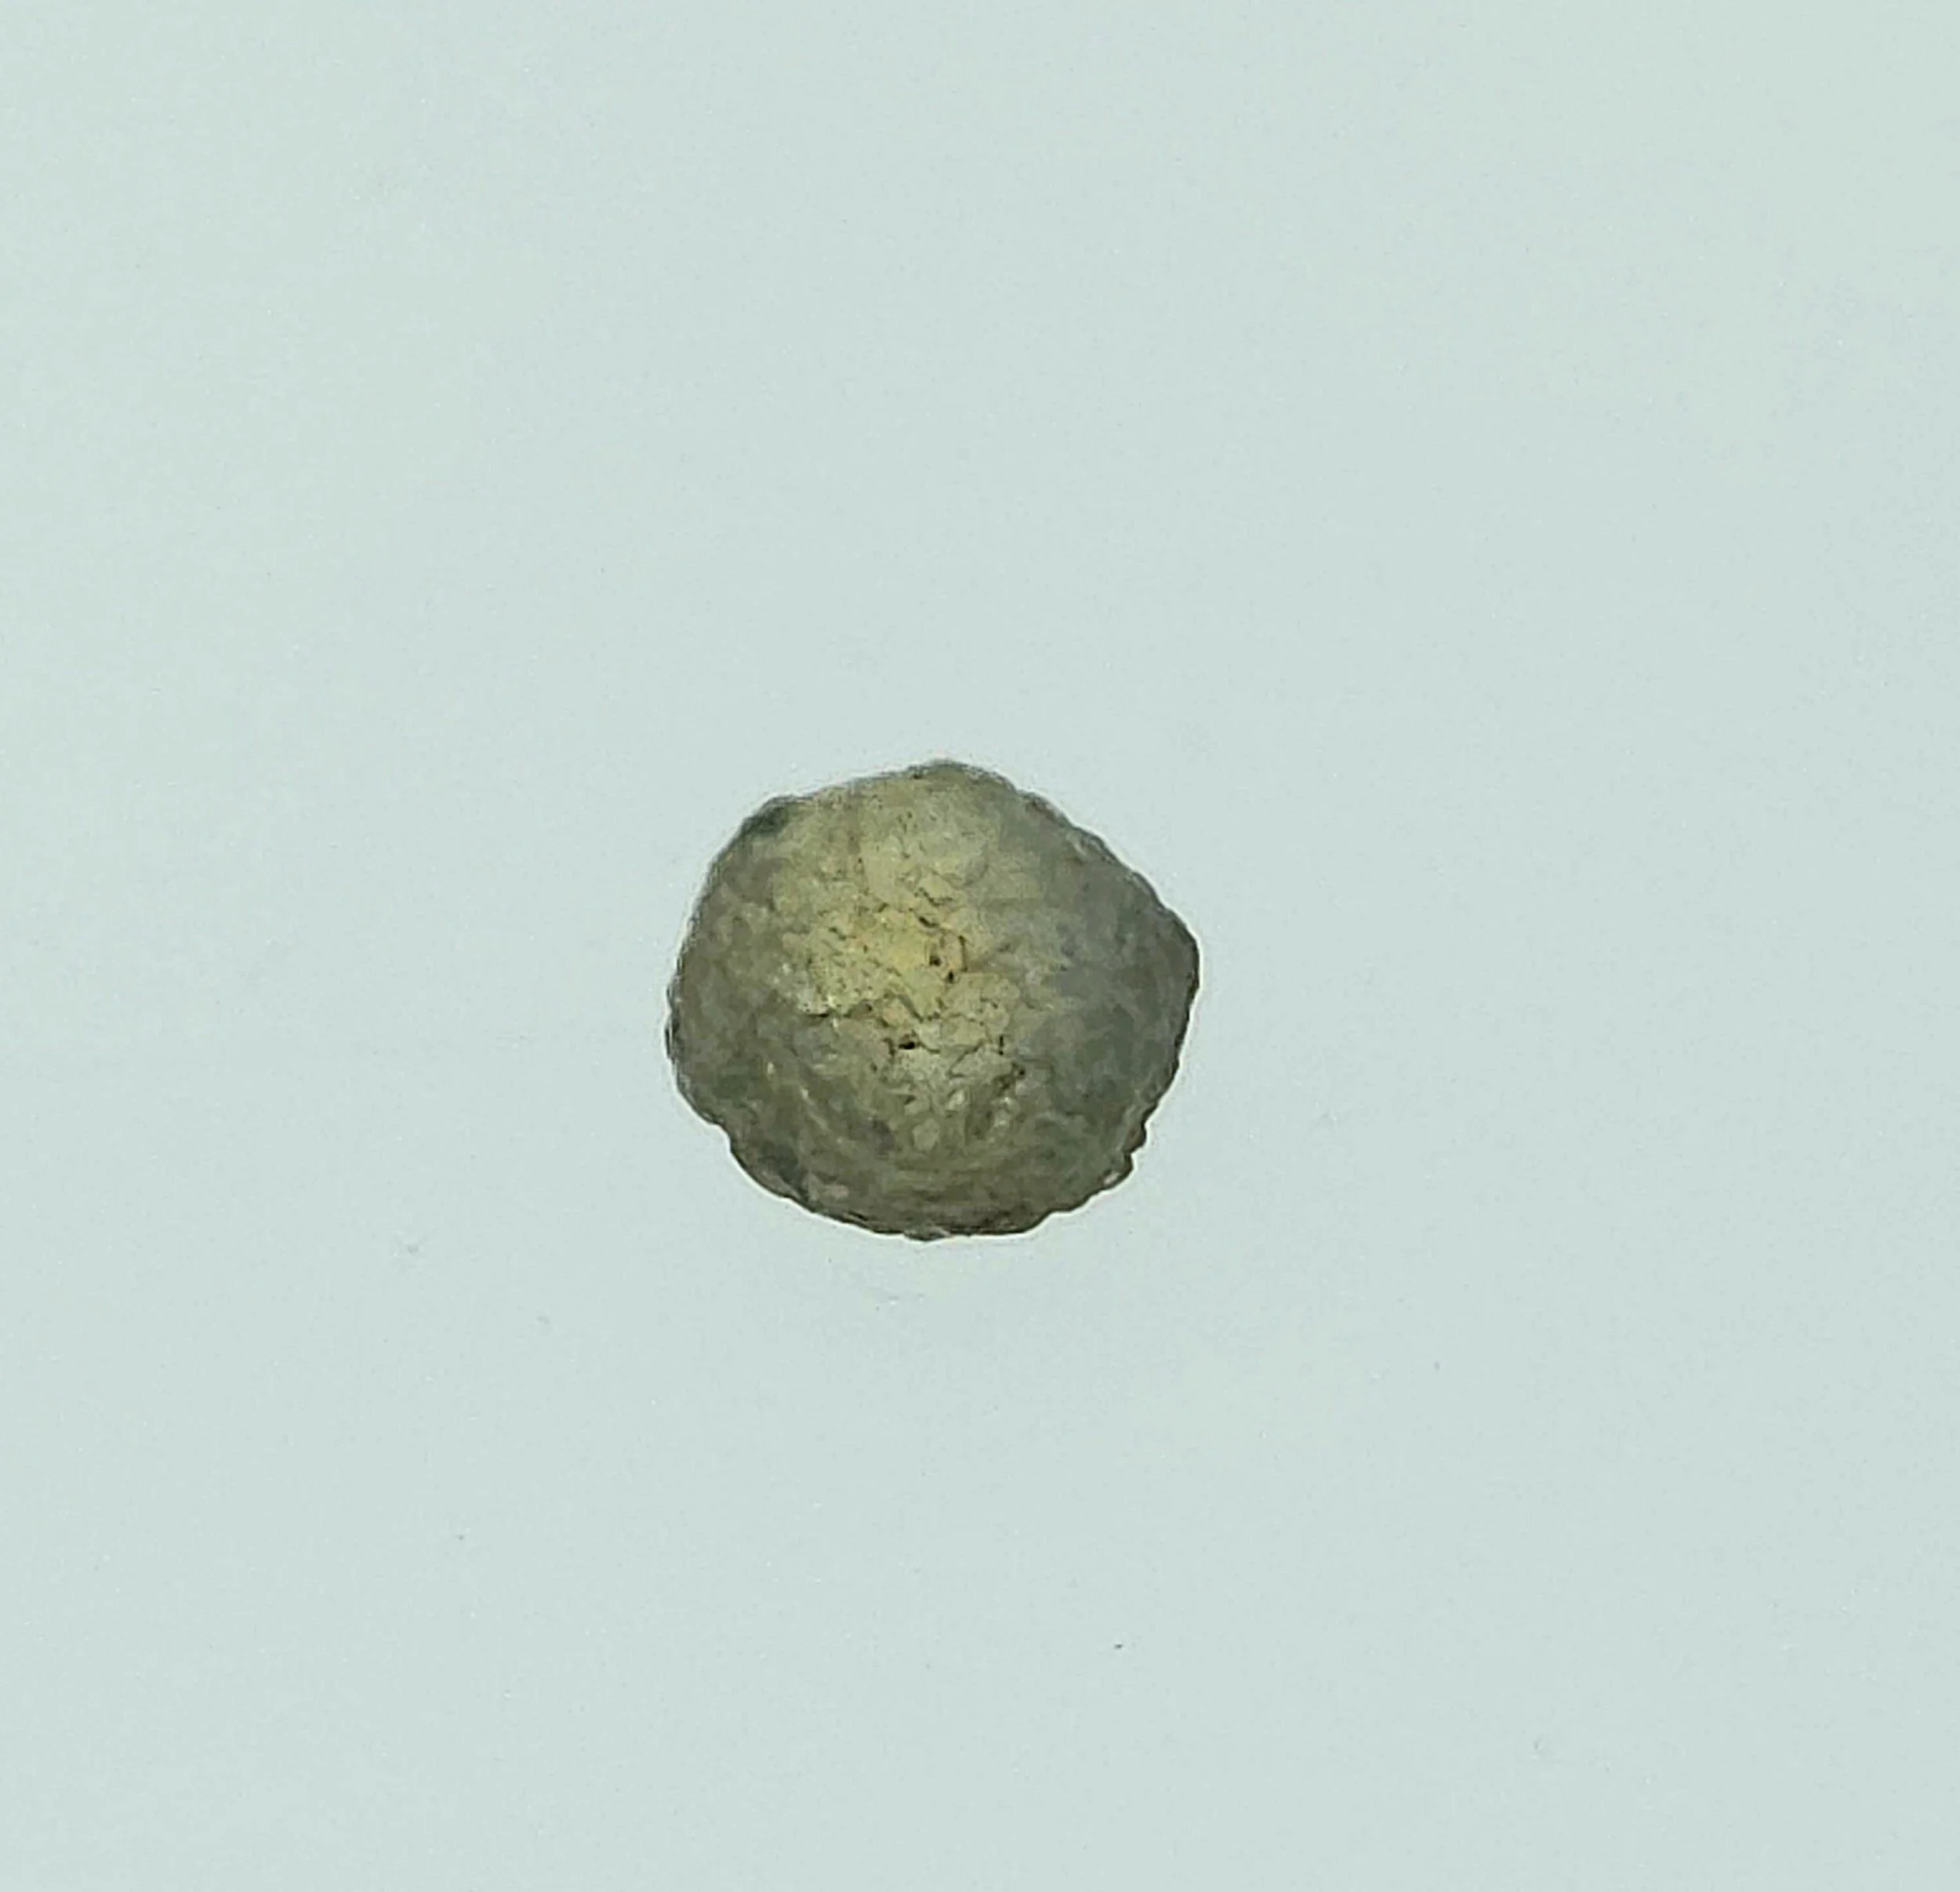
Initial light-table assessment of a rough Montana sapphire. The backlighting reveals an overall yellow-green core with darker blue-green edges. Because the darker perimeter will likely be removed during faceting, the final gem color is projected to be a vibrant yellow-green.
Lets get a closer look at the internal structure of the stone with an oil inspection
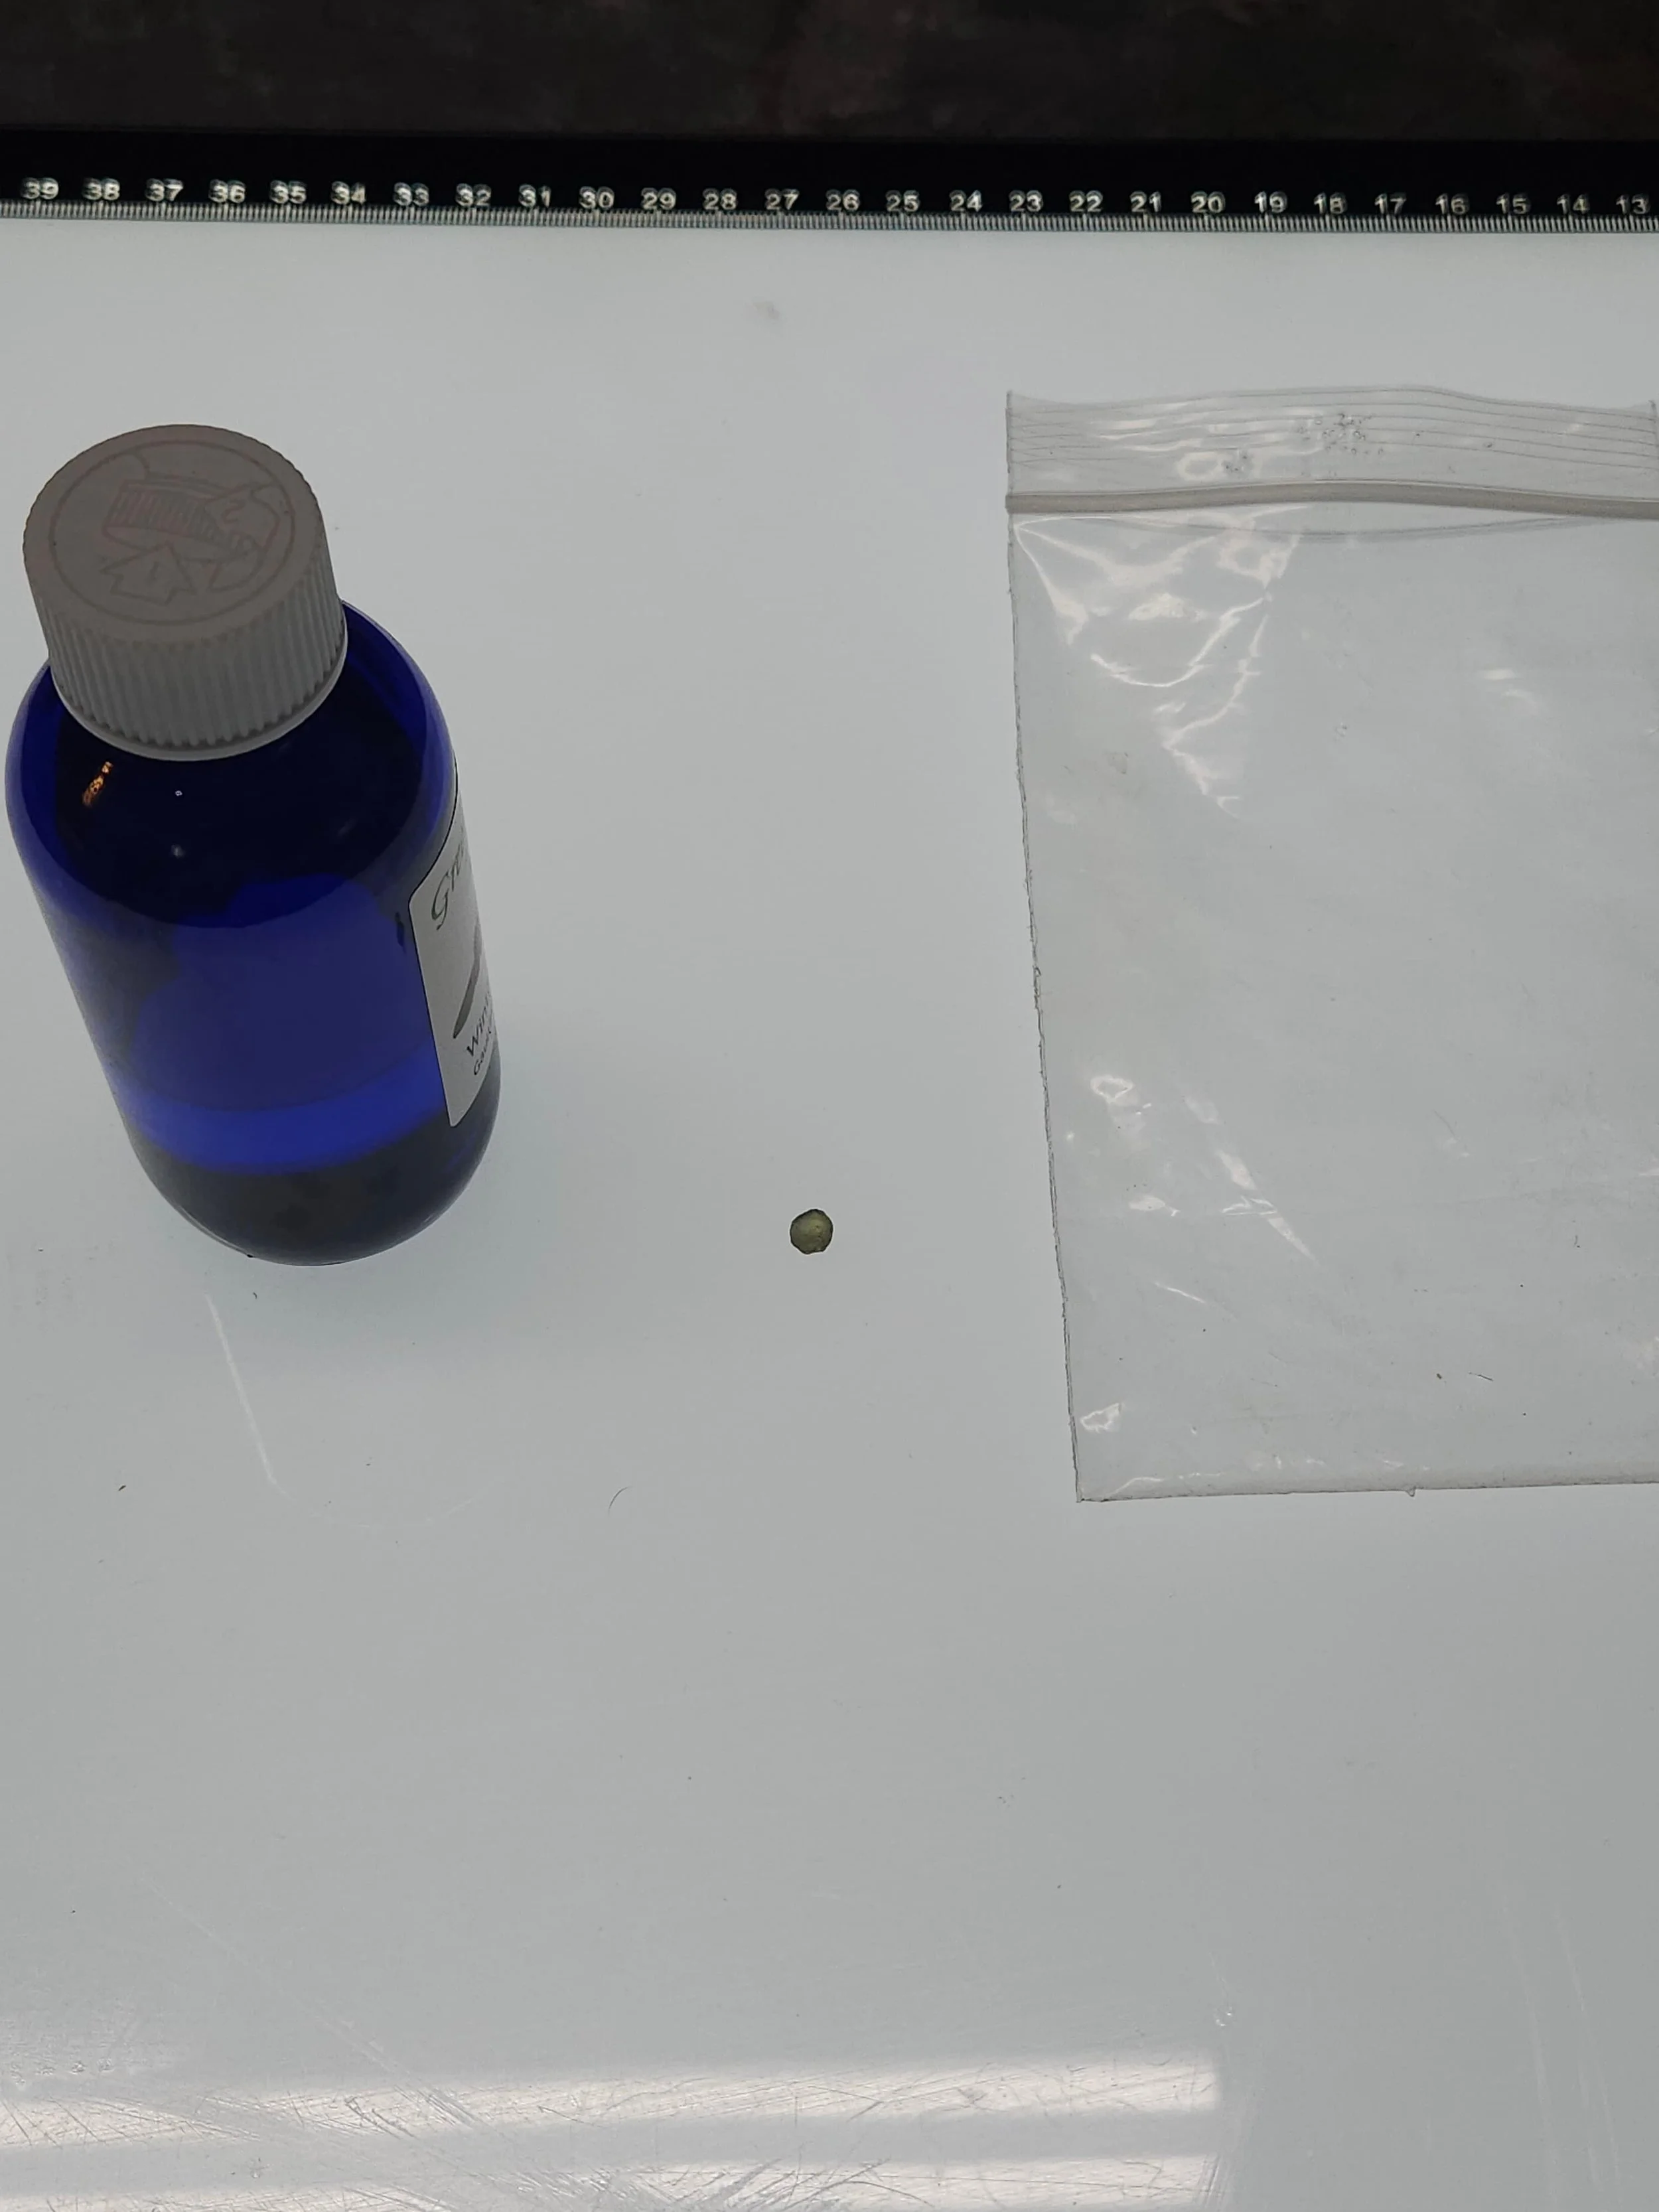
Prepping for refractive index (RI) oil inspection. I select a high-RI oil specifically formulated for sapphires, pairing it with a clear packet to easily manipulate the rough and evaluate the crystal from multiple angles.
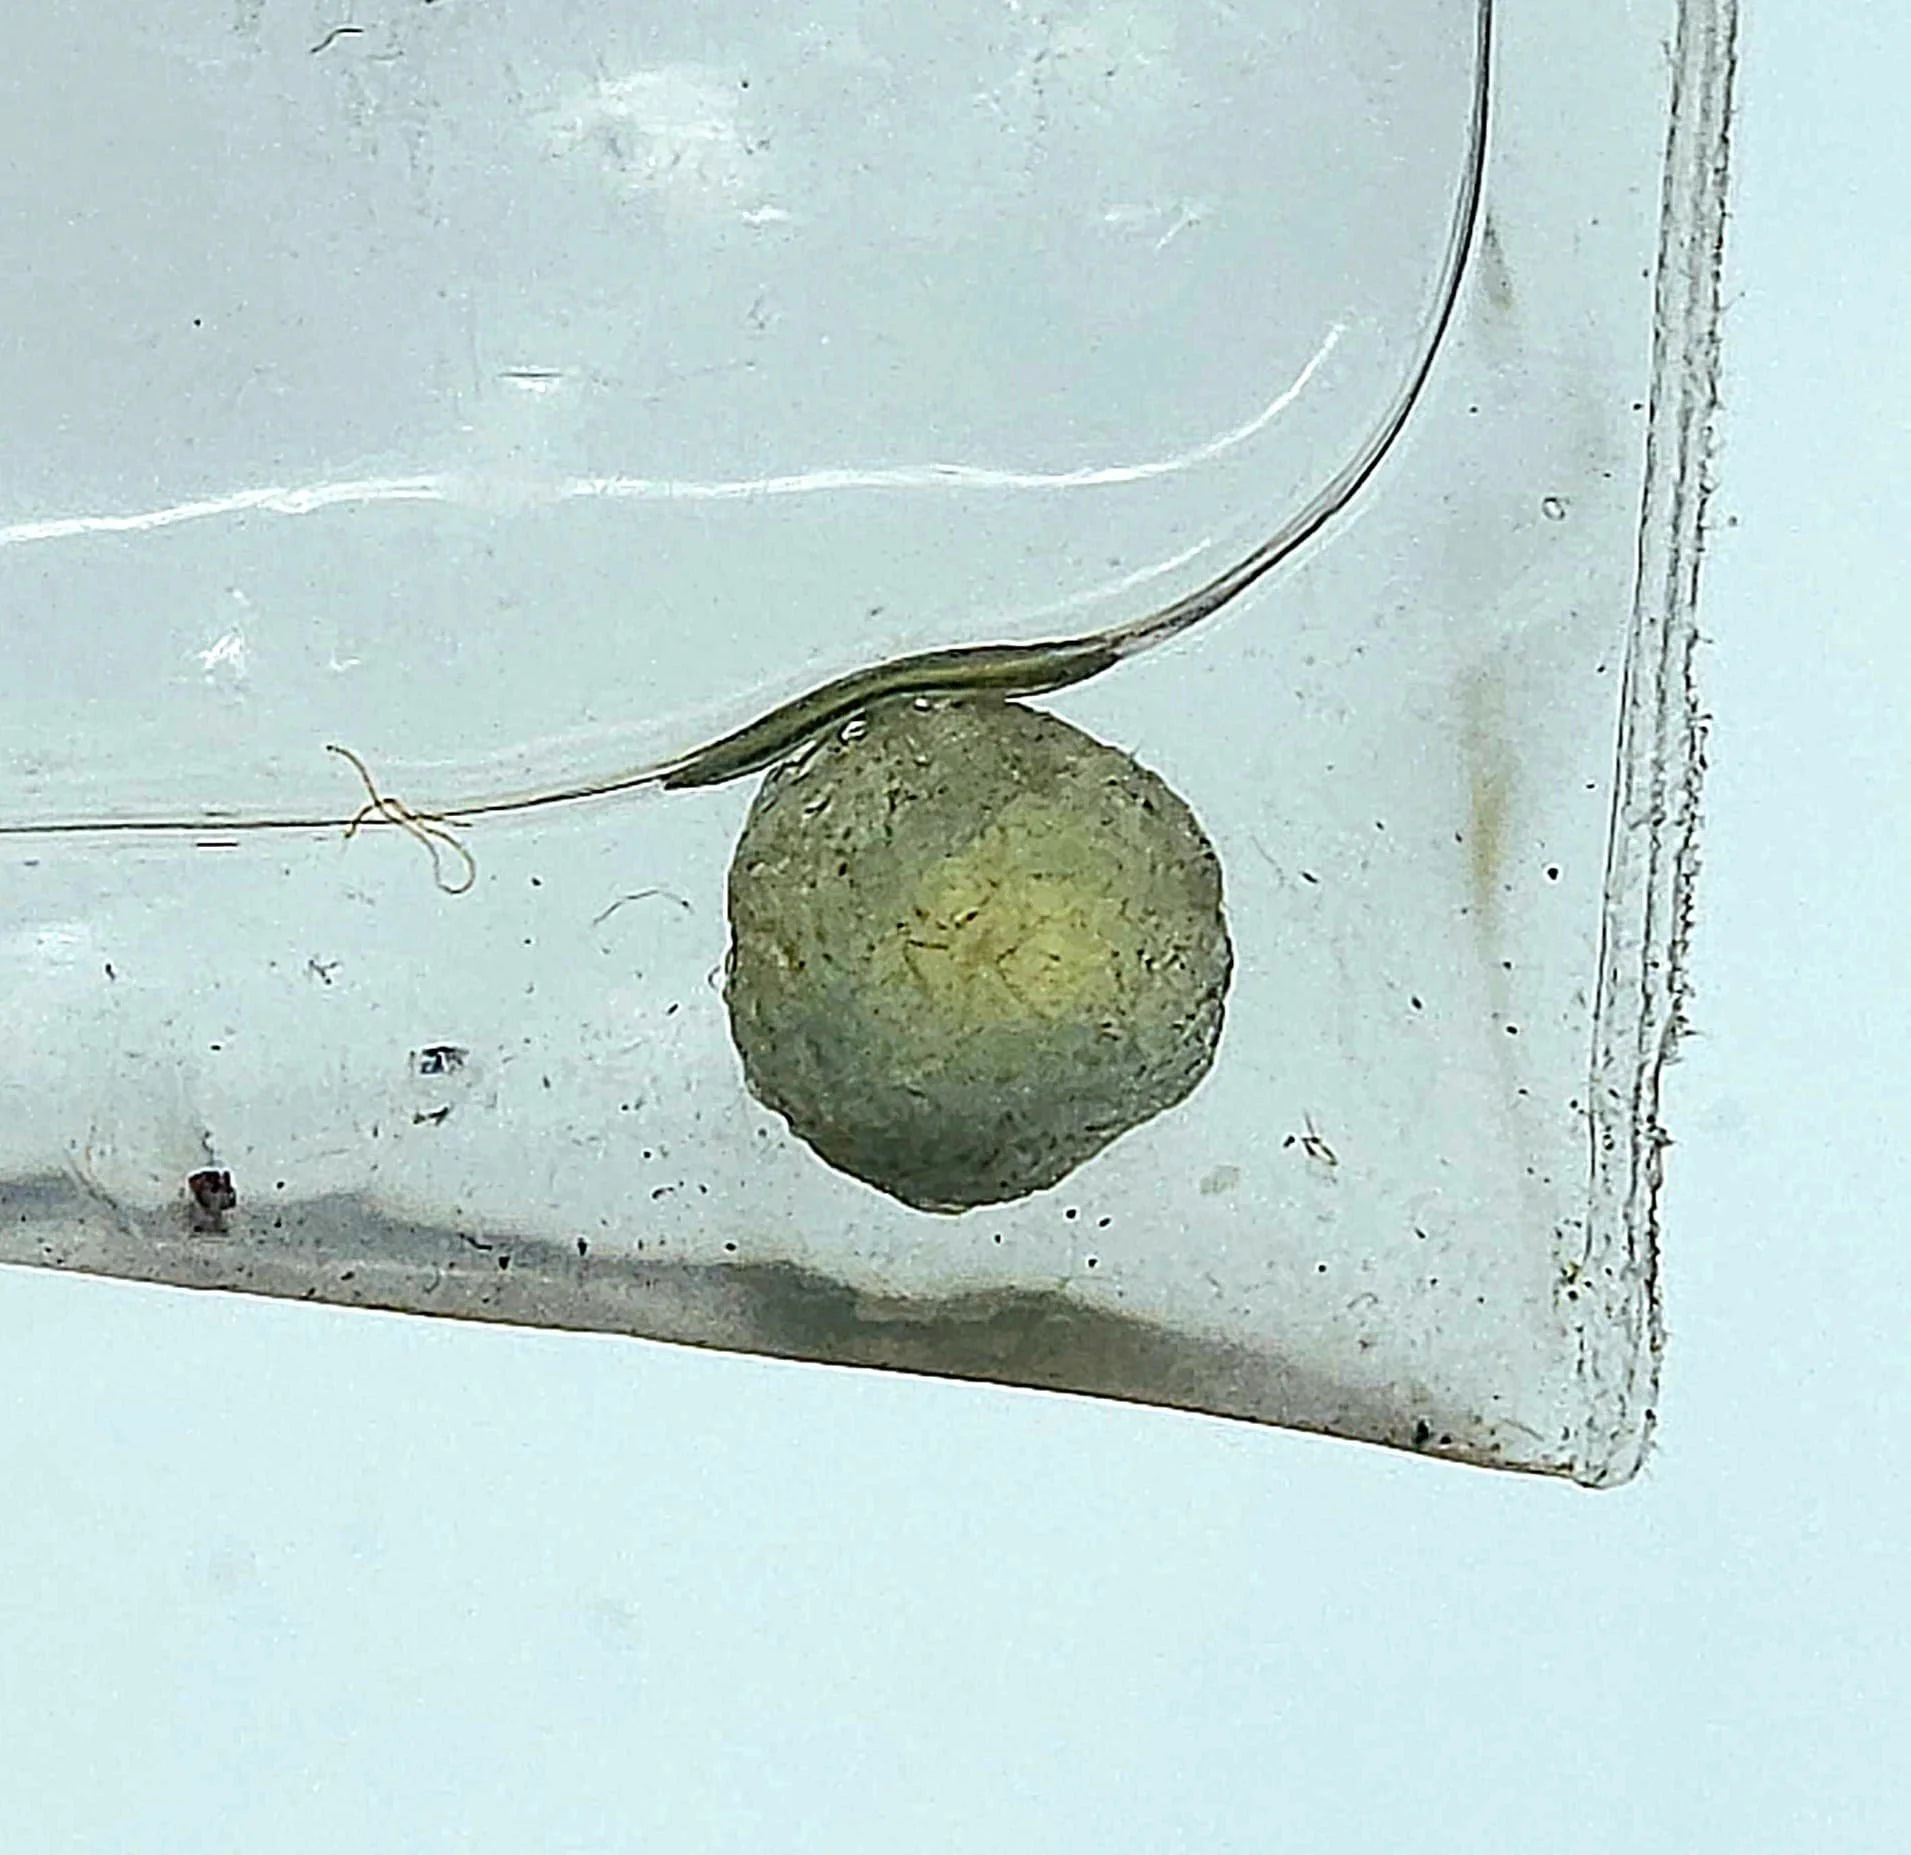
Submerging the rough in immersion oil allows me to look past the stone's frosted exterior, granting a crystal-clear view of its internal structure and hidden features.
Transitioning to Physical Metrics: Weight and Dimension
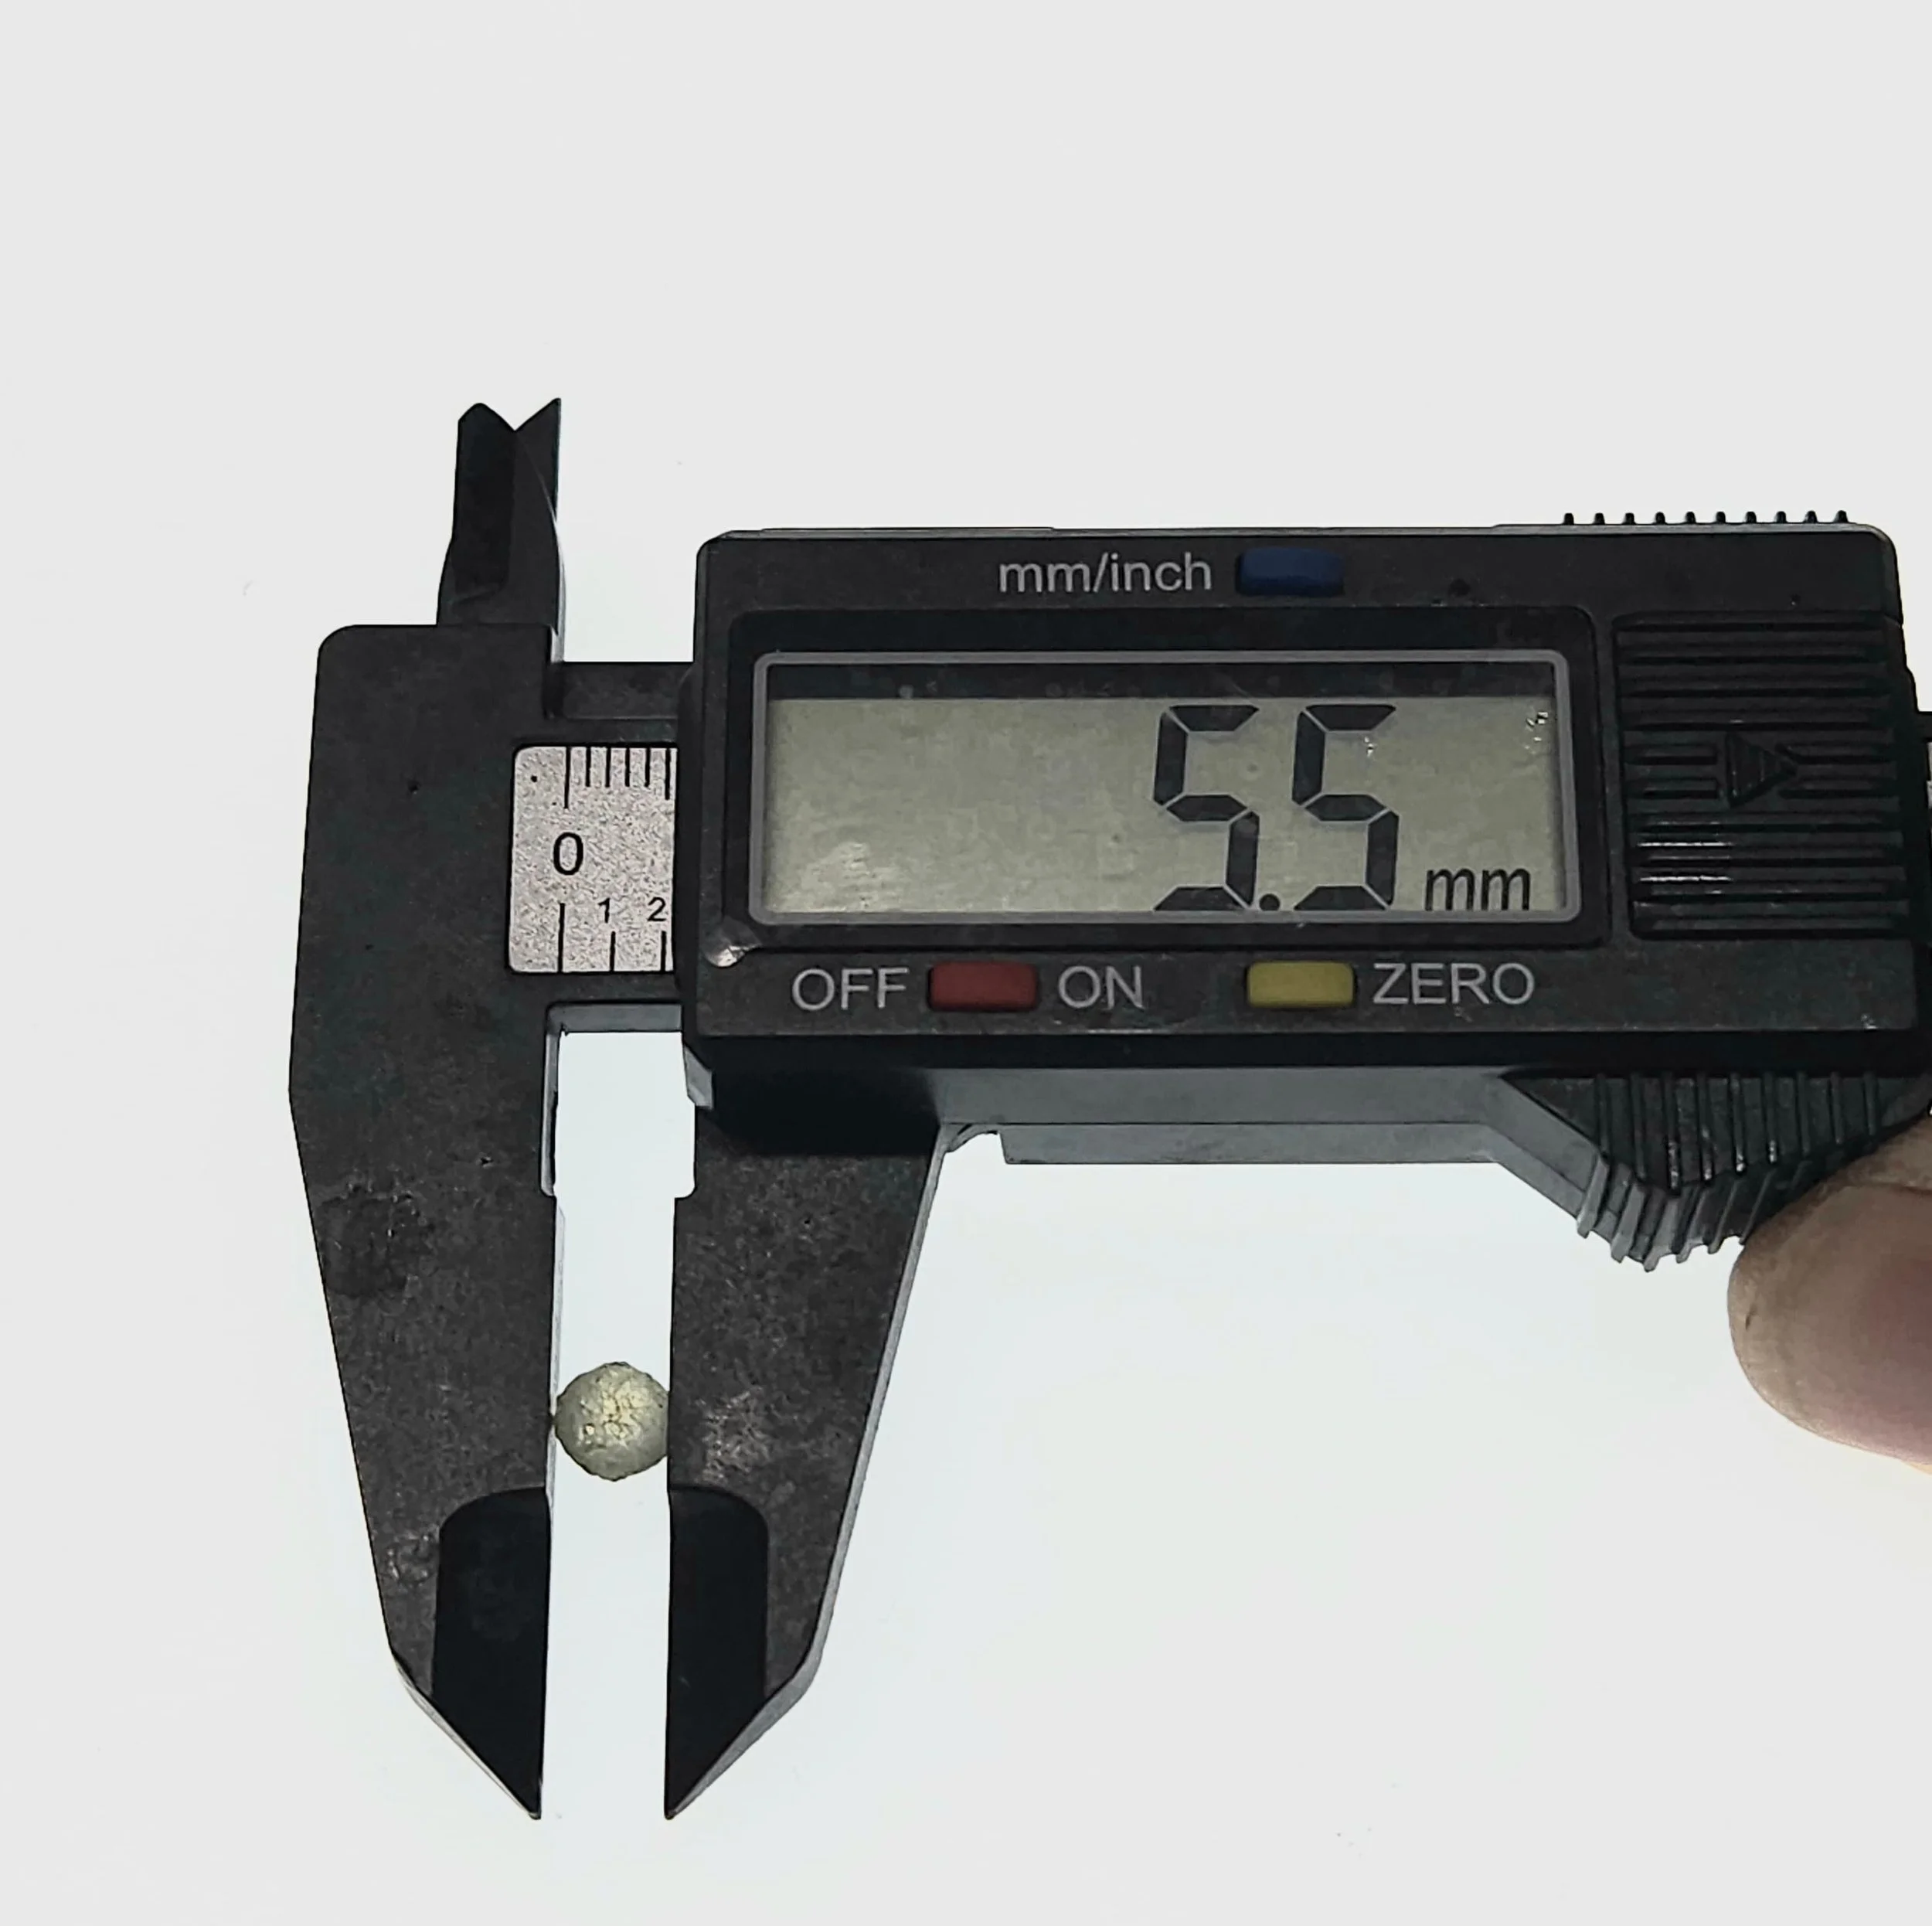
Recording precise physical metrics. Using digital calipers, the rough sapphire’s exact dimensions—including maximum width (shown here at 5.5mm) and overall depth—are meticulously mapped. These critical proportions dictate which faceting designs will yield the highest possible carat weight.
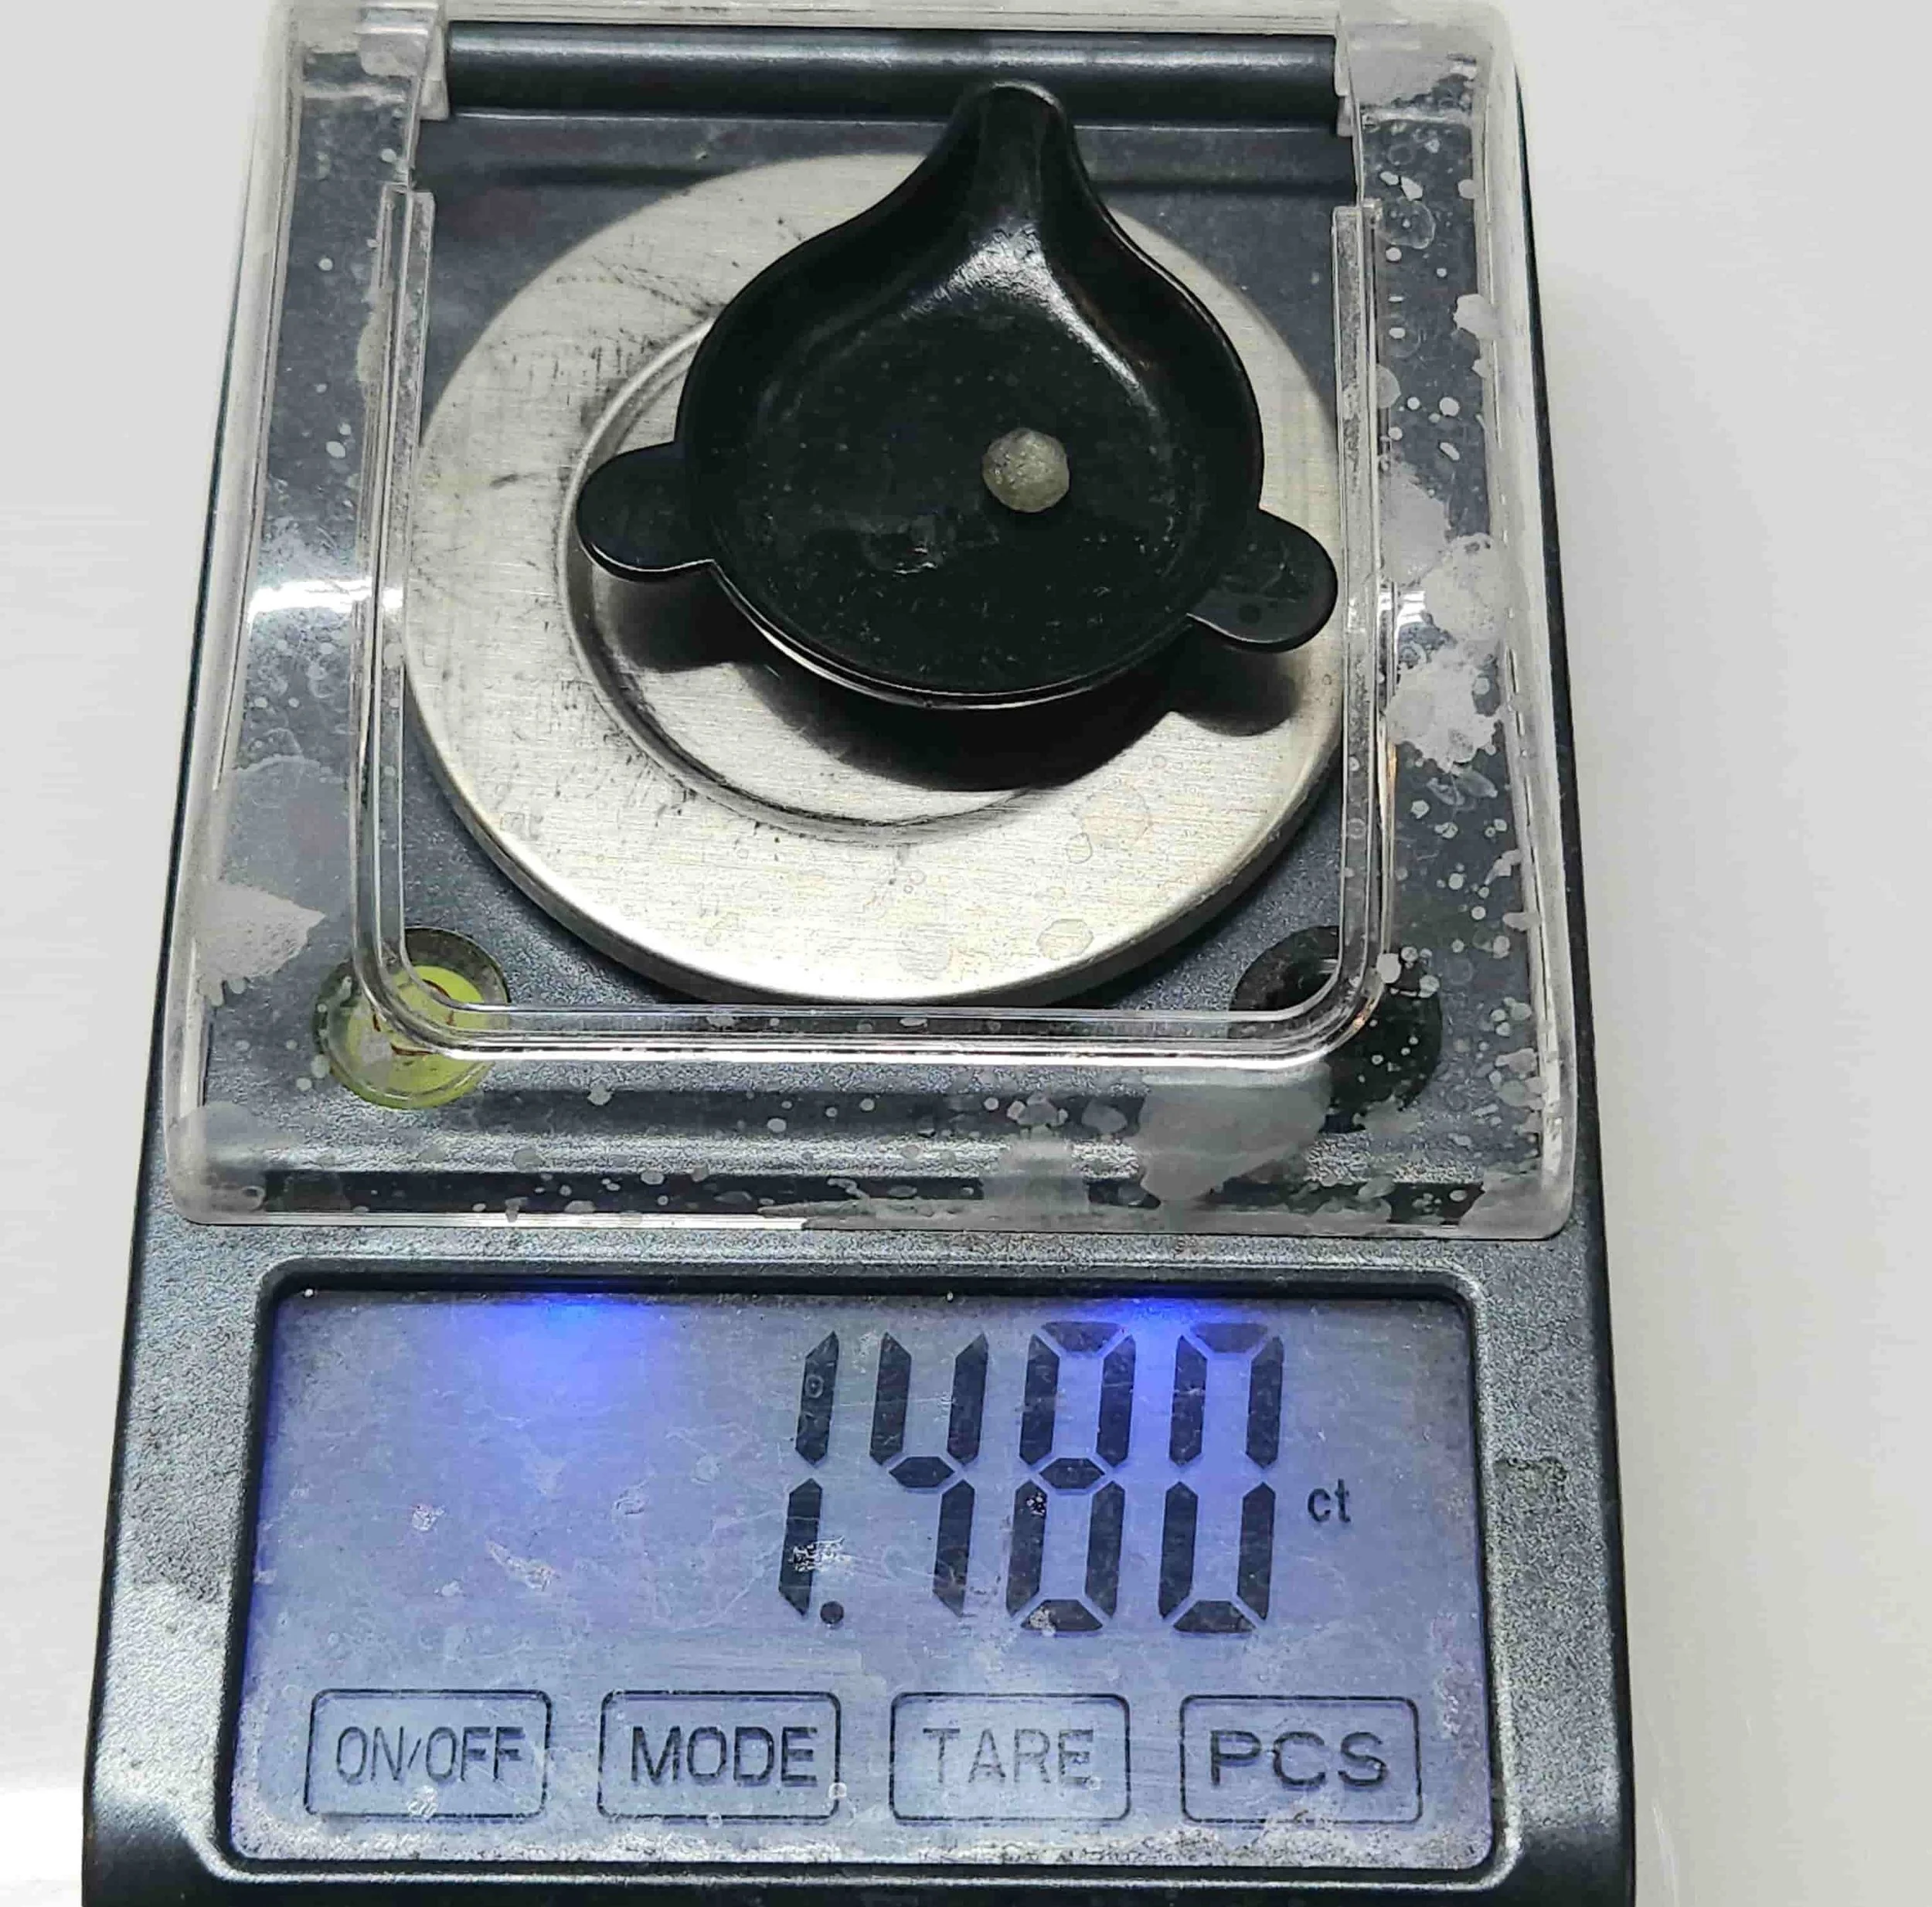
Establishing the baseline starting weight. The rough sapphire is weighed on a calibrated gemstone scale, registering at 1.480 carats. Based on its shape and proportions, I anticipate a final yield of roughly 30% or more once the faceting is complete.
Advanced Microscopy & Gemological Verification
To complete the diagnostic phase, the stone is placed under a microscope utilizing diffused illumination to thoroughly map its internal characteristics. For this specific Montana sapphire, we also conducted a Specific Gravity (SG) analysis in our laboratory to precisely measure its density, further confirming its identity and purity.
While this project was verified using these non-invasive methods, The Lapidary Office is fully equipped to perform a comprehensive suite of advanced diagnostics. Our laboratory capabilities include, but are not limited to, Polariscope optical testing, UV fluorescence reaction, and specialized gemological filters such as the Chelsea filter, Jadeite filter, and Ruby filter.
A Note on Destructive Testing: Certain diagnostic procedures, such as direct Hardness testing or traditional Refractive Index (RI) testing, can inherently scratch or alter the material. Because a traditional RI test requires a flat, polished surface to get an accurate reading, performing it on raw rough involves facets being pre-polished or ground down prematurely. Because I treat your property with the utmost care, these specific tests are never performed without explicit prior permission and consultation with the client.
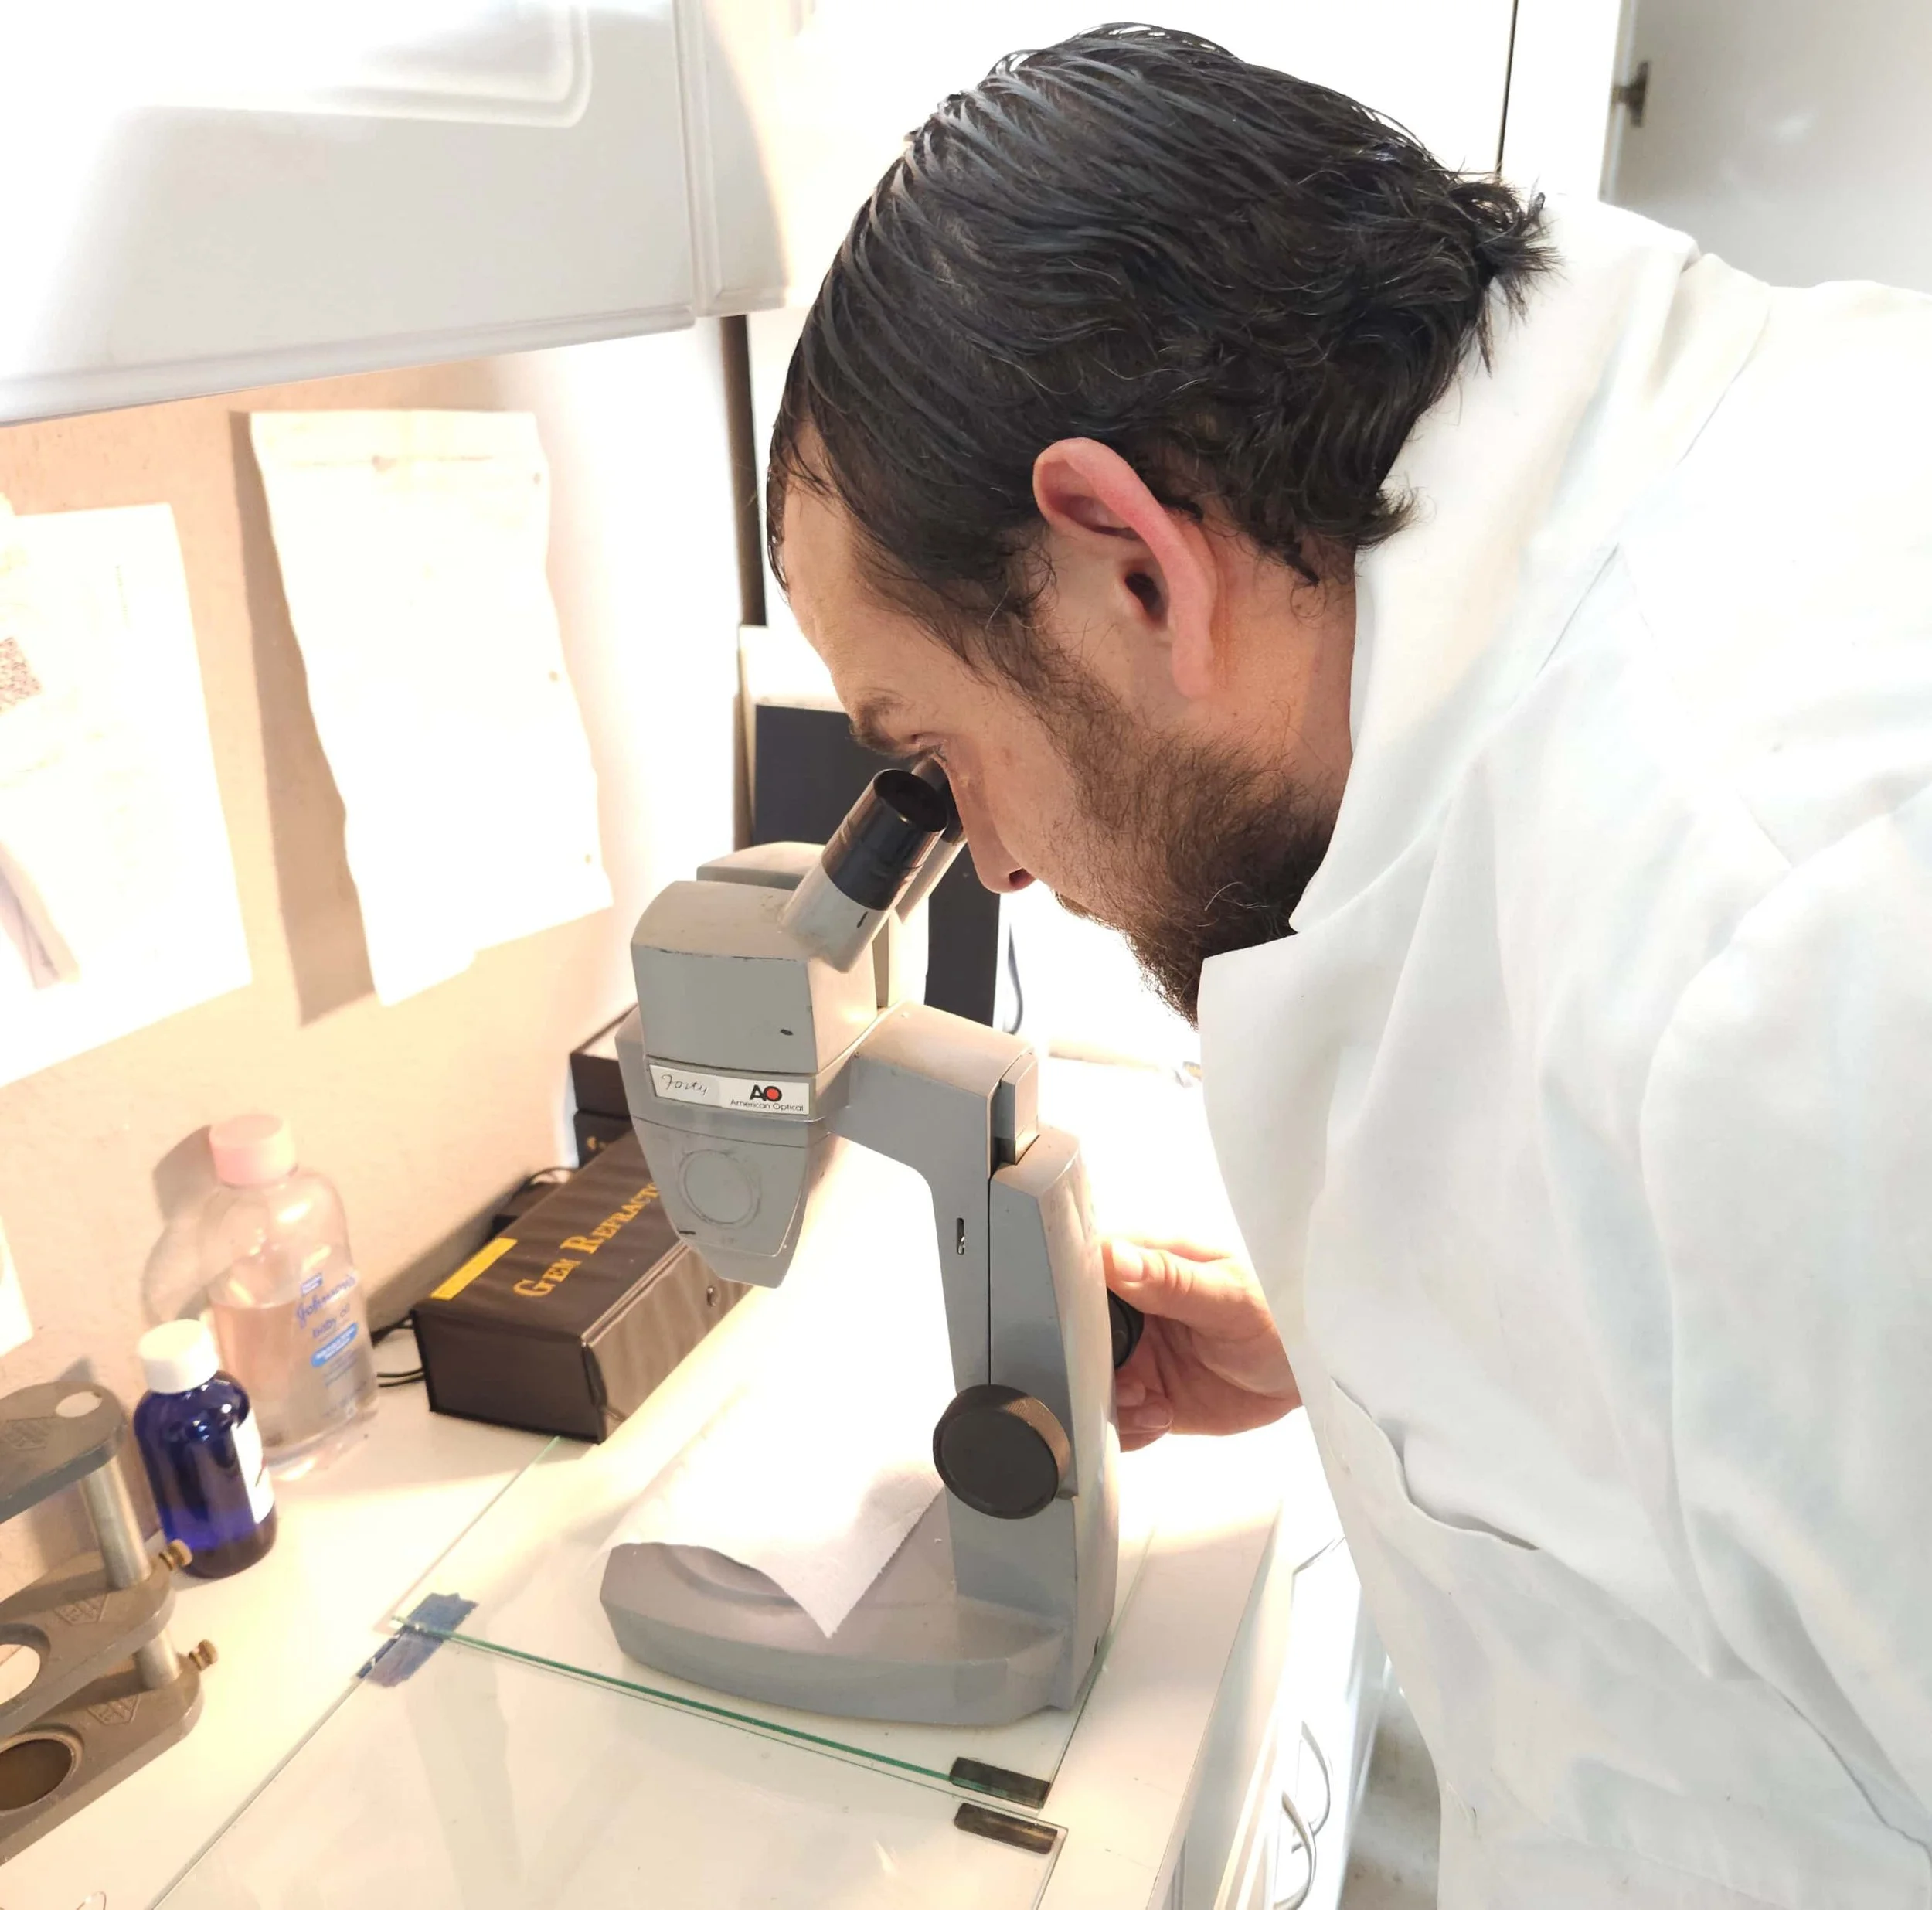
Utilizing a gemological microscope with diffused illumination allows for a detailed analysis of the sapphire's internal characteristics. This crucial step identifies any inclusions or microscopic fractures, ensuring the final design circumvents structural vulnerabilities to maximize both beauty and durability.
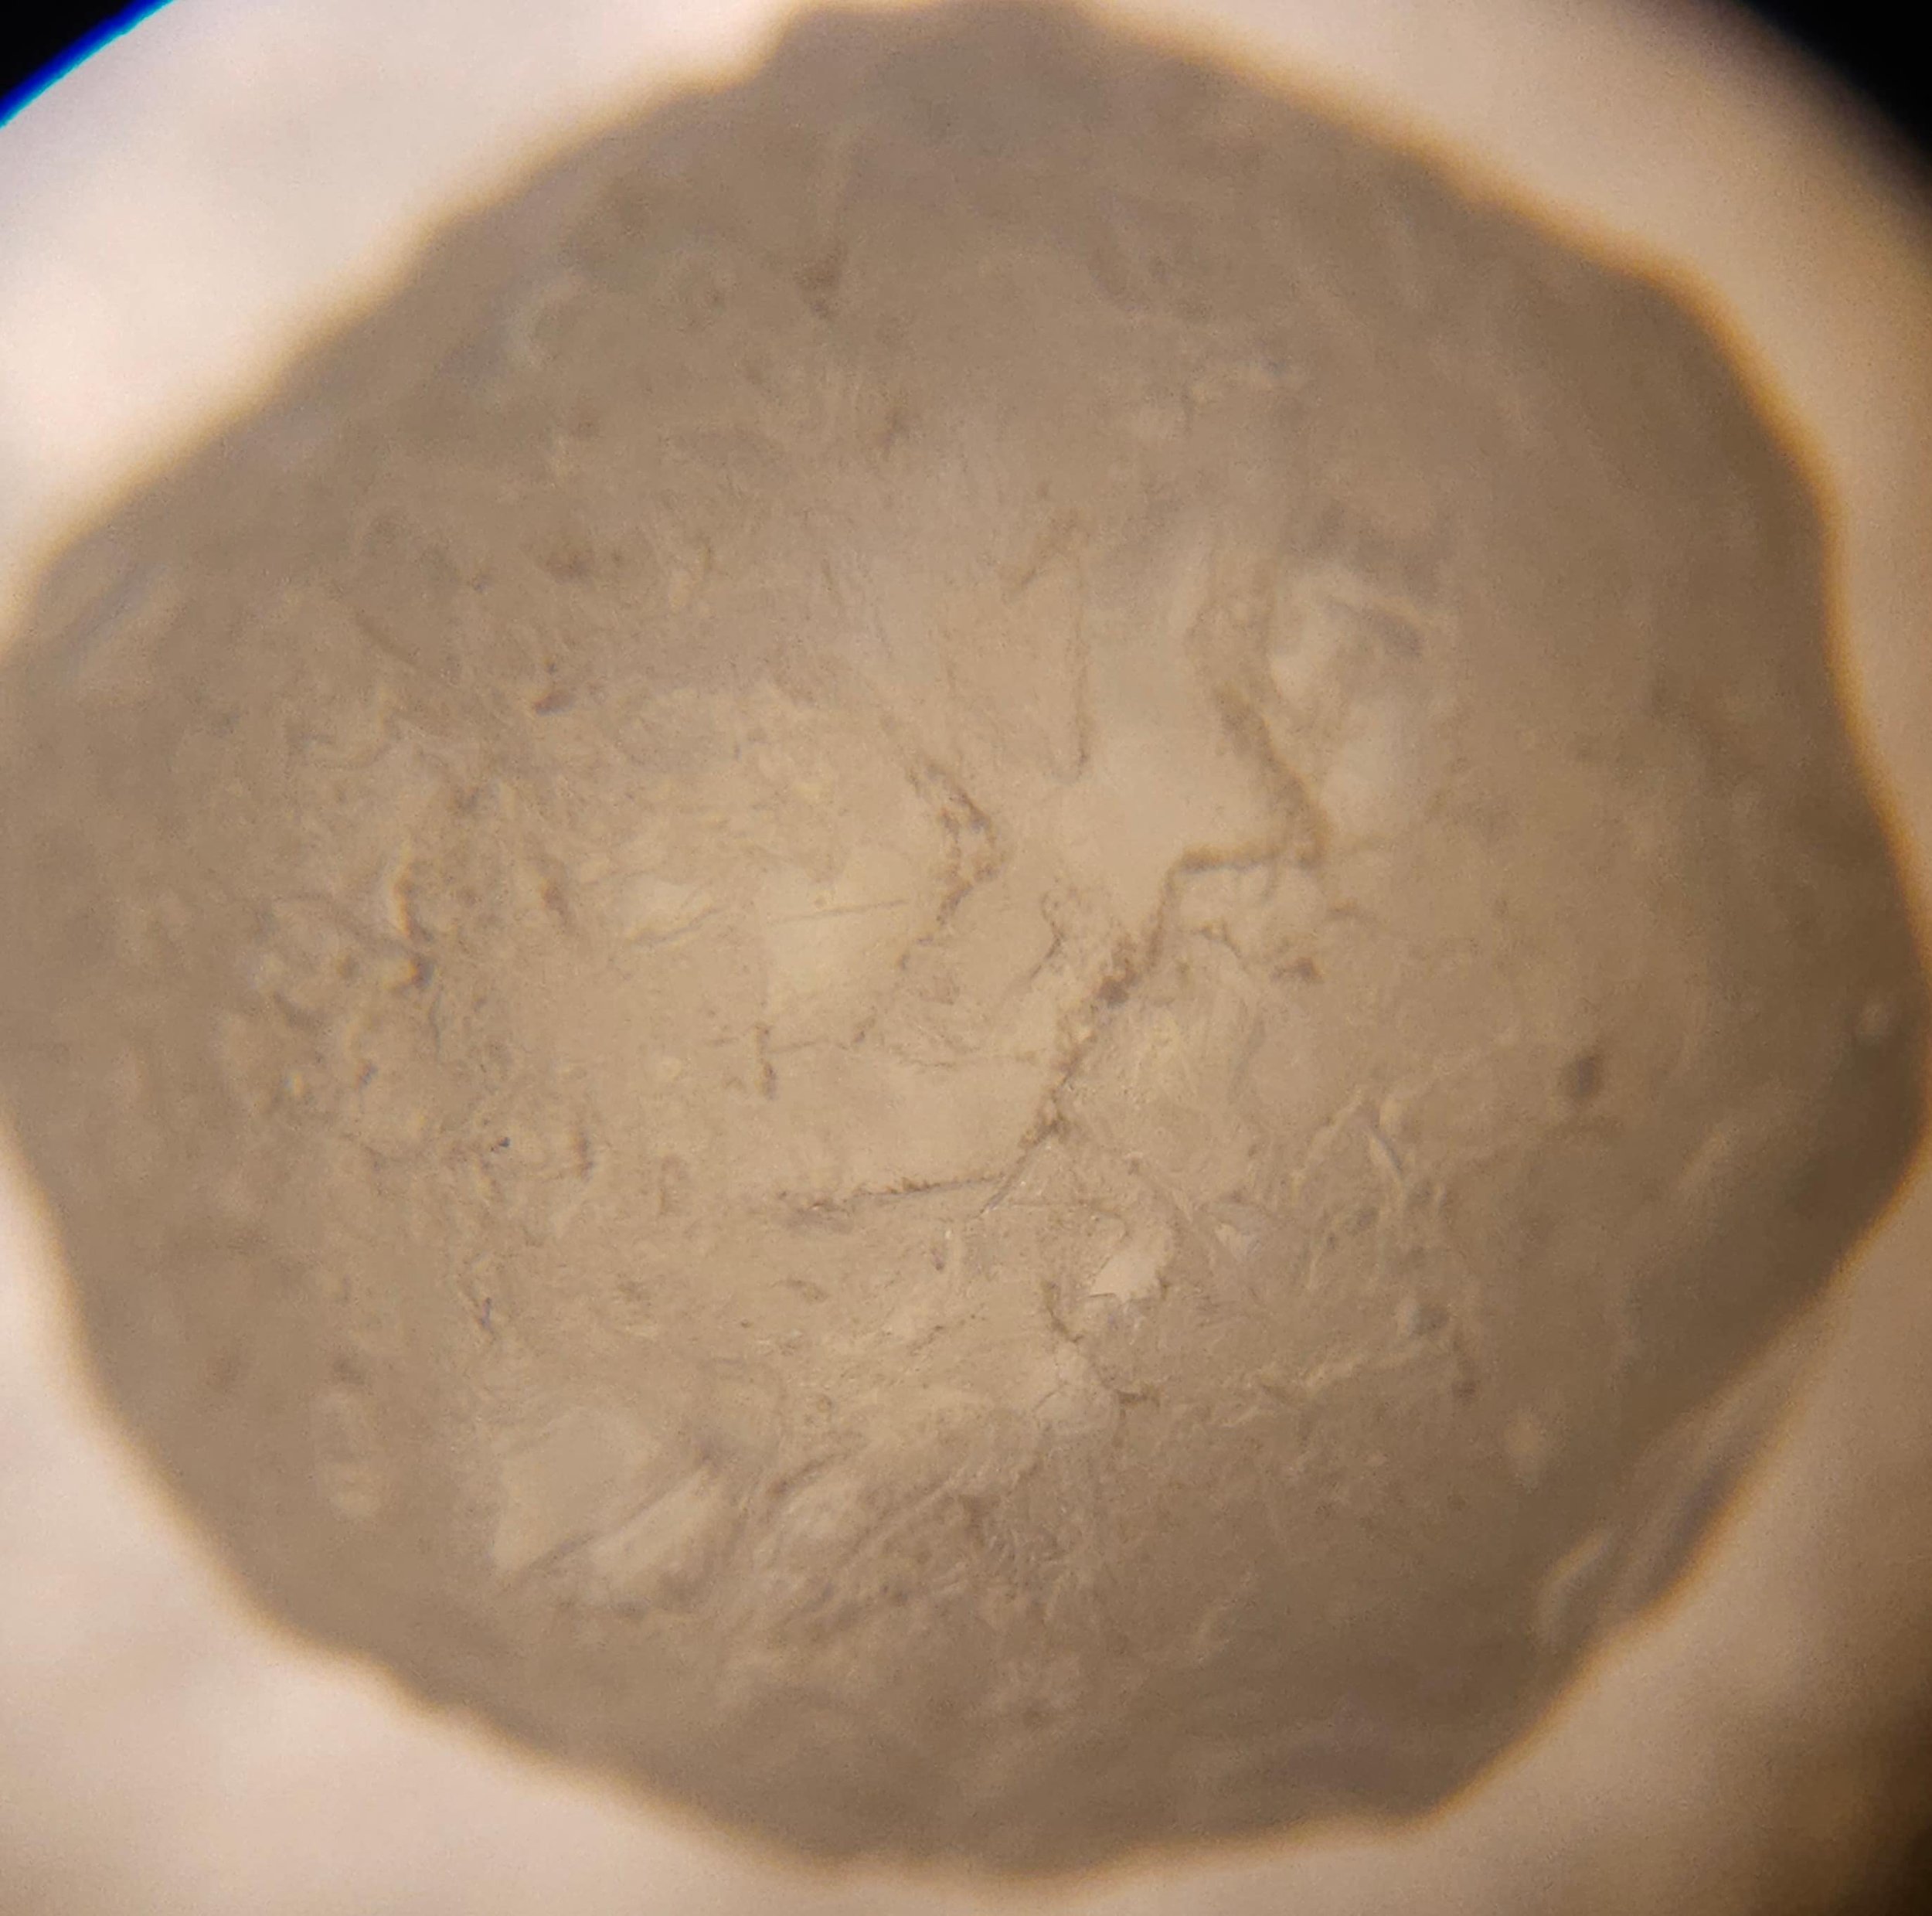
A microscopic view into the heart of the crystal. This close-up, diffused-light analysis reveals the inner landscape of the rough Montana sapphire. By examining these subtle internal features under high magnification, I can precisely navigate around inclusions to ensure the final gem boasts exceptional clarity and structural integrity.
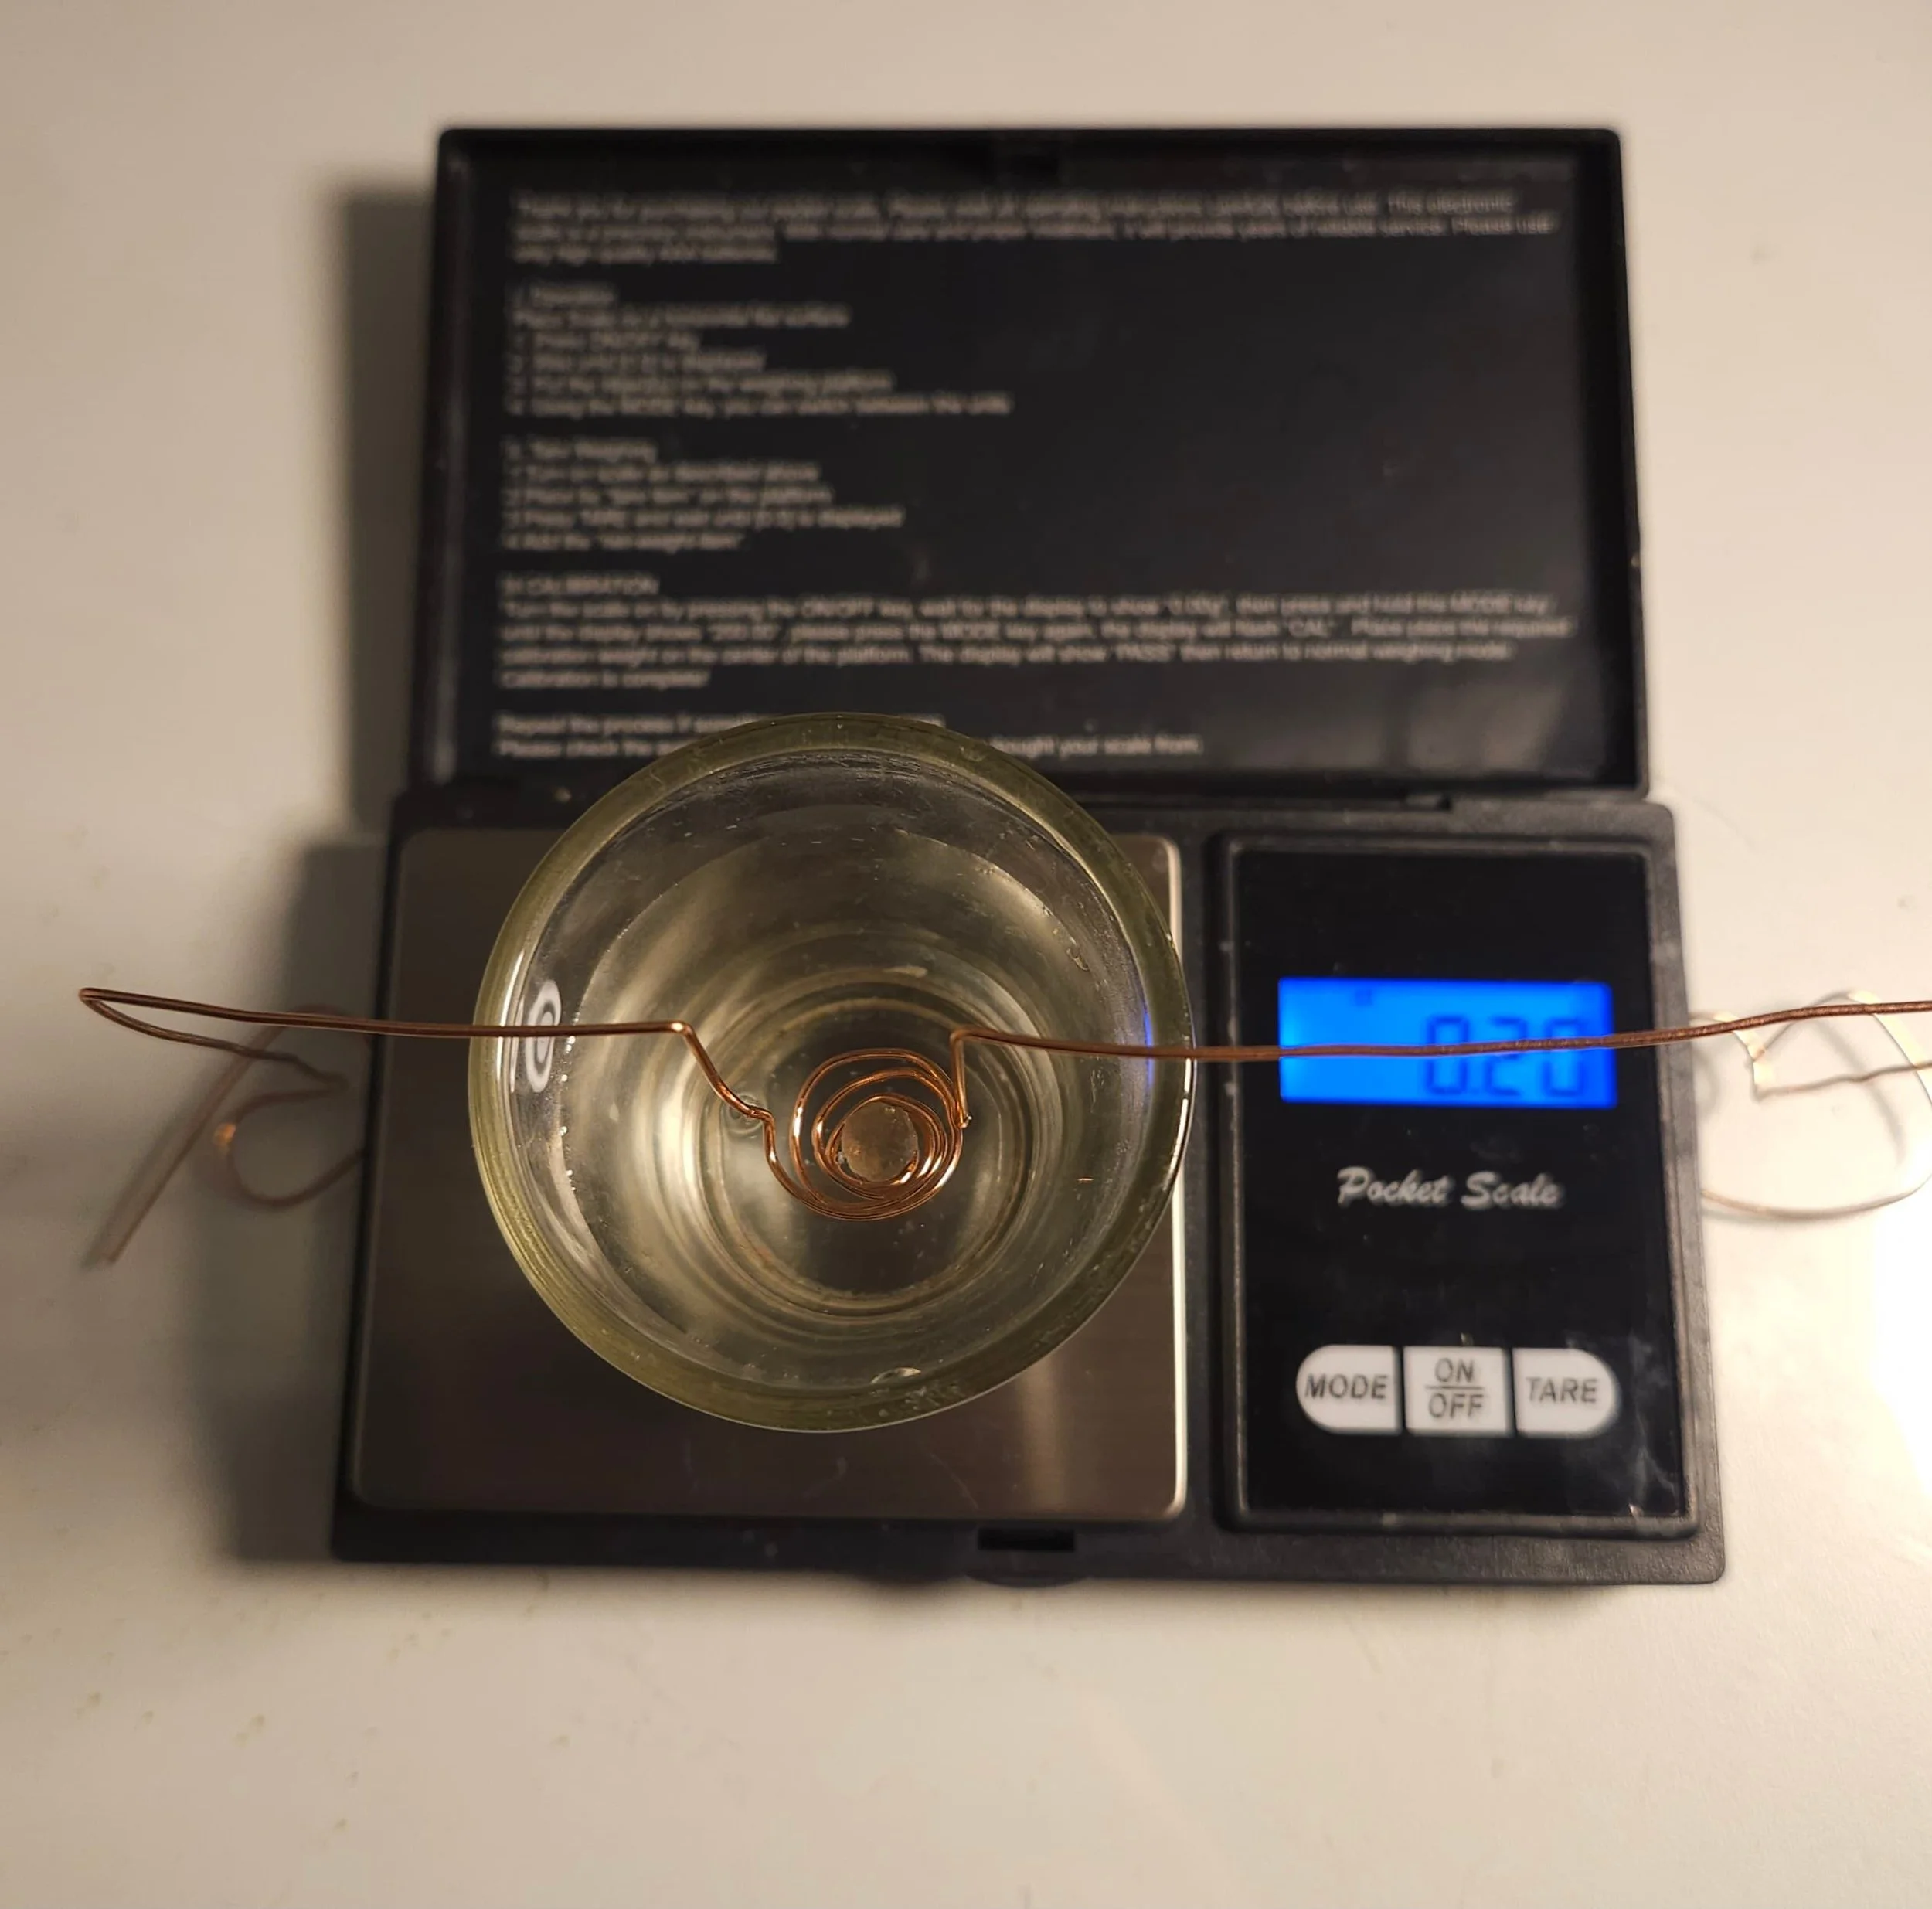
To conclusively verify the mineral species and assess its density, we conduct a hydrostatic Specific Gravity (SG) test. The stone is first weighed normally in air (Wa) . It is then placed in a custom wire harness and completely submerged in a vessel of distilled water, suspended without touching the sides or bottom of the container, to record its water weight (Ww) .
Using the standard gemological formula for density, we calculate the stone's relative density:
SG= Wa/(Wa-Ww)
For this project, the resulting metrics aligned perfectly with the known constant for corundum (approximately 4.00), verifying the authenticity of the Montana sapphire before moving to the design phase.
Step 1 Summary: The Diagnostic Foundation
By combining visual immersion testing, precise physical calibration, and rigorous hydrostatic data, this raw material has been completely mapped and verified.
My diagnostics revealed a slightly cloudy interior containing a few reflective inclusions. Fortunately, through careful analysis, I have determined that these features can be strategically oriented during the cutting process to ensure they do not show up in the final gem. With its identity confirmed as authentic corundum, this stone promises to yield a beautiful yellow-green sapphire with a subtle, distinctive glow. I now possess the precise mathematical and visual blueprint required to transition safely into the engineering and design phase.
Step 2: Gemstone Design and Consultation
In this phase, the data gathered during diagnostics is transformed into a concrete cutting strategy. Utilizing Gem Cut Studio software, I create precise digital 3D models of the rough sapphire to calculate exact facet angles, predict light performance, and maximize potential yield.
Once these technical calculations are complete, I enter the Client Consultation process. I present you with my internal findings, discuss the stone's natural characteristics, and share our tailored design recommendations. To ensure absolute alignment on the artistic direction, the finalized plan is agreed upon and locked in with a non-refundable $100 design deposit before the first facet ever touches the cutting wheel.
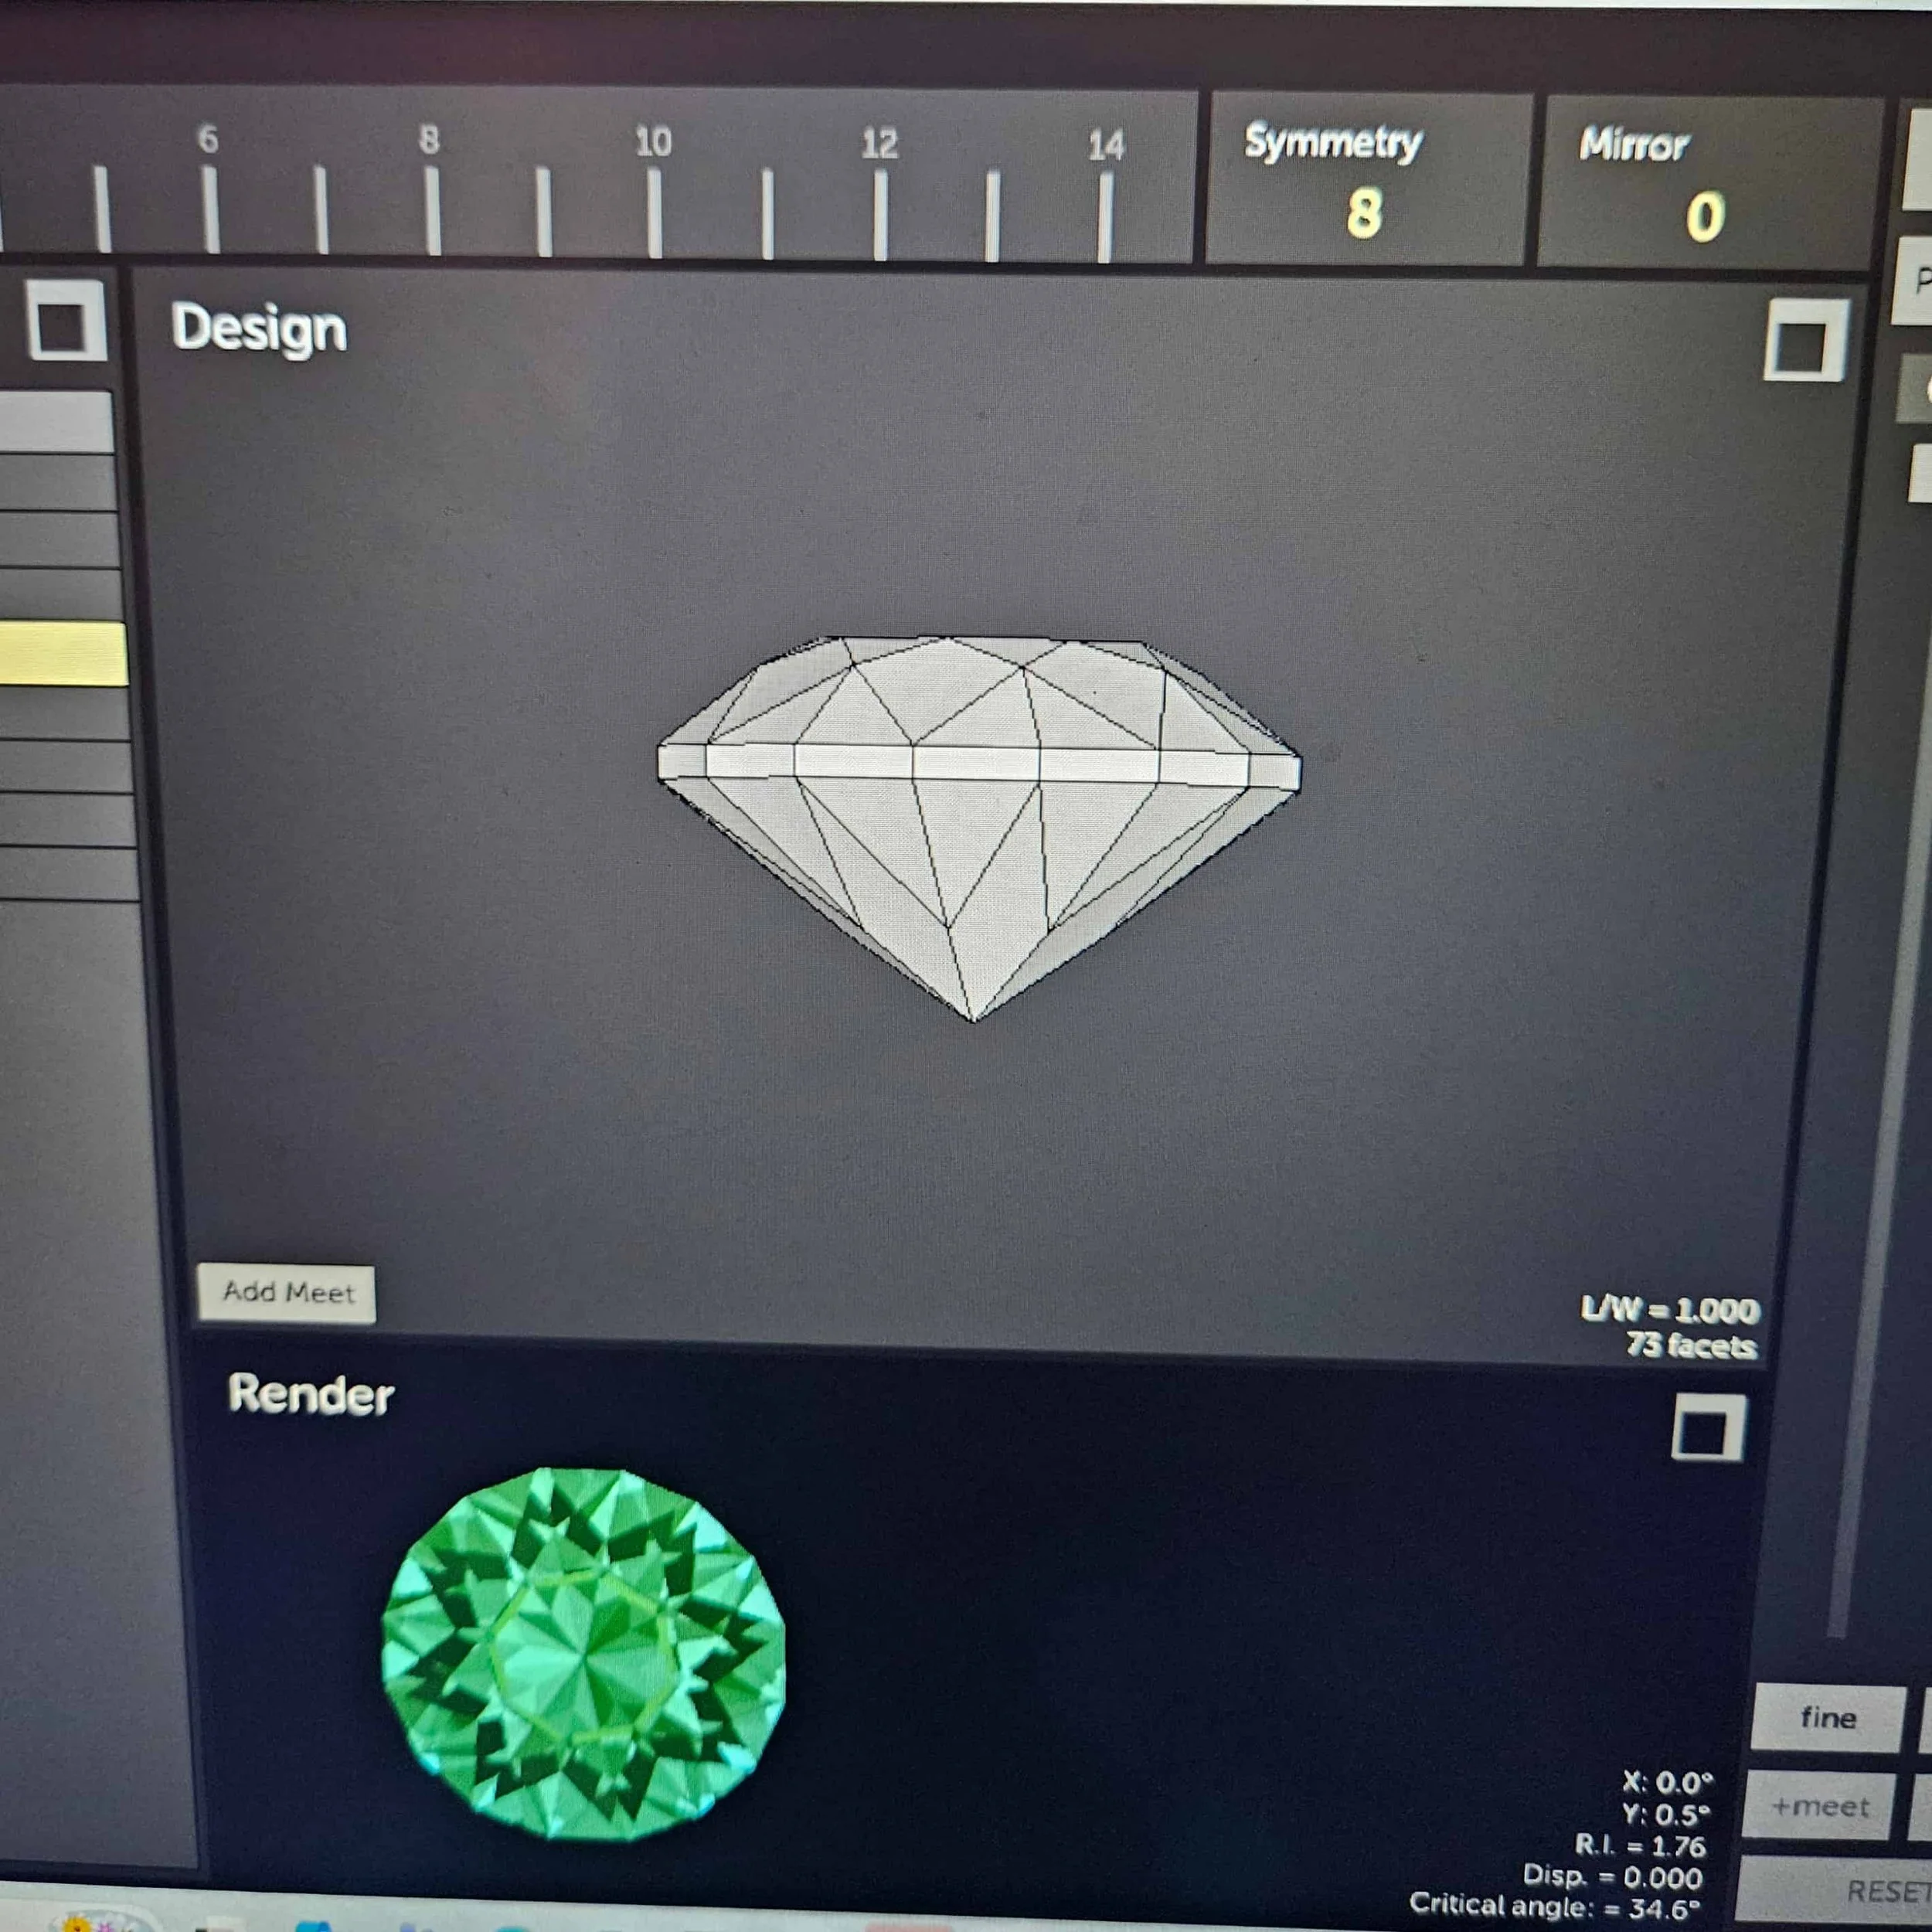
Engineering the perfect cut. Using Gem Cut Studio, a custom 73-facet round brilliant design is mapped out to optimize the stone's specific proportions. The 3D wireframe model (top) establishes precise facet placement, while the digital render (bottom) simulates how light will perform within the material, ensuring the final sapphire achieves maximum brilliance and the desired face-up color.
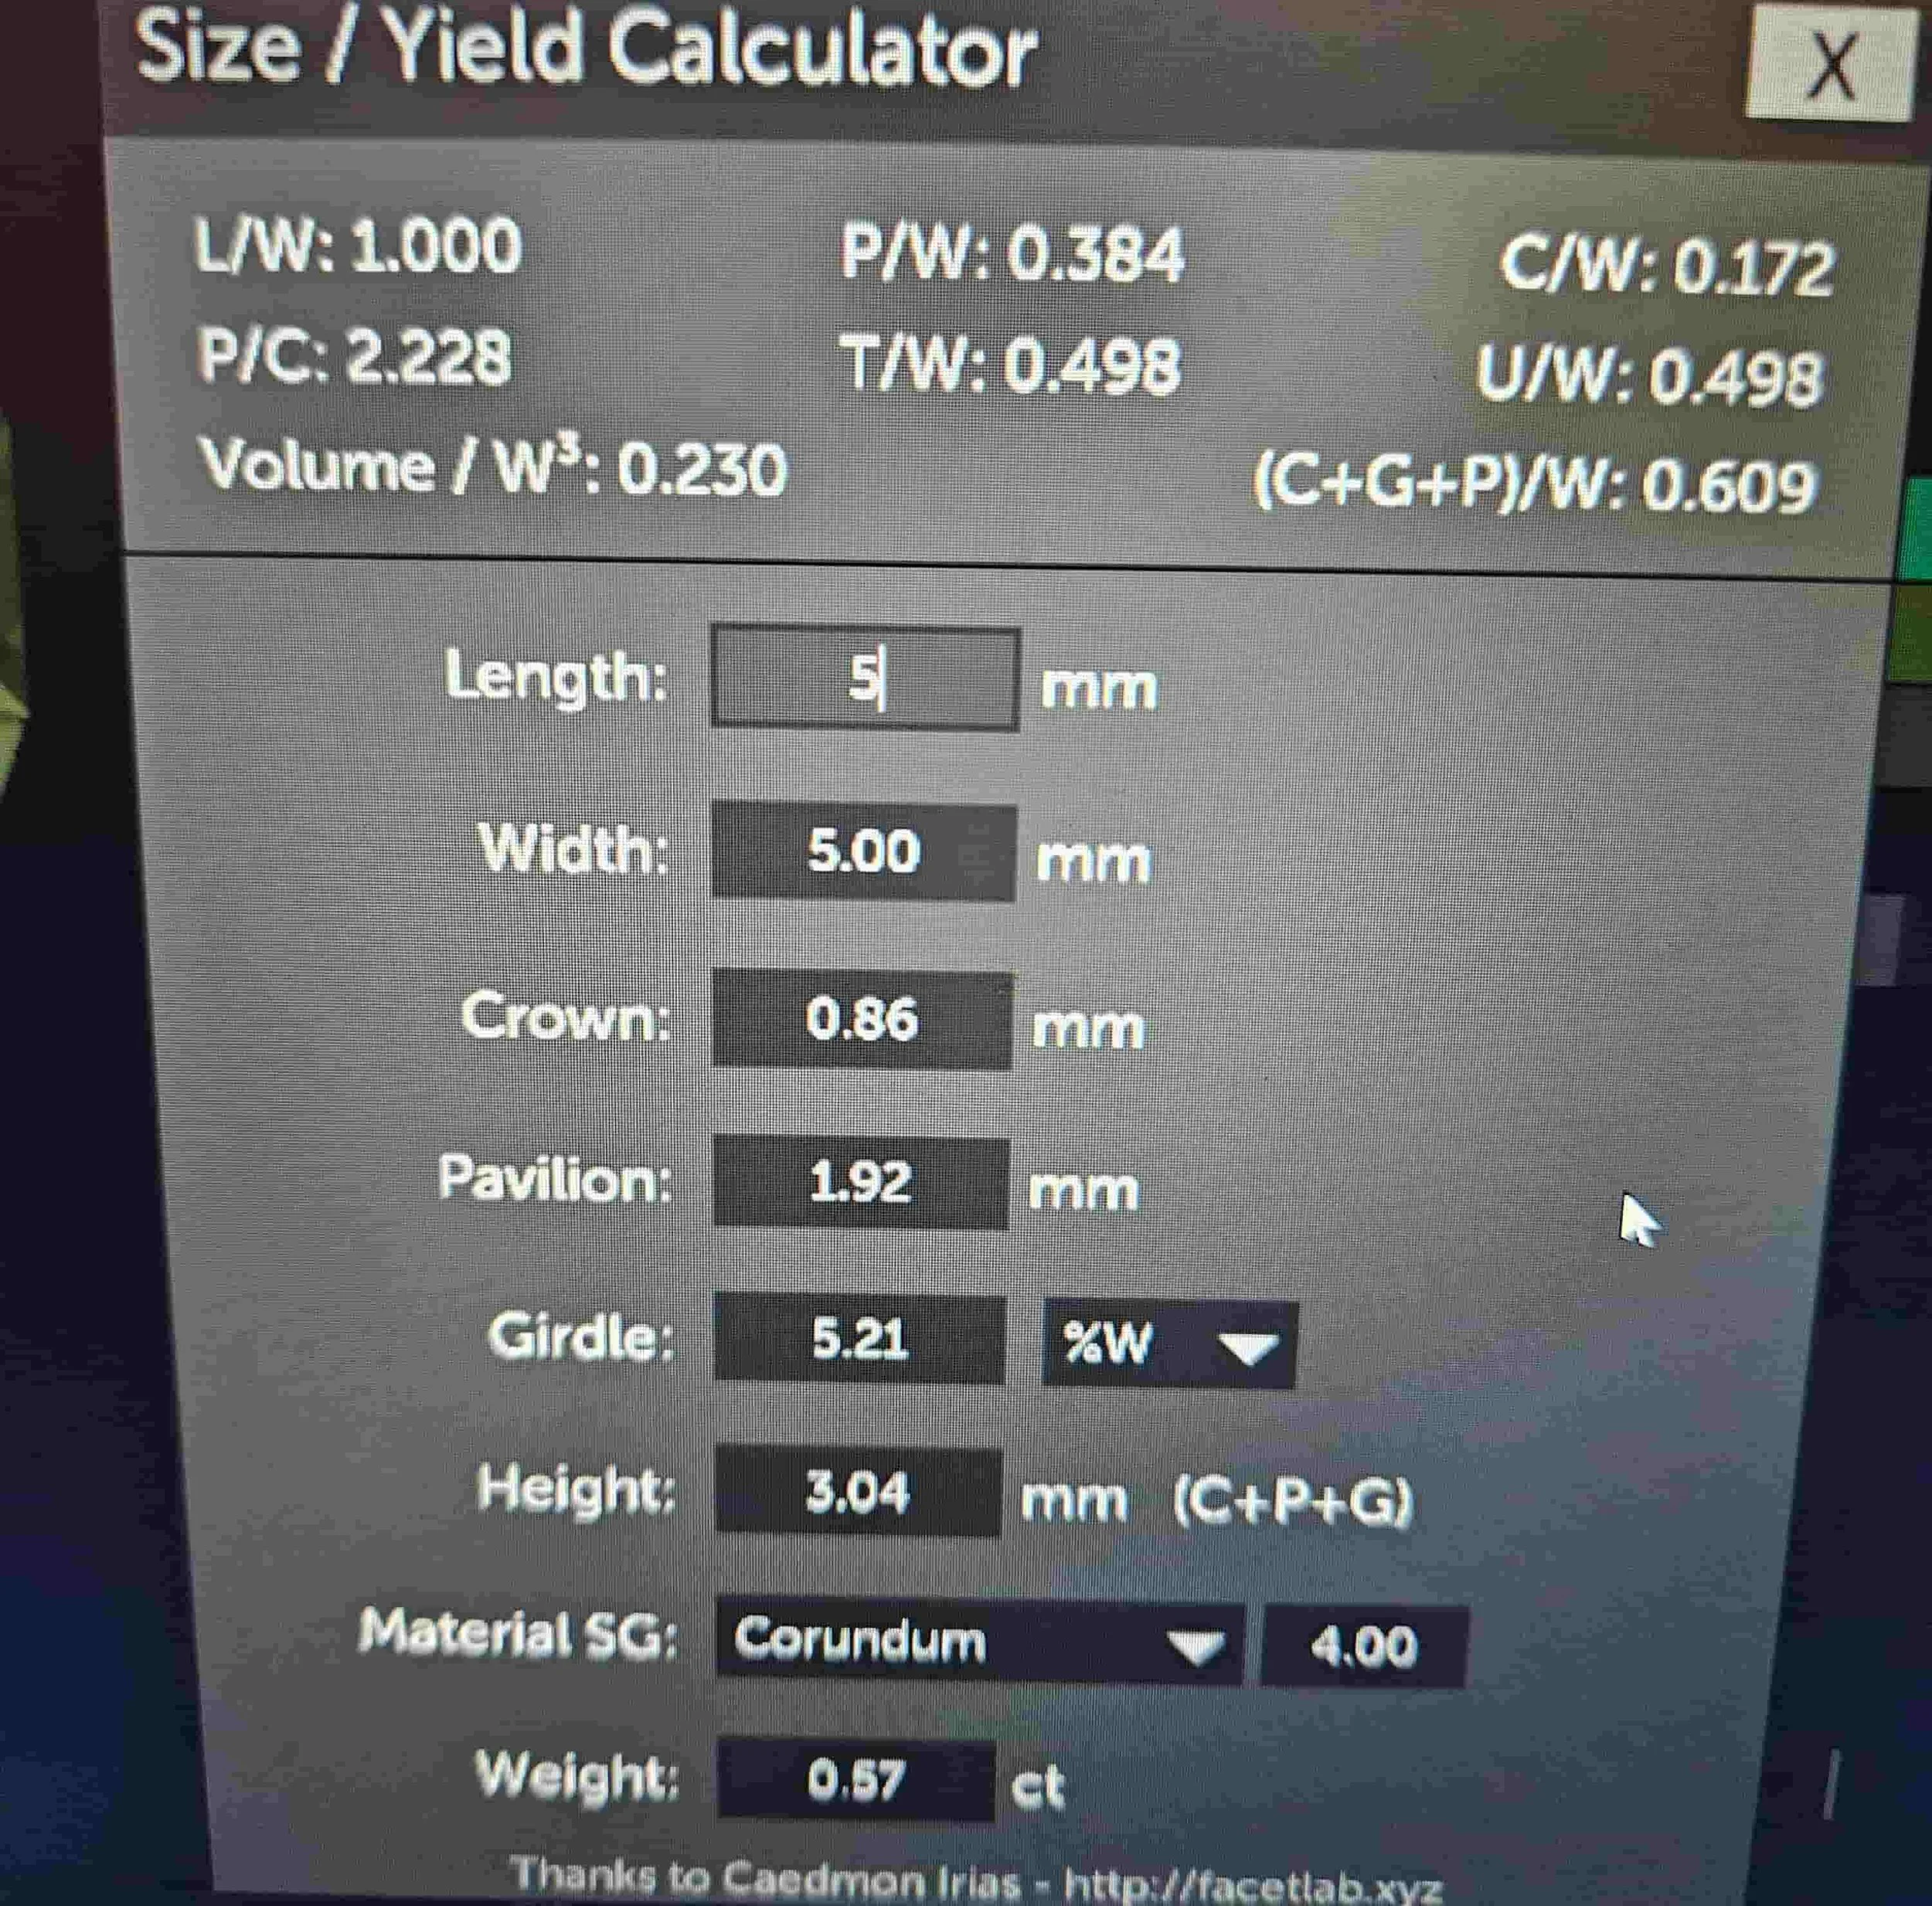
Predicting the final yield. By inputting the target dimensions into the software’s calculator, I can map out the expected physical limits of the cut gemstone. Based on a target diameter of 5.00 mm and a crown-to-pavilion profile utilizing the Specific Gravity constant for corundum (4.00), the software projects a finished weight of approximately 0.57 carats—confirming a highly optimized yield from the original rough.
The Consultation Process
Once the digital design and yield projections are finalized, I present My findings to you through a personalized design consultation. This step ensures you have a clear understanding of your stone's natural features and how the proposed cut will maximize its beauty.
To accommodate your preferences, I offer a few ways to connect:
Video Call (Highly Recommended): This is my preferred method, as it allows us to share our screen in real time, walk you through the 3D Gem Cut Studio models, and show you exactly how the light will perform across the facets.
Phone Call & Messaging: If a video call isn't ideal, we can speak over the phone and send the 3D renders and sizing screenshots directly to your mobile device during the conversation.
Email Correspondence: We can also manage the entire consultation via email. Please note that while this method provides a great written record, the back-and-forth communication makes it a notably slower process.
Once you approve the design recommendation and the non-refundable $100 deposit is submitted, your project is officially locked into the cutting schedule.
Step 3: Pre-Polishing, Precise RI Calibration, and Faceting
By initiating the faceting process with the strategic cutting and polishing of the stone's main table, the sapphire's exact Refractive Index is unlocked. This critical data allows for the final calibration of all subsequent facet angles before the rest of the rough is worked. From master blueprint to mechanical dopping, every step on the wheel is executed with calculated precision to draw out the stone's vivid color and maximum possible brilliance. With the faceting complete, the newly transformed gem is cleaned, inspected, and prepared for its final reveal.
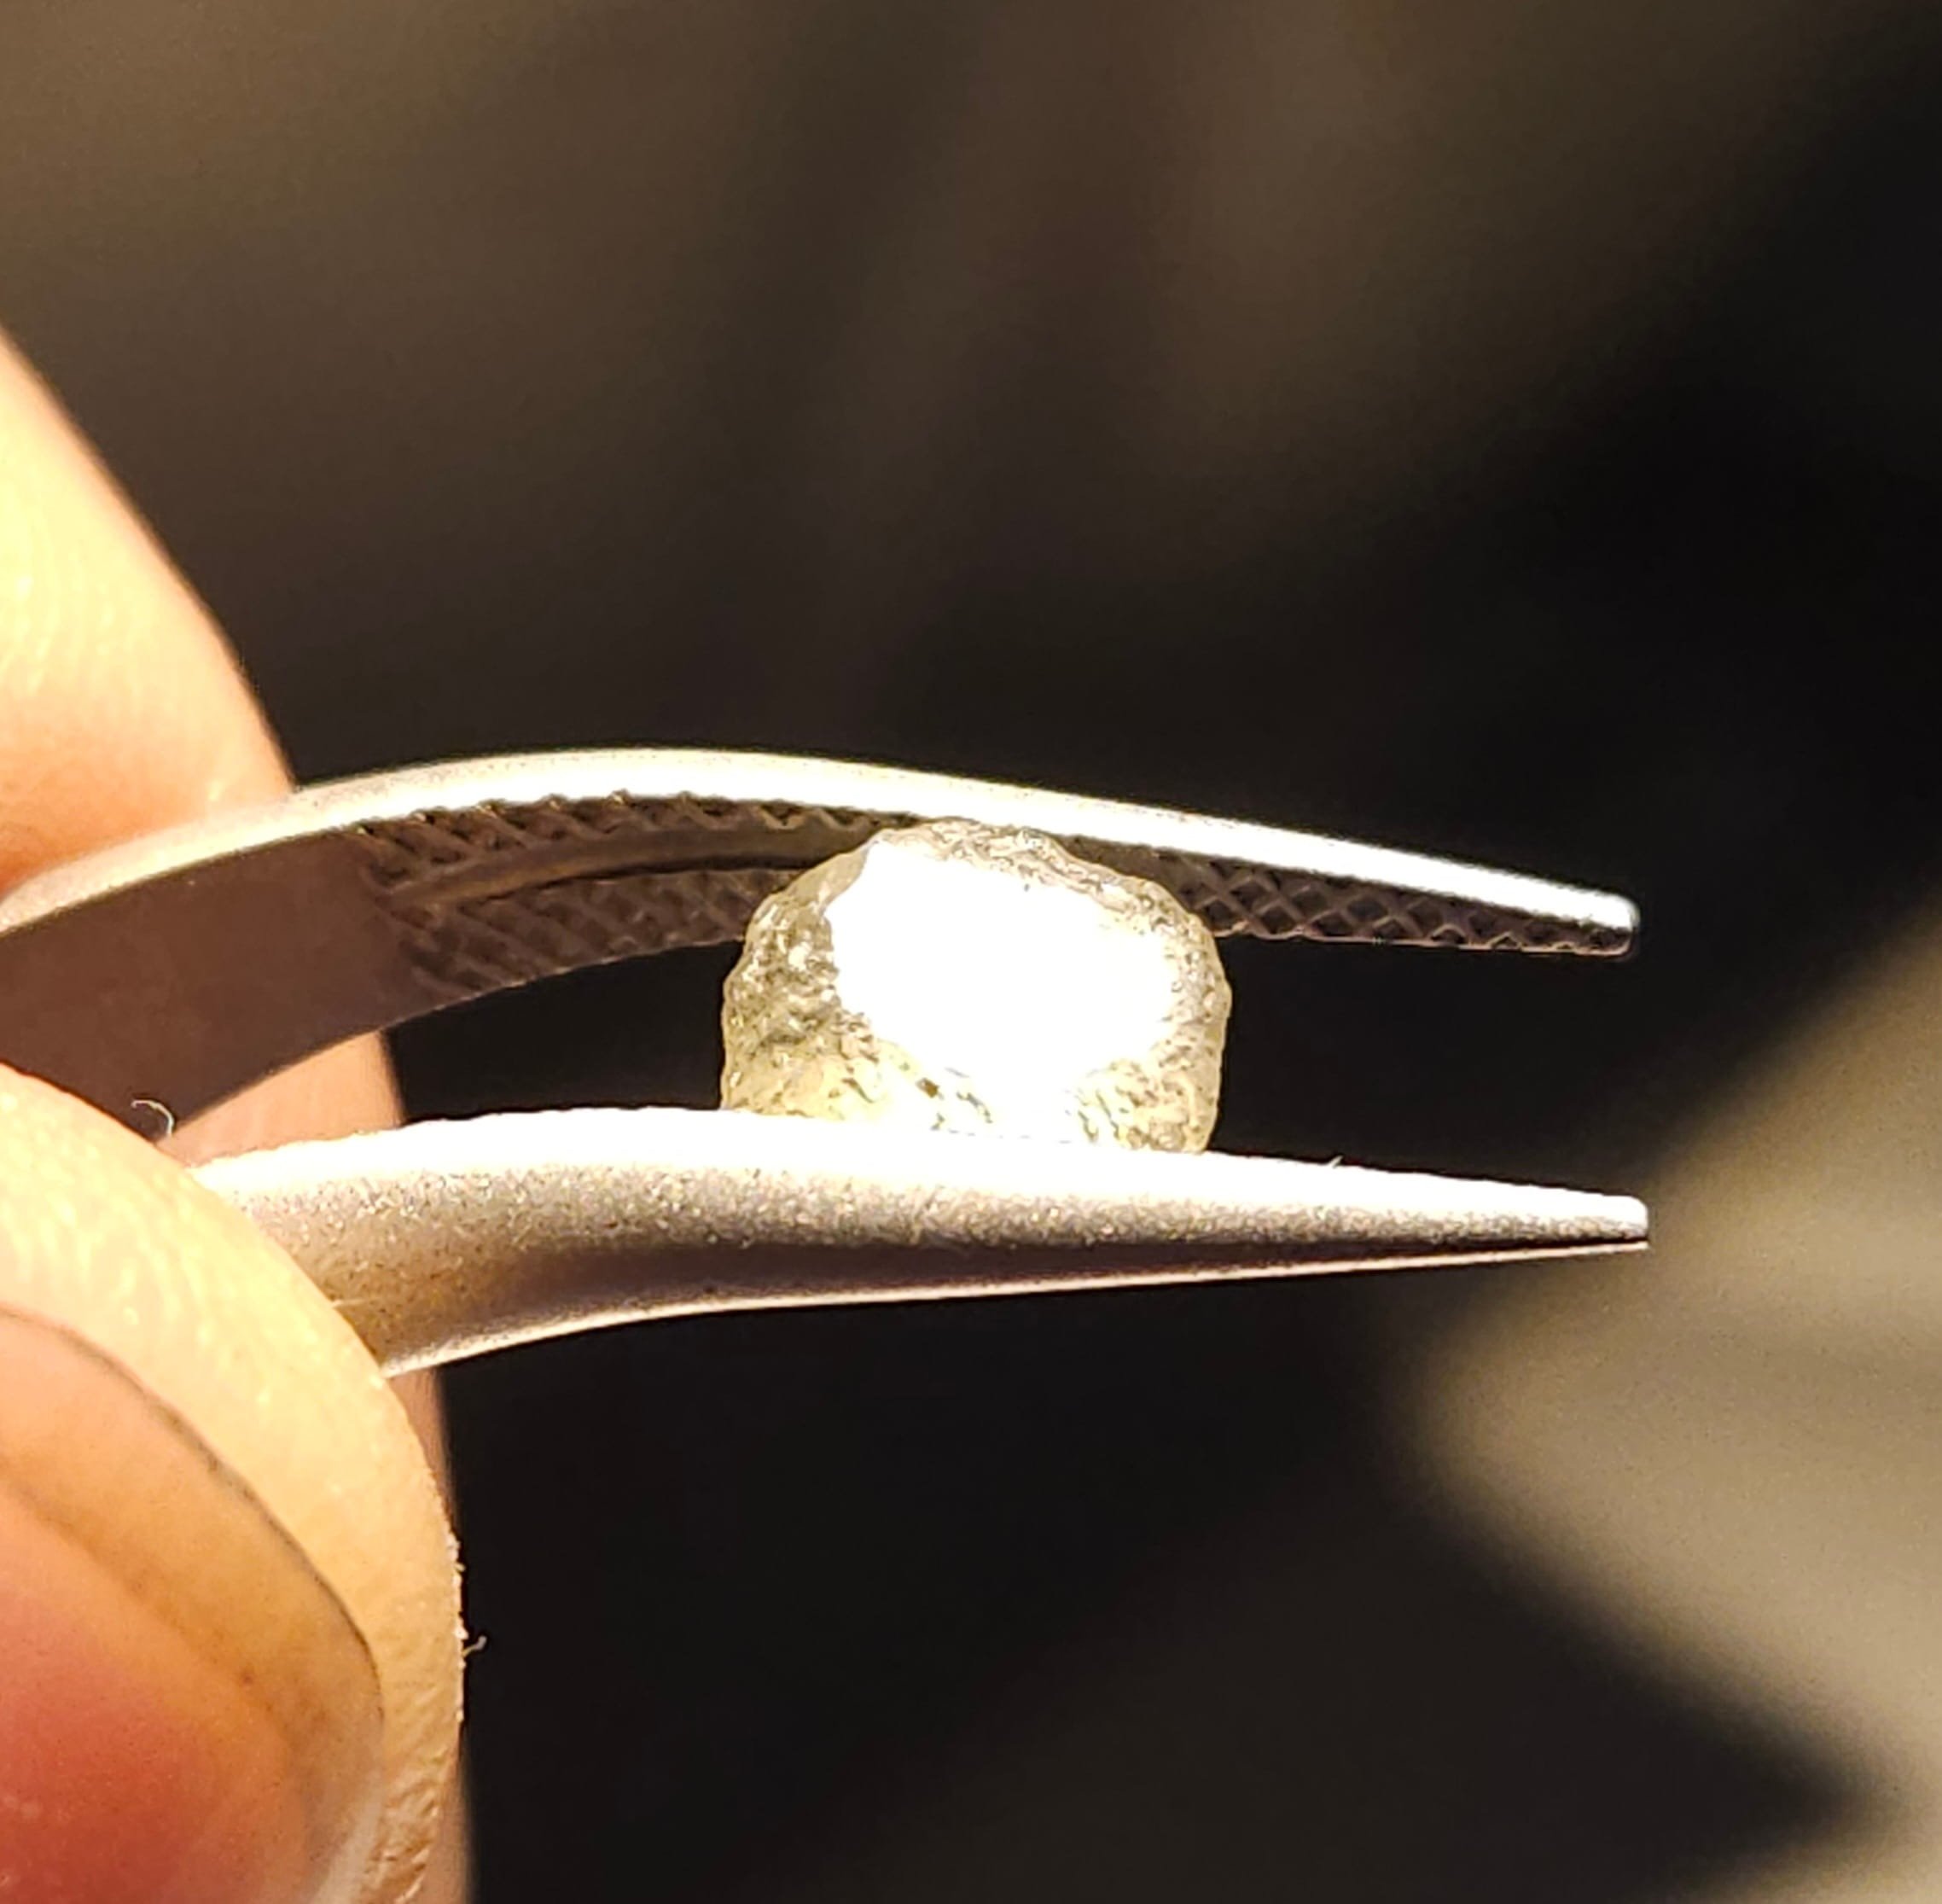
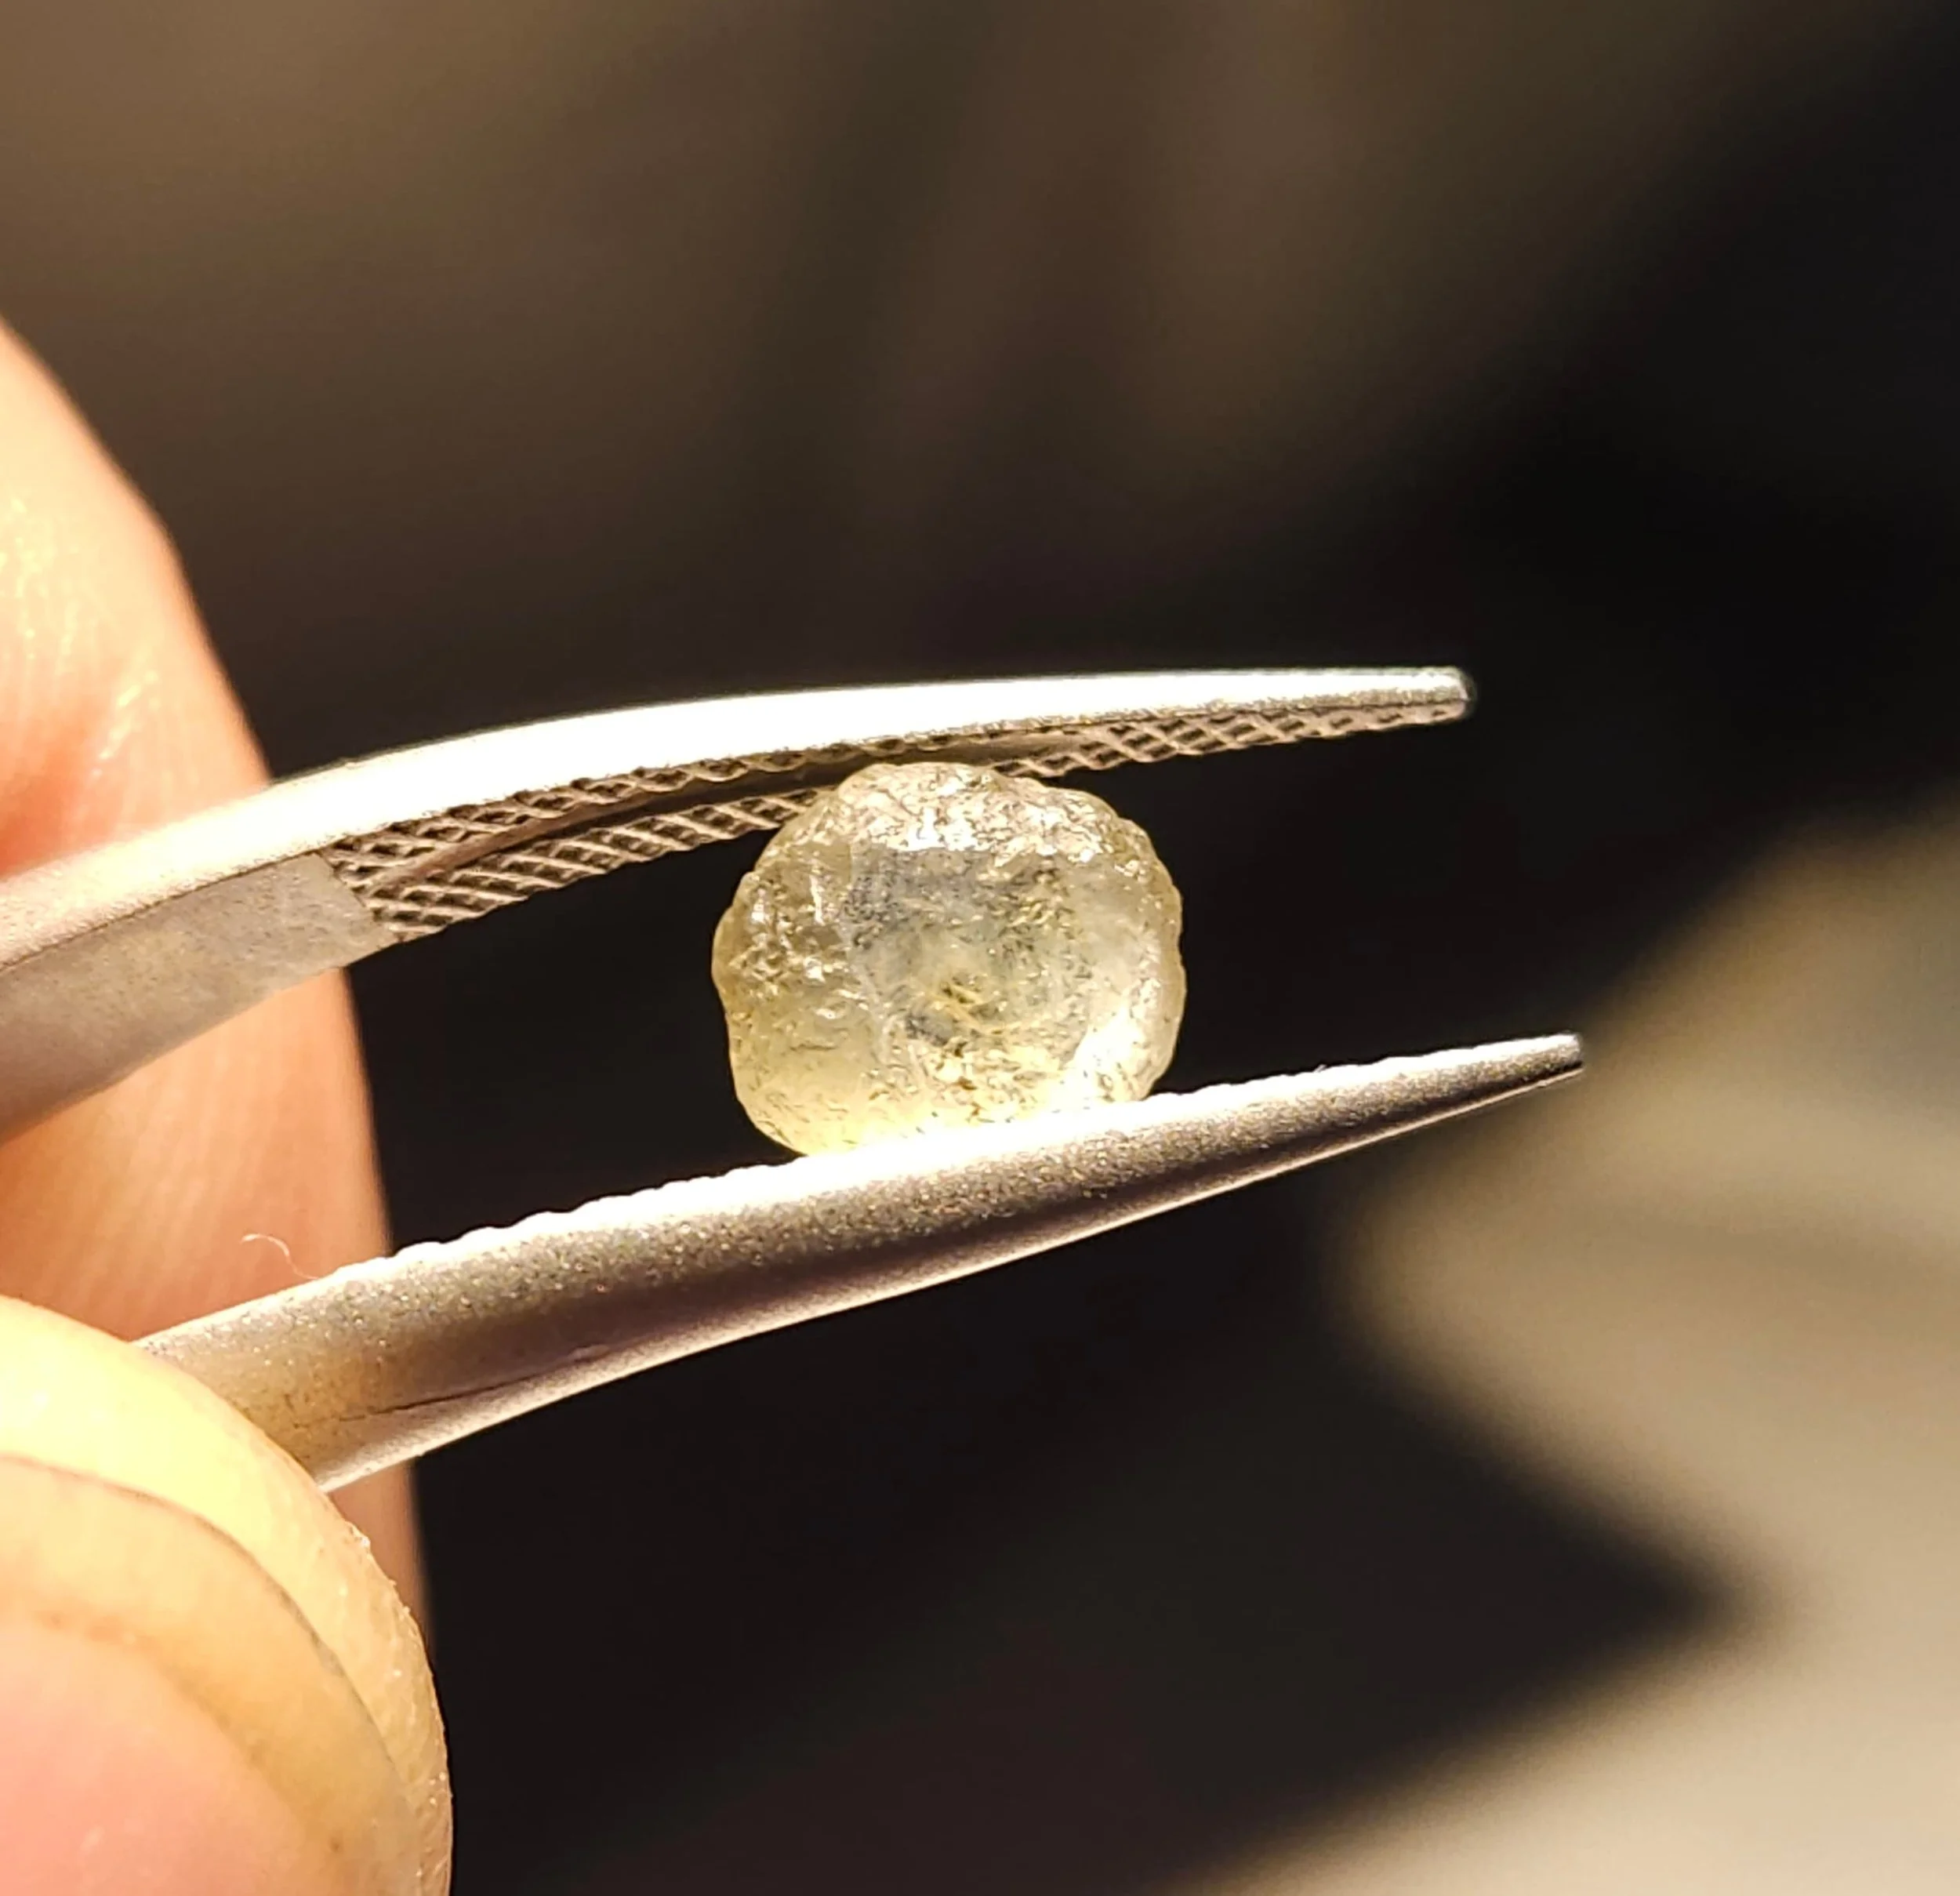
The strategic window. The first physical alteration to the rough is the careful placement and pre-polishing of the stone’s table facet. Rather than standard destructive testing on un-mapped rough, this intentional first cut creates the perfectly flat, optically clean surface required to take an exact, localized Refractive Index reading before the surrounding facets are engineered.
Refractive index testing
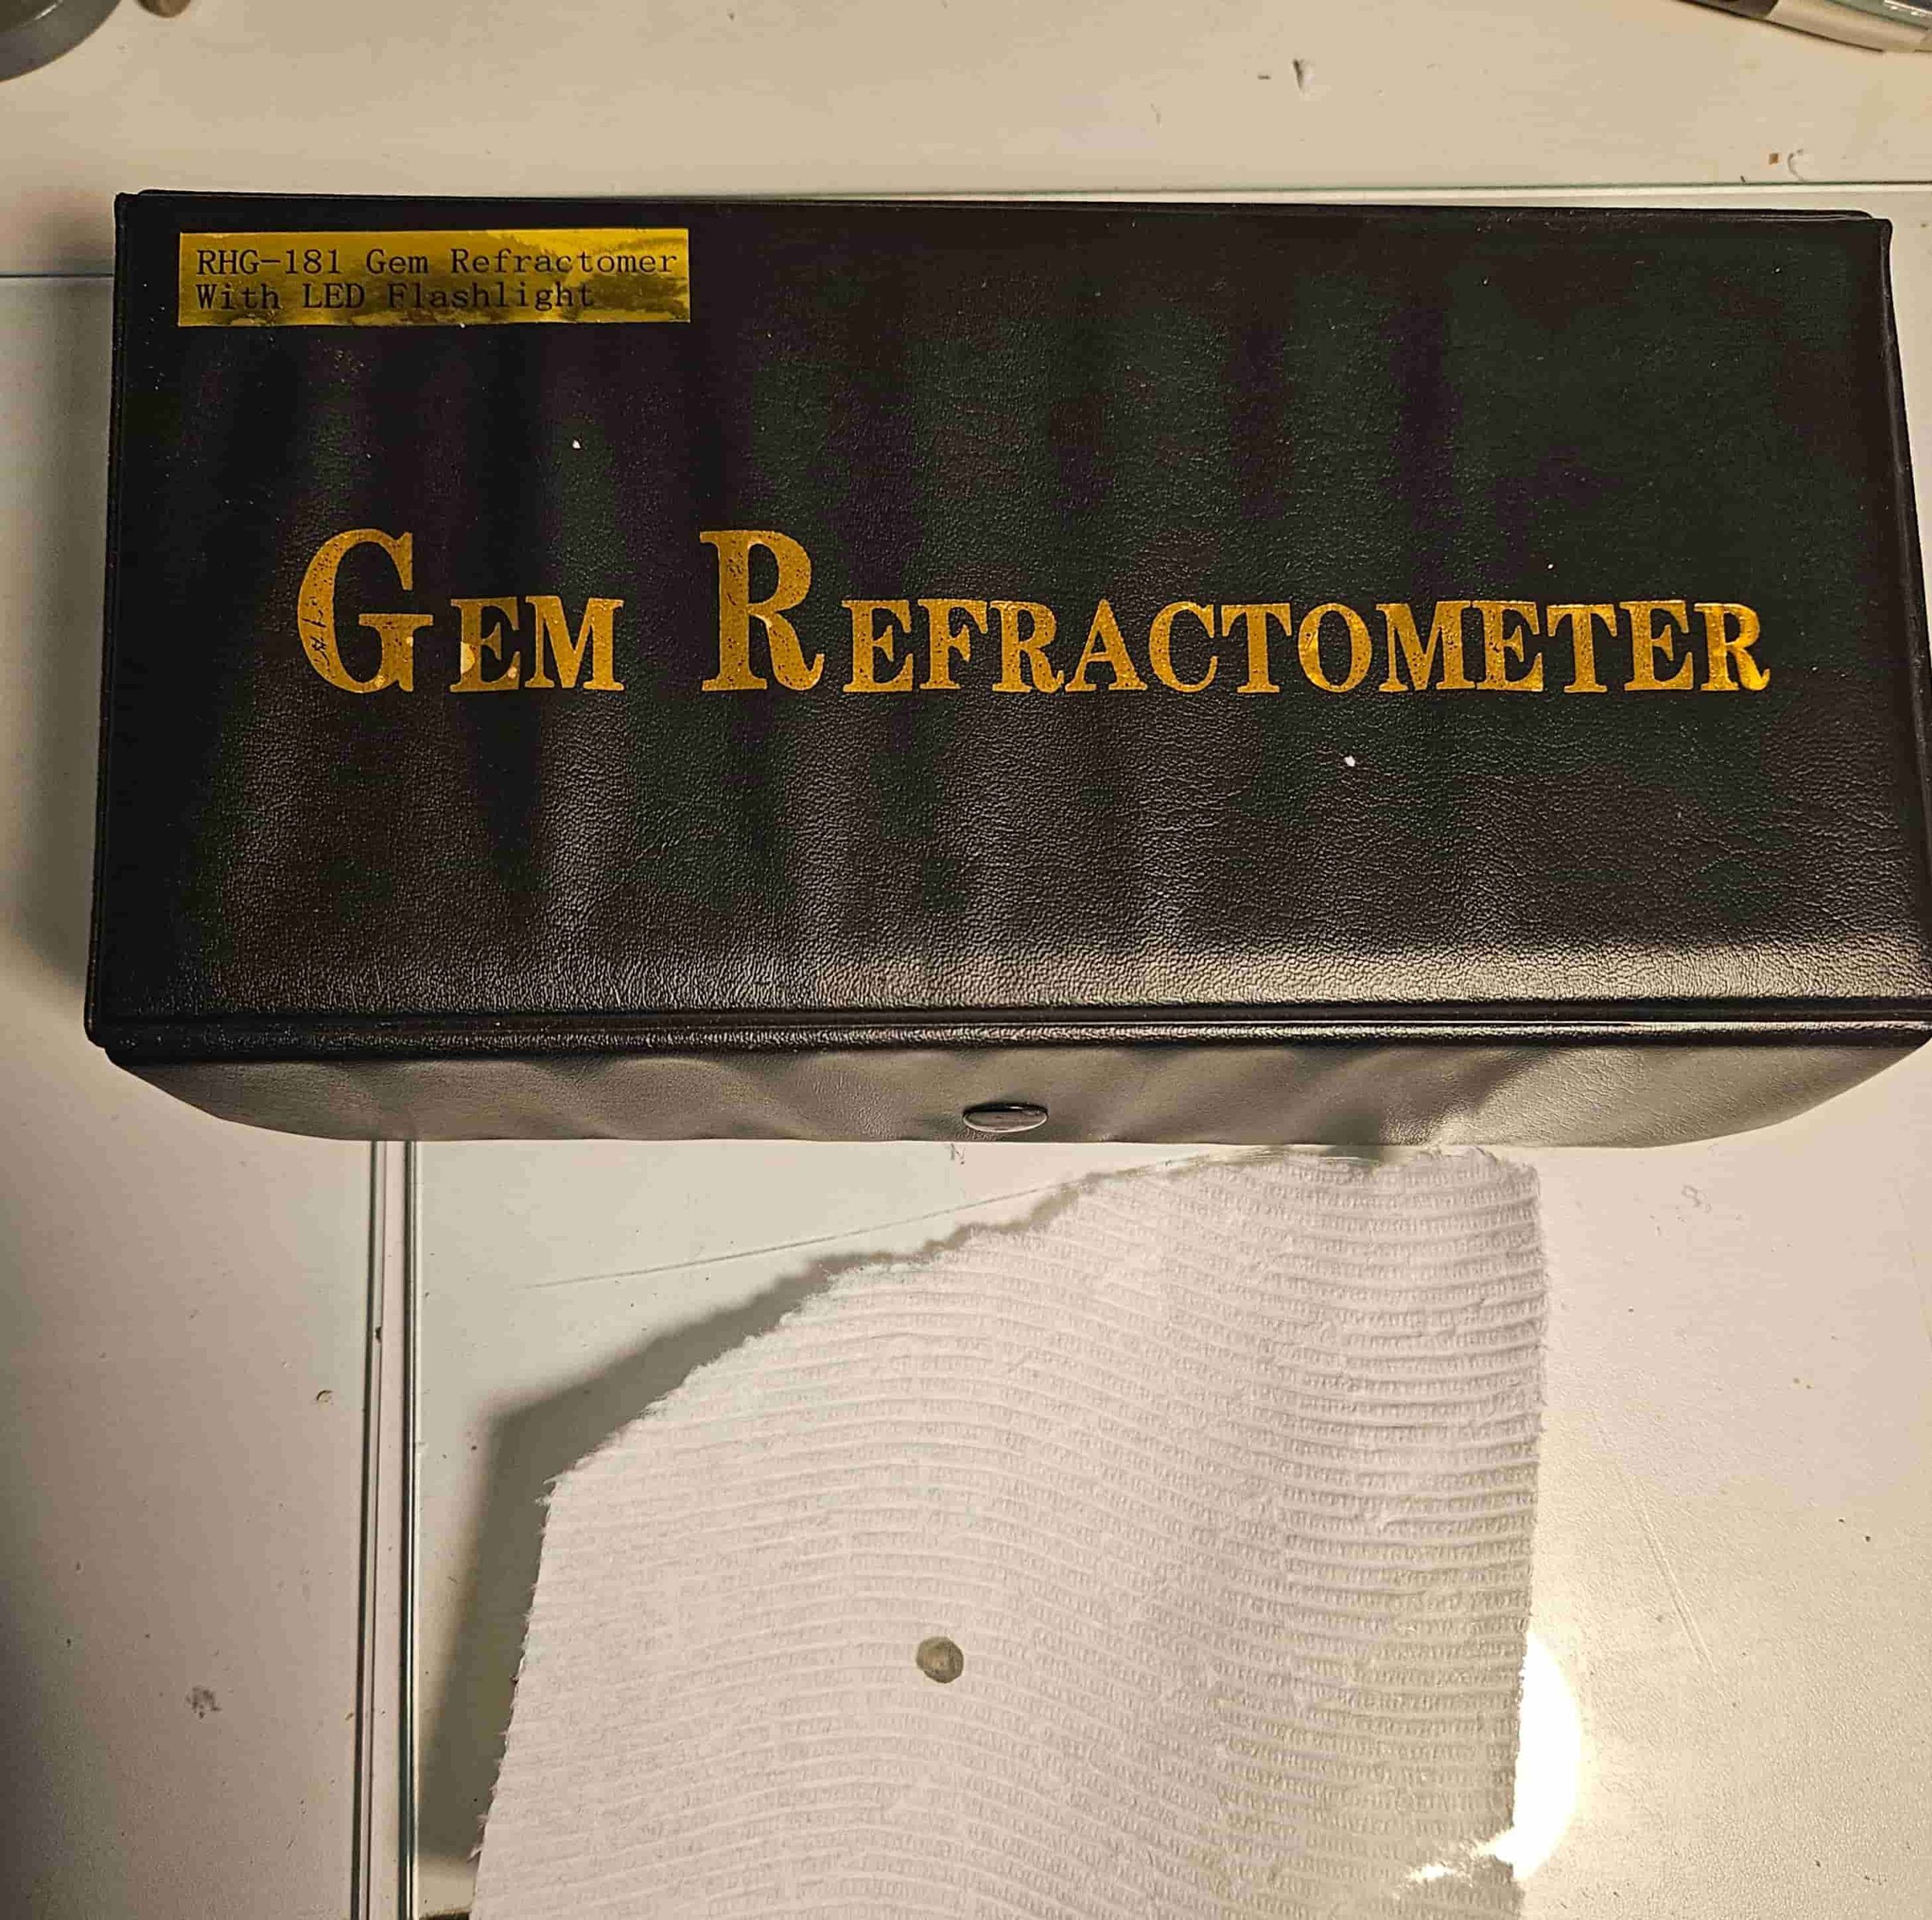
Precision on a budget. Specialized laboratory equipment doesn't always require a prohibitive investment; this functional gem refractometer was acquired for around $60. While entry-level units have specific limitations compared to high-end models—such as a narrower testing range that cannot measure diamonds or high-index synthetic materials—it is perfectly calibrated and highly suitable for identifying and measuring the vast majority of natural colored stones in my studio.
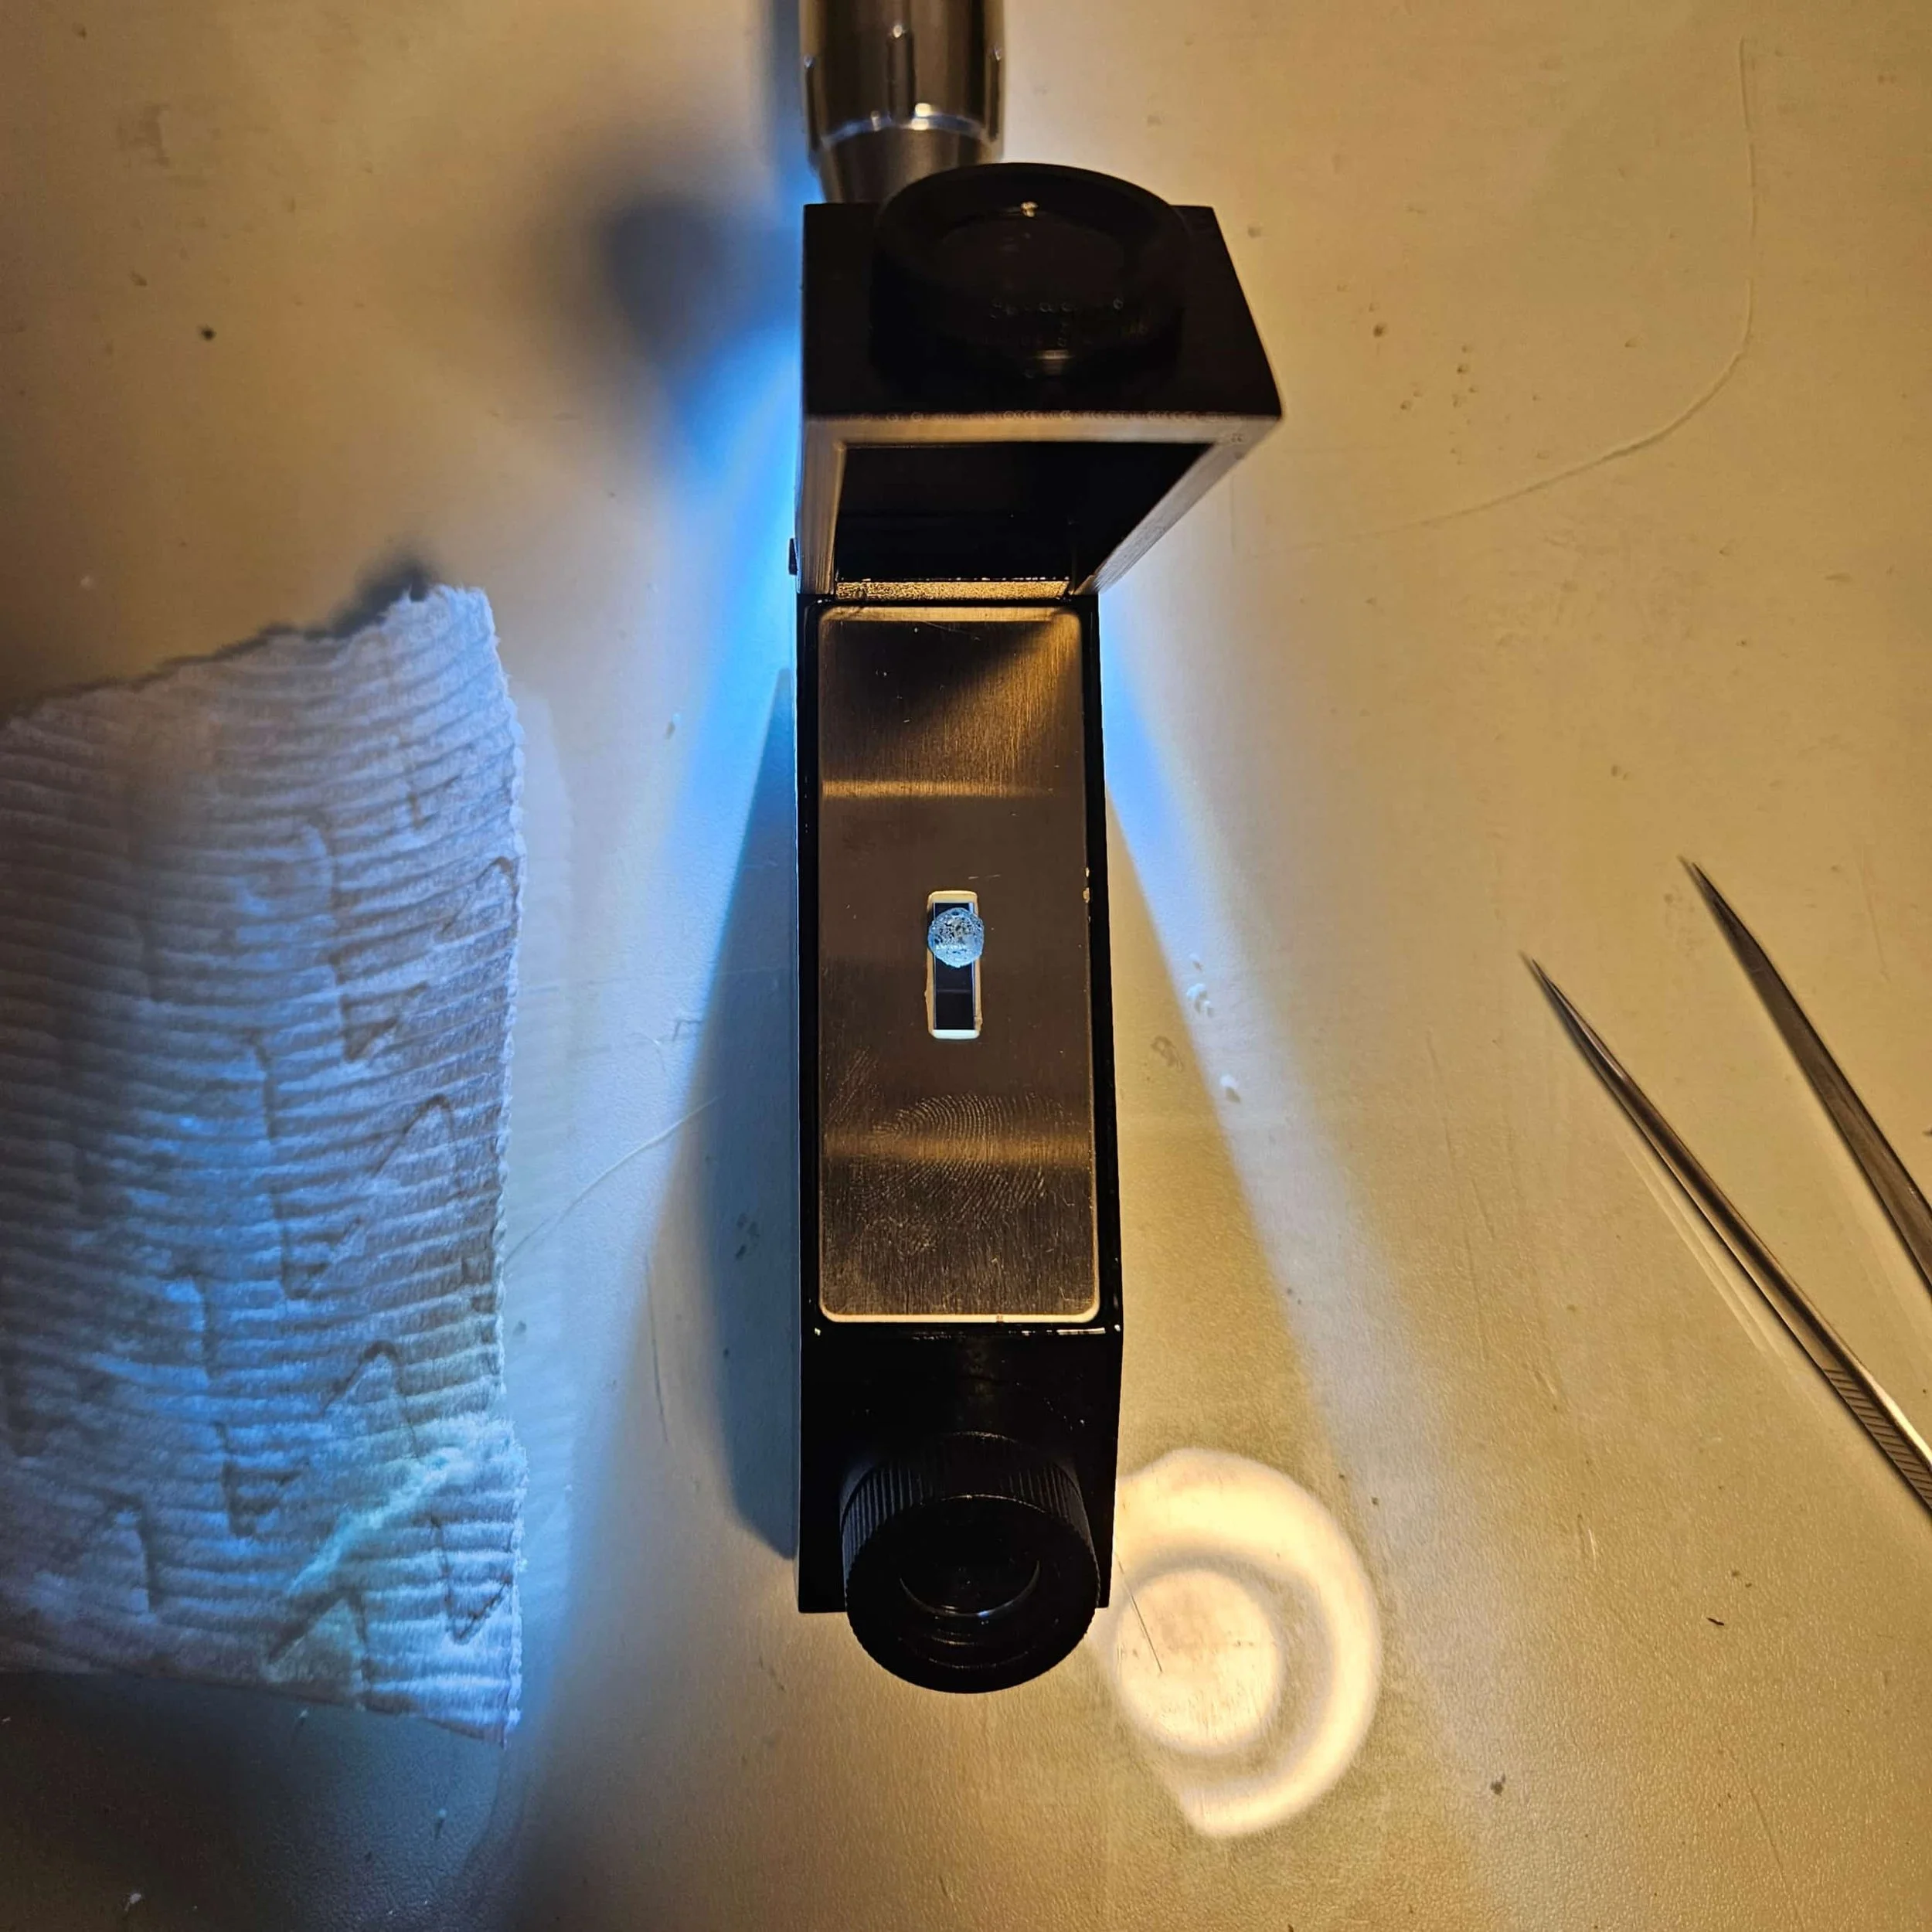
Setting the optical interface. To read the stone's Refractive Index, a single drop of specialized contact liquid (RI fluid, standard with the testing kit or sourced separately) is applied directly to the hemicylinder glass prism. The freshly polished table facet of the sapphire is then carefully placed face-down into the fluid. This liquid creates an optically seamless seal between the stone and the testing glass, allowing light from the provided source to refract accurately through the material and into the eyepiece.
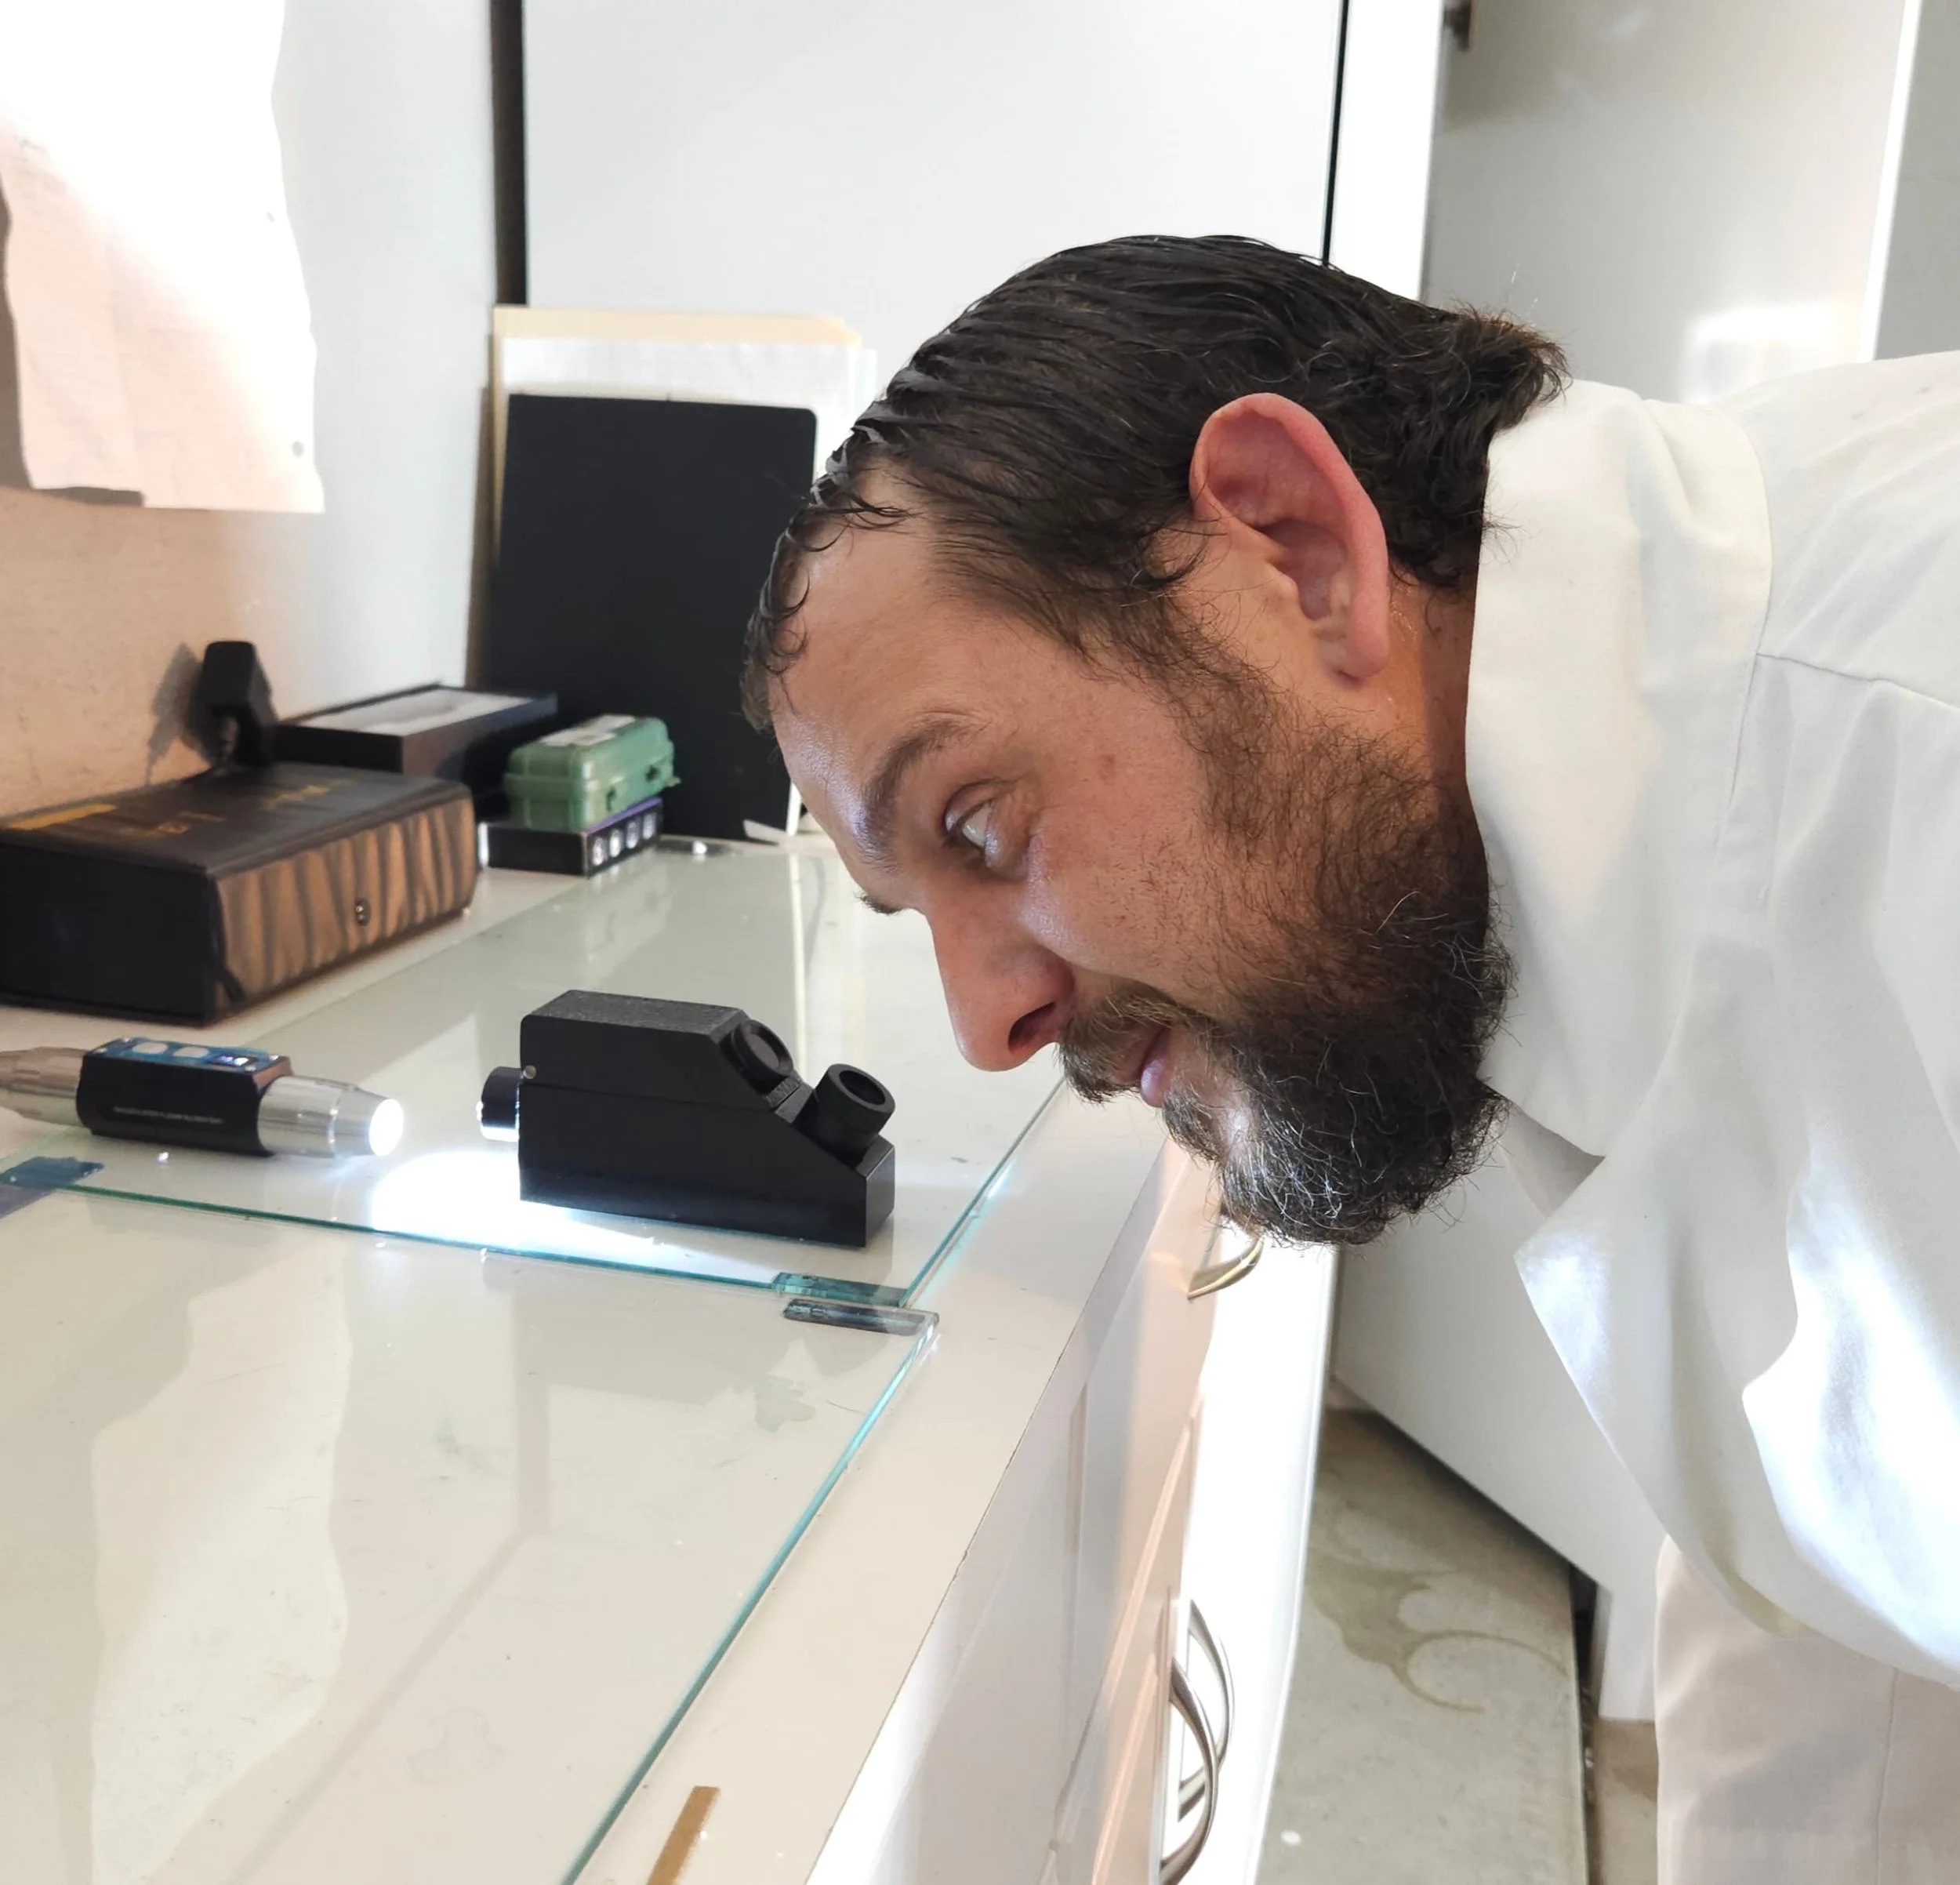
Reading the optical data. Analysis using the refractometer allows for the direct observation of the stone's internal light velocity. The instrument features an adjustable eyepiece to sharply focus the internal scale, while an optional, separate polarizing filter can be rotated over the lens. This specialized filter is critical for identifying birefringent (doubly refractive) materials, revealing the precise degree of optical splitting characteristic of specific gemstone species.
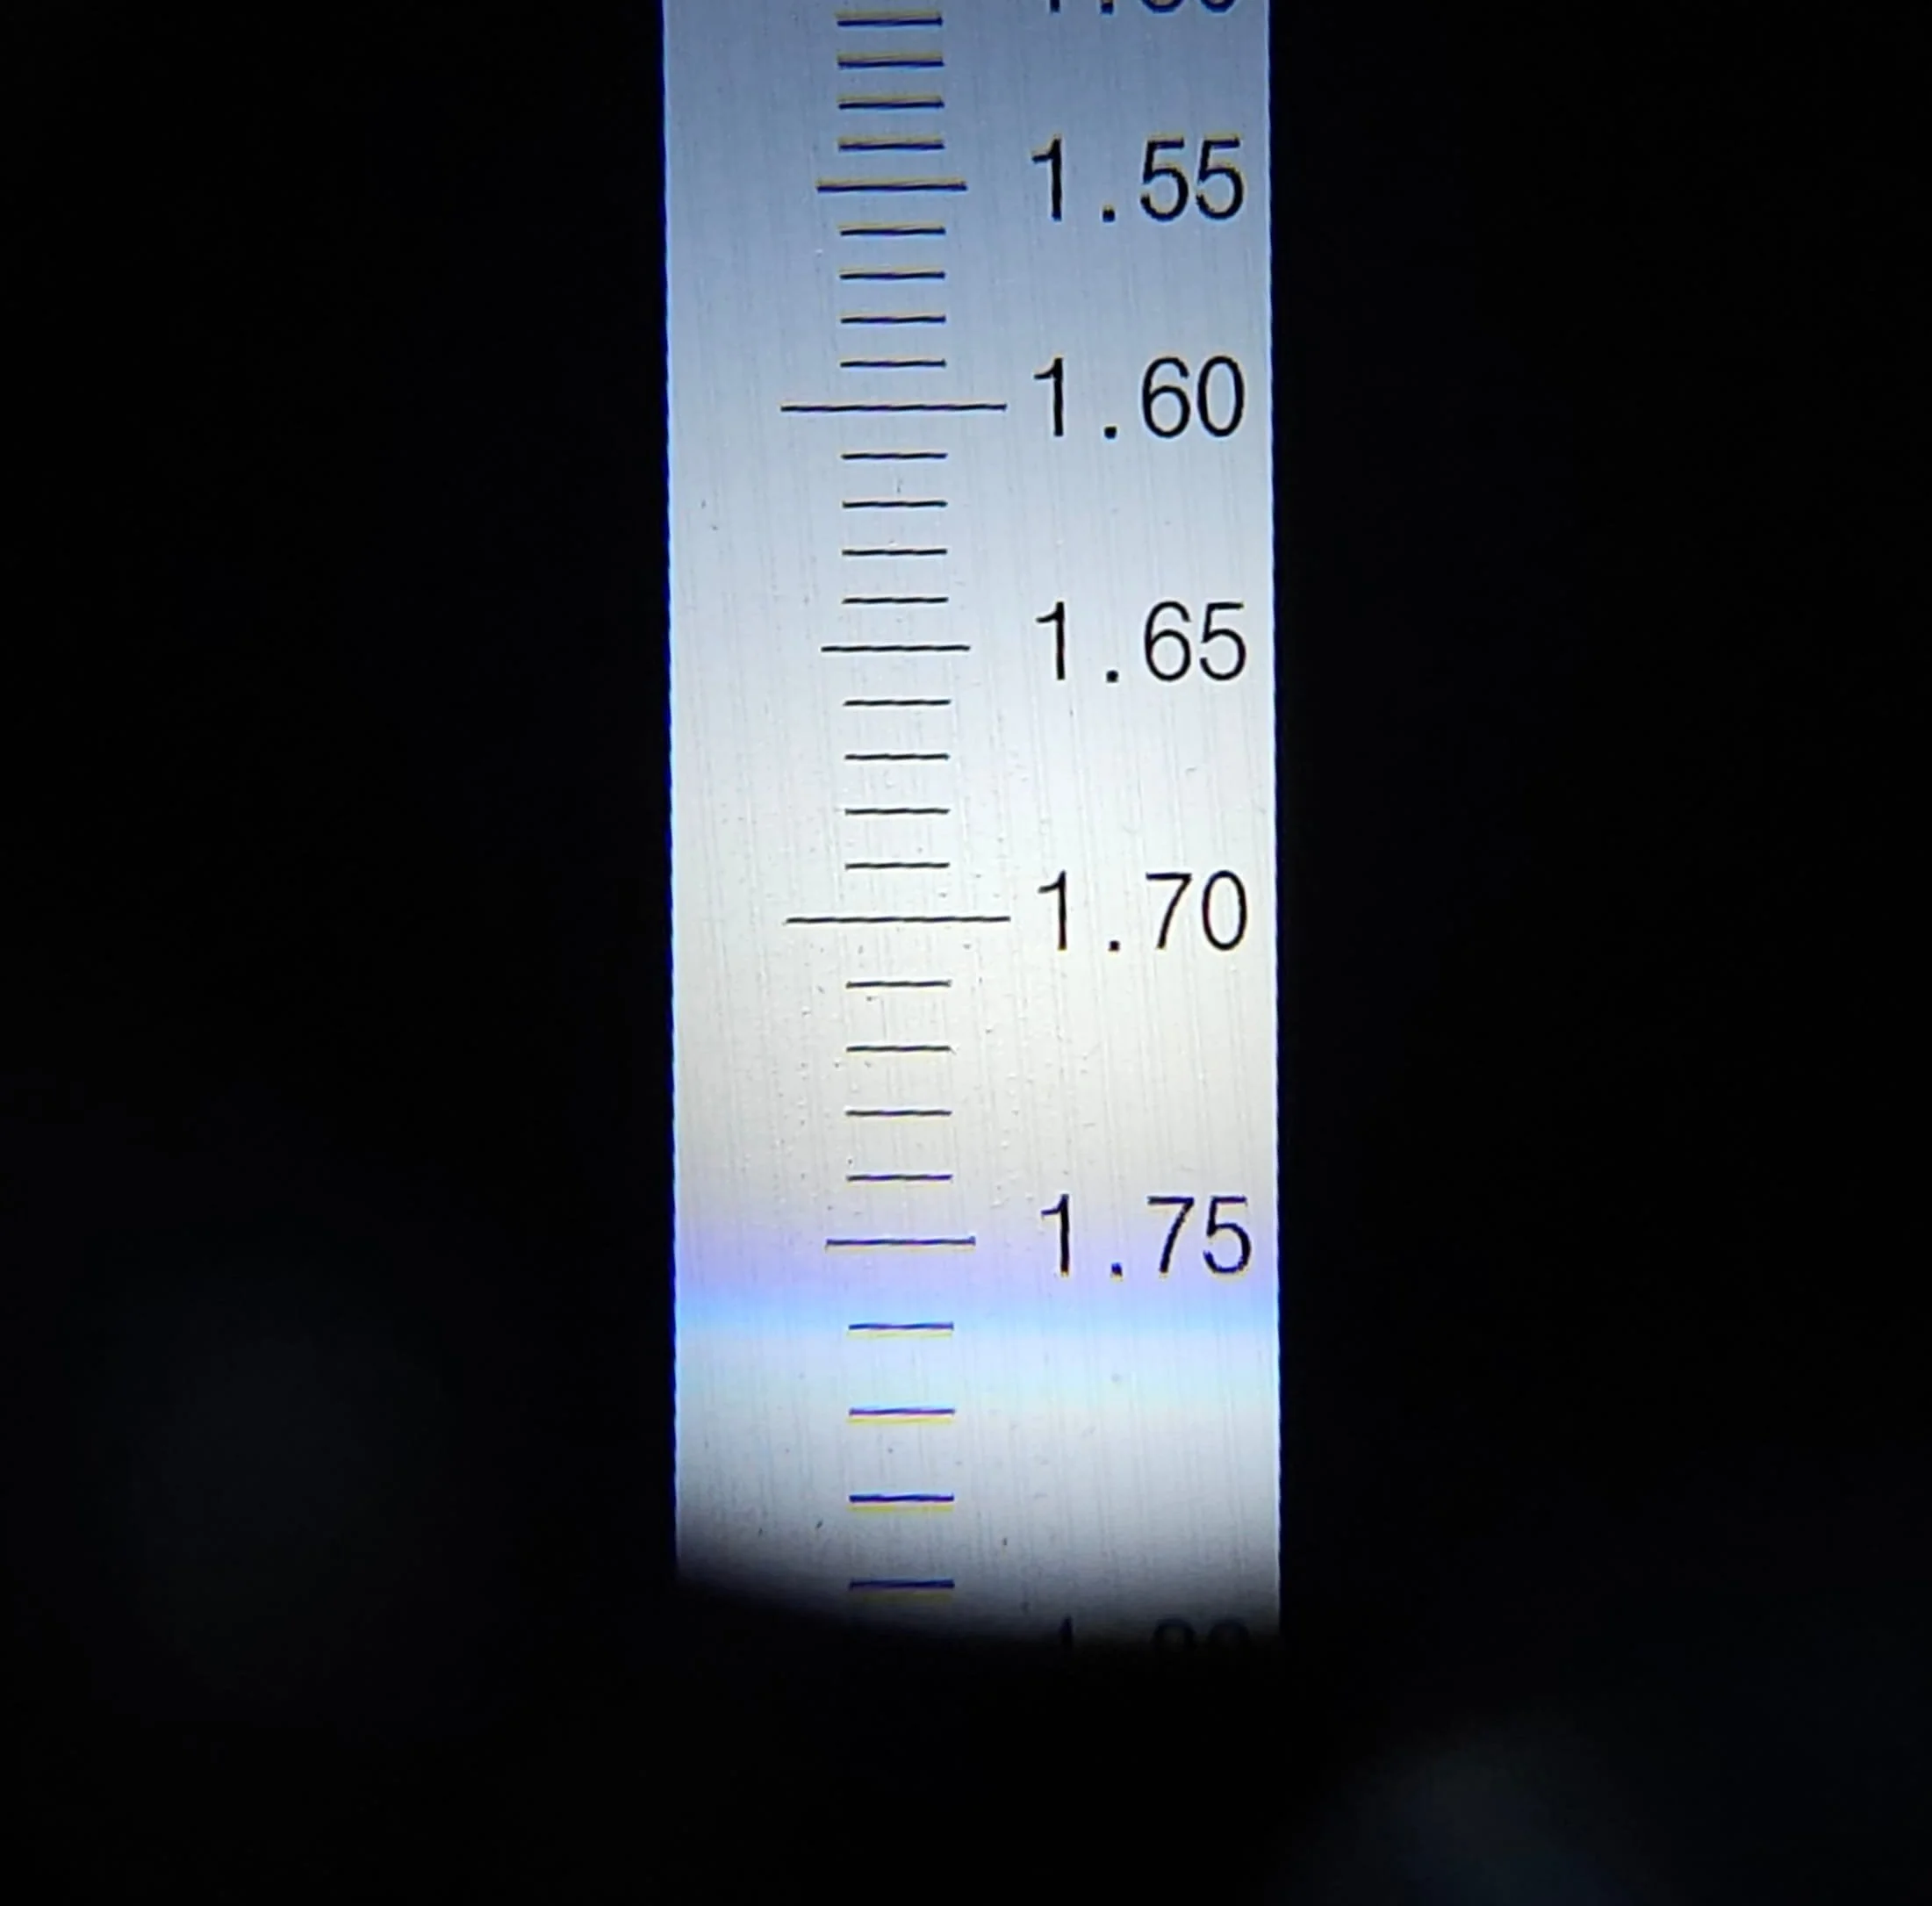
Analyzing the shadow line. Looking directly through the adjustable eyepiece reveals a clear boundary line (the shadow line) landing precisely between the 1.75 and 1.80 marks on the scale. Measuring at approximately 1.760, this exact optical reading perfectly aligns with the known refractive index range for natural corundum, conclusively validating the stone's physical identity as a genuine sapphire.
Doping the stone, printing the design, and setting up the faceting station.
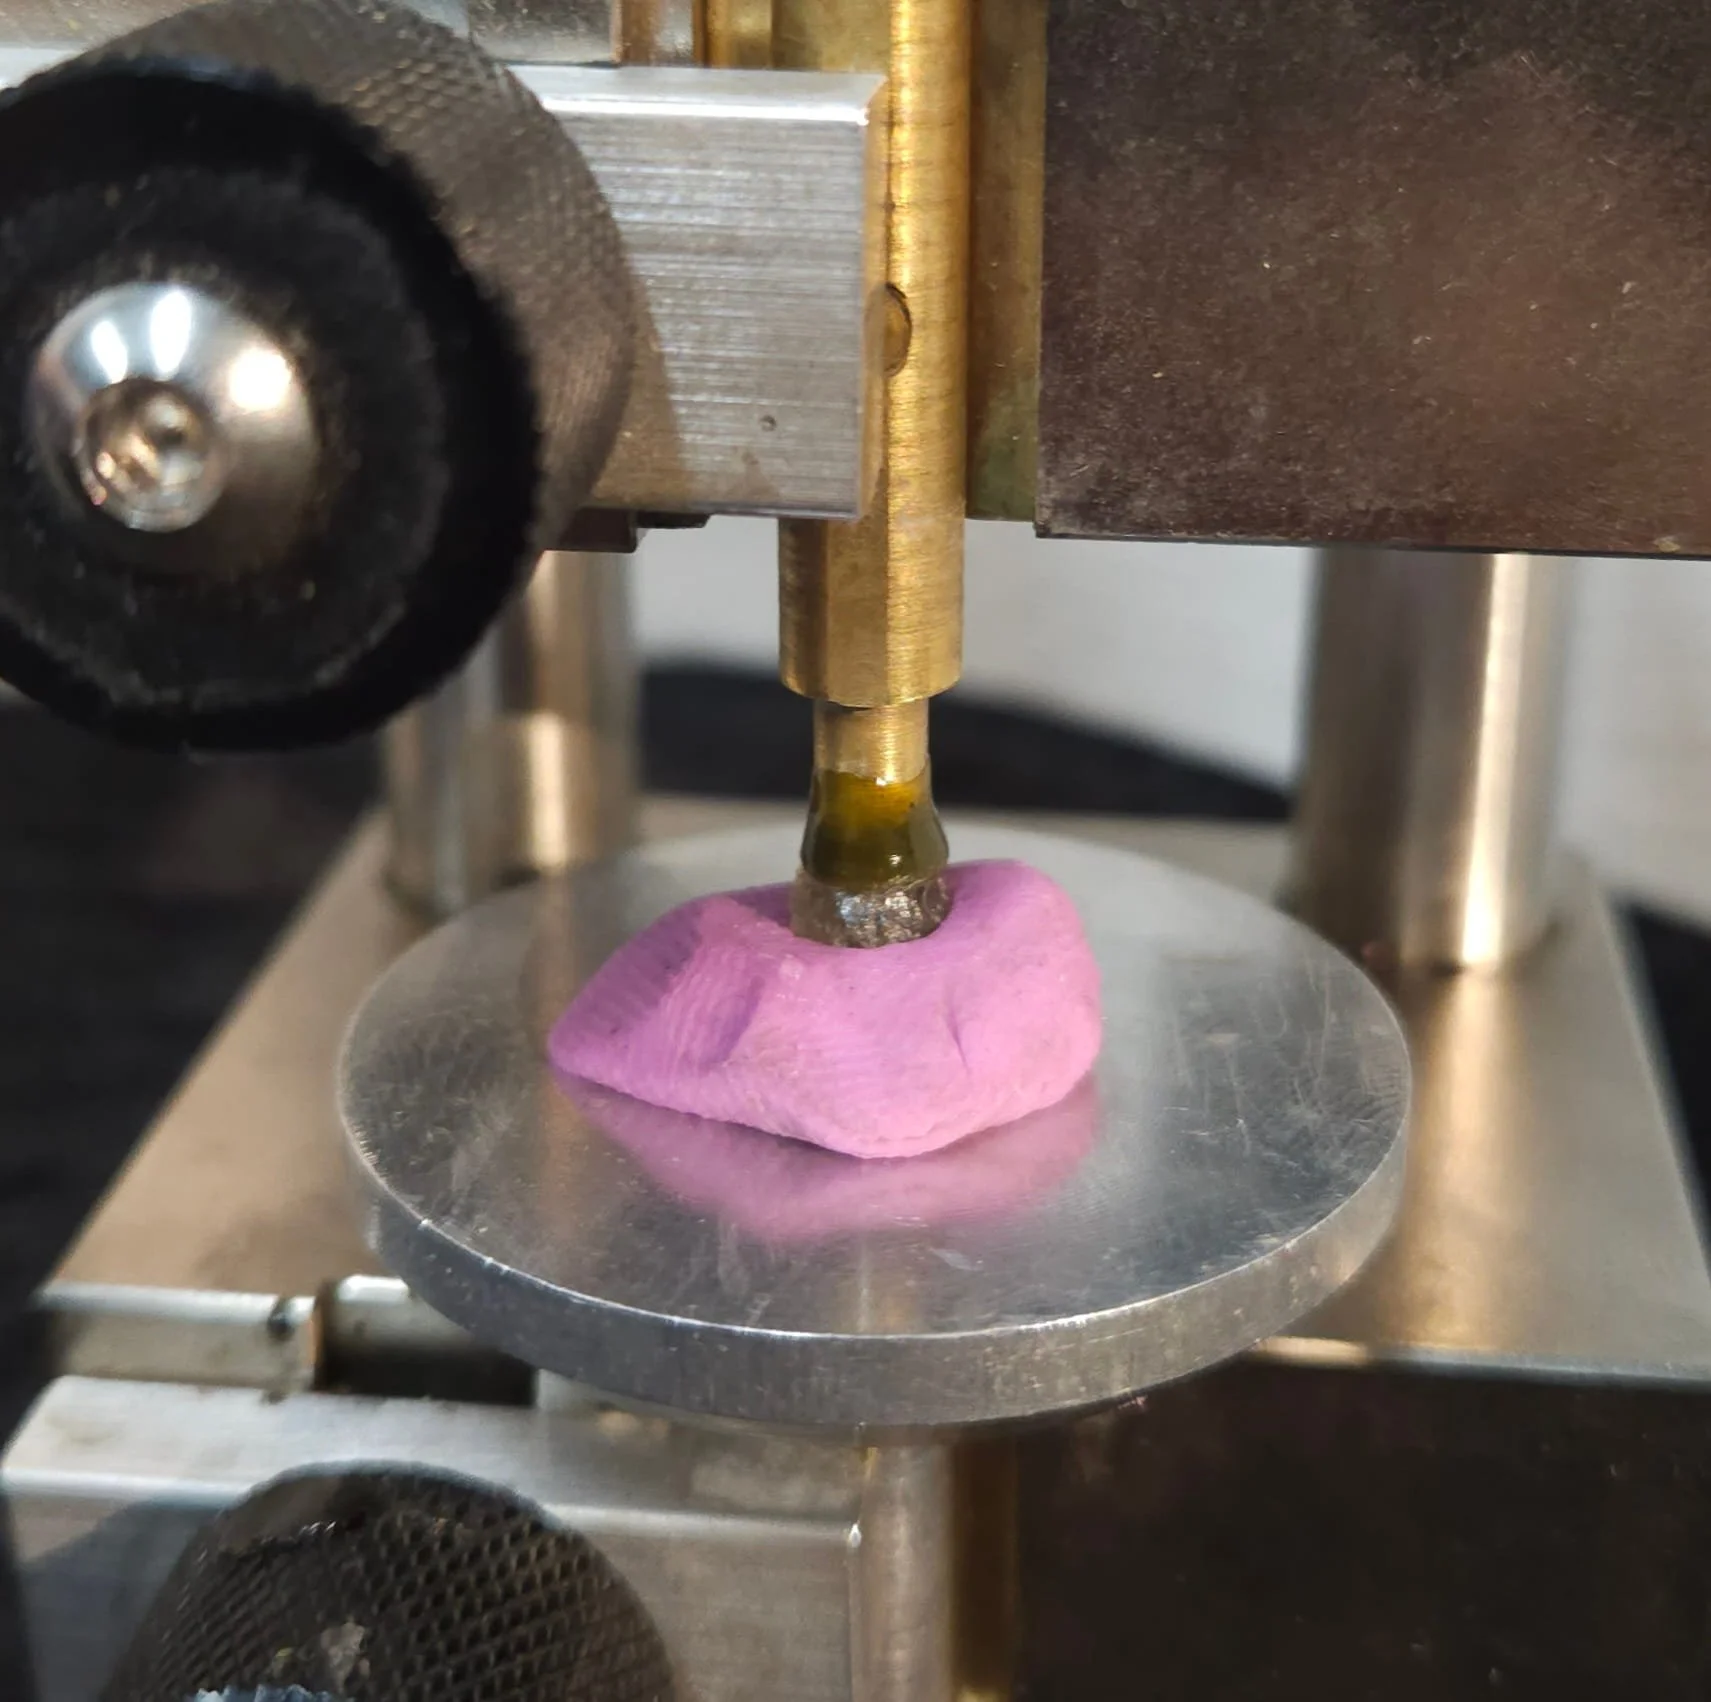
Precision alignment via the hybrid method. To secure the sapphire for cutting, a cold/hybrid dopping technique is employed. By first pressing a warm, malleable wax impression to mirror the stone's flat table facet, a perfect mechanical seat is created without exposing temperature-sensitive materials to high heat. High-strength adhesive is then introduced to lock the stone completely in place. This advanced approach ensures that the pre-calibrated table facet stays perfectly centered and rigid on the dop stick throughout the entire faceting process.
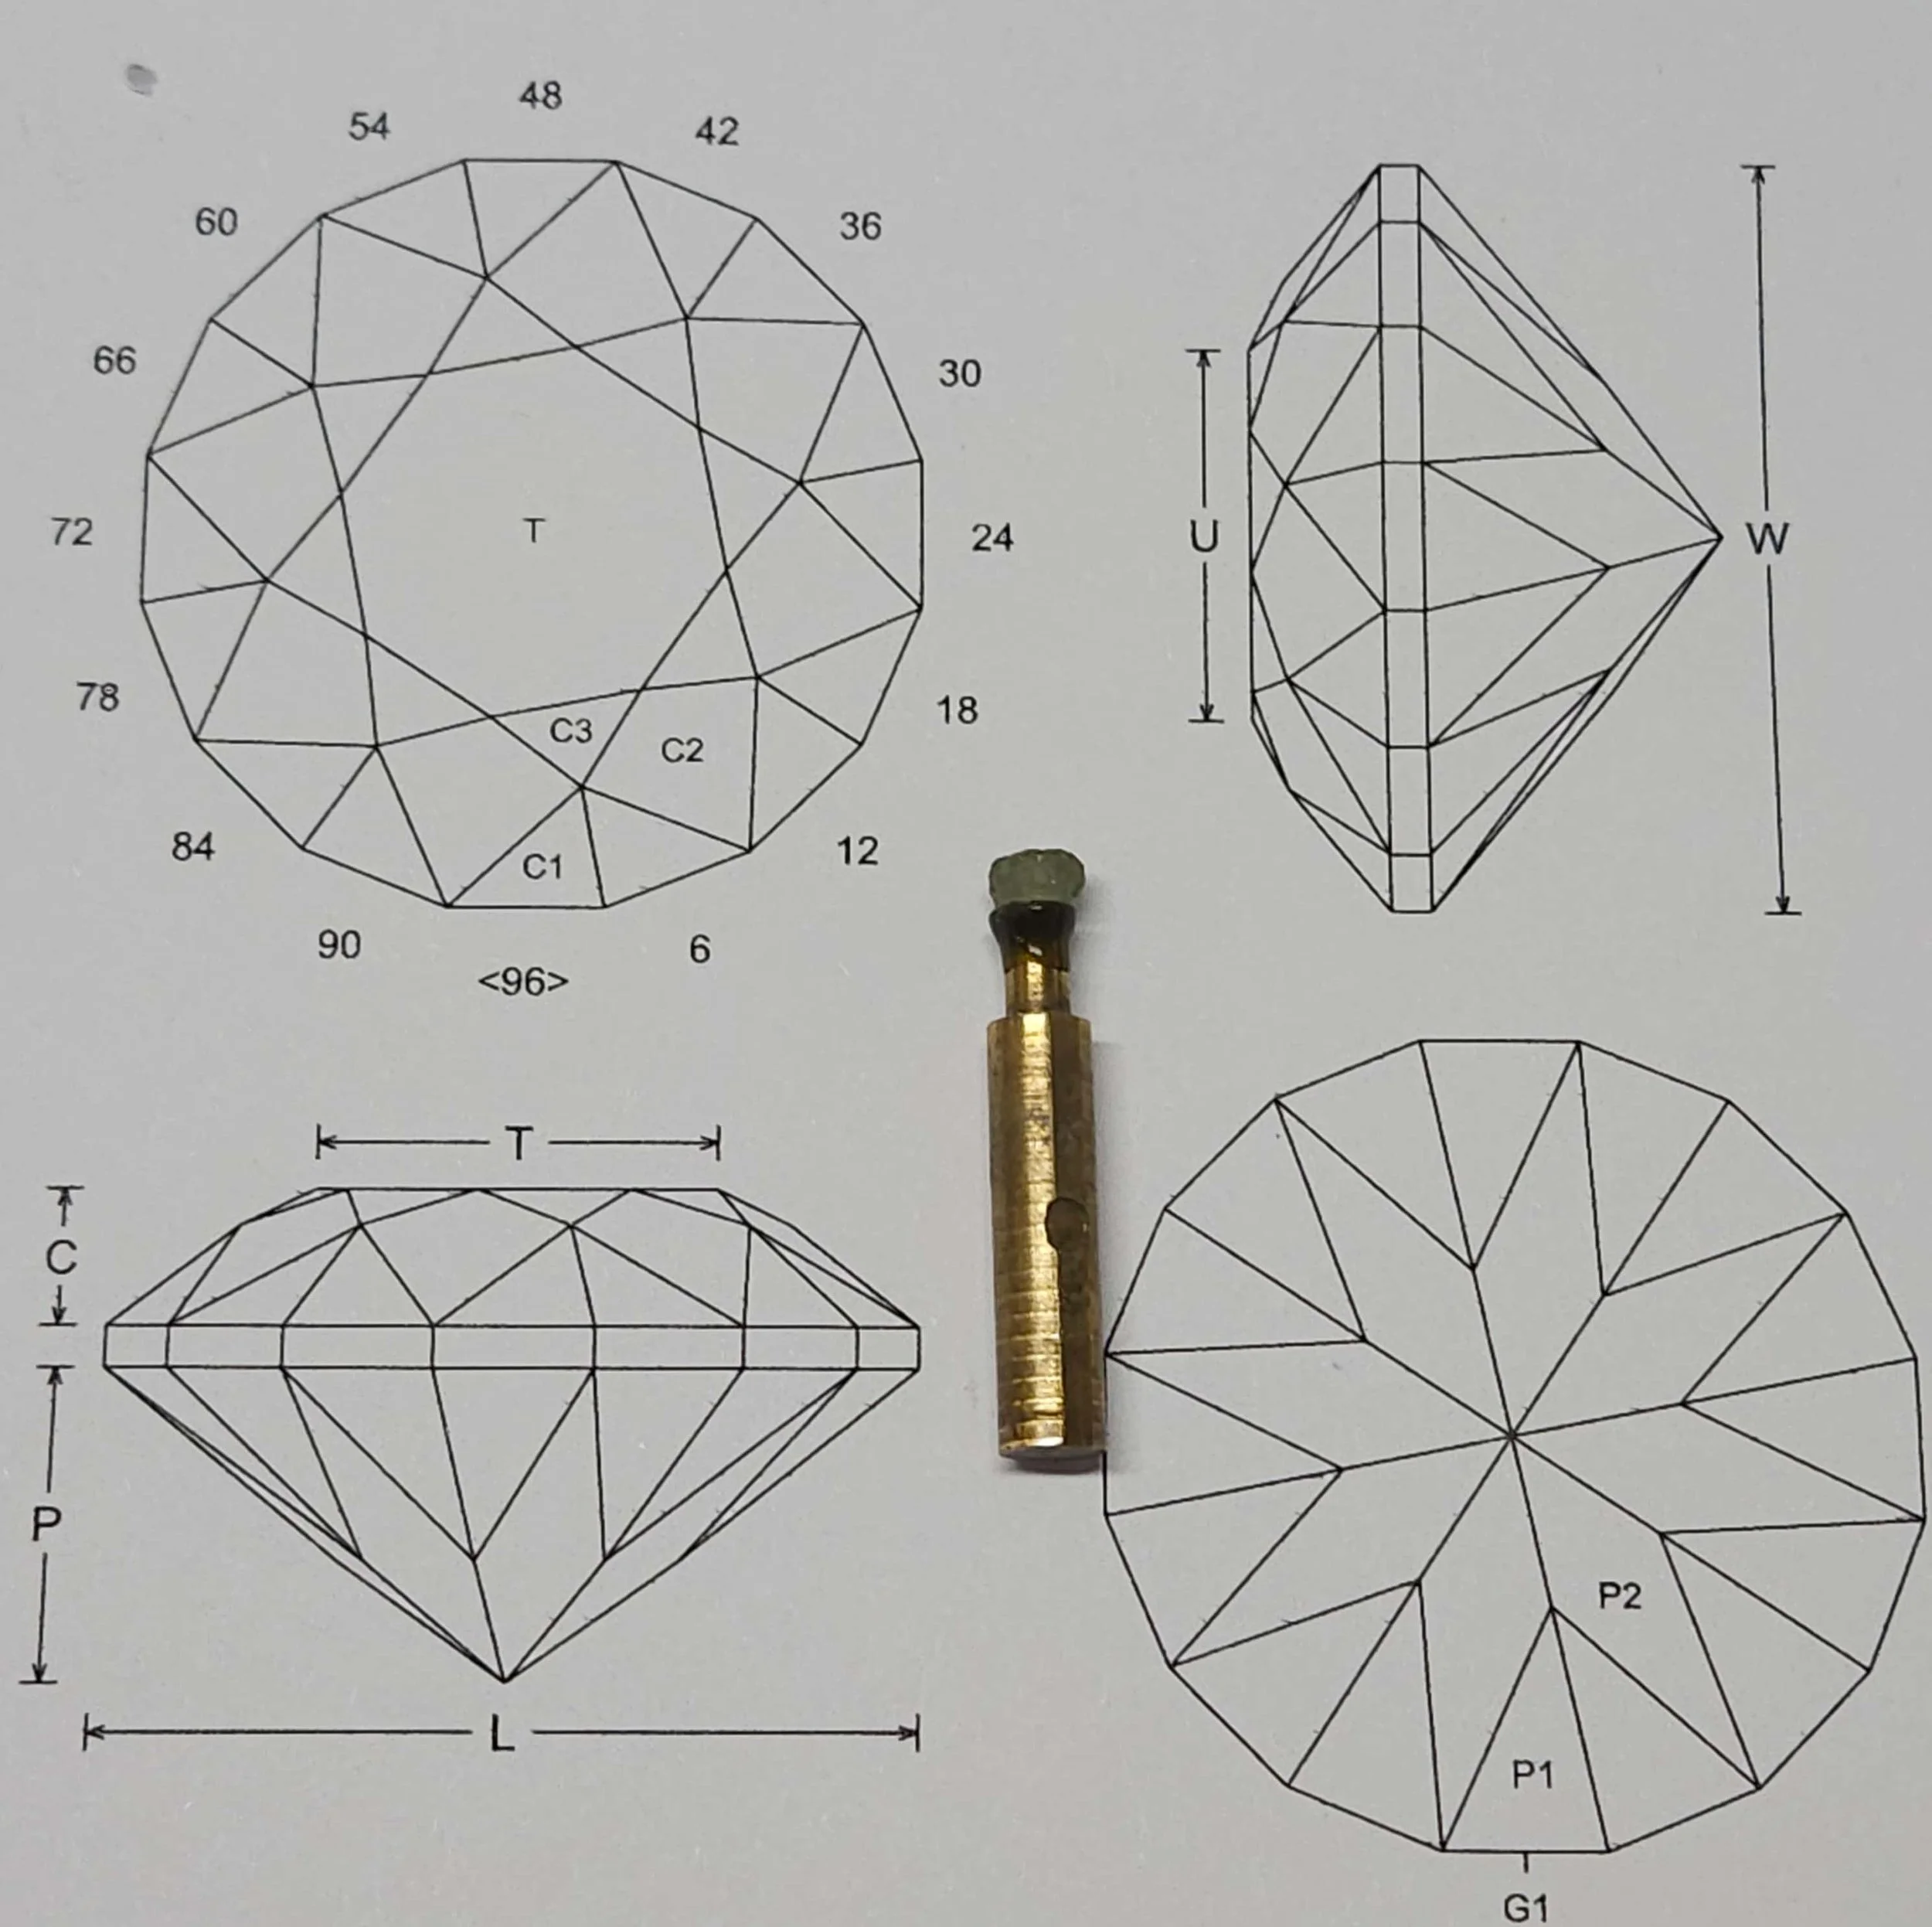
The blueprint meets the material. With the calibration data locked in and the sapphire securely secured via hybrid dopping, the physical faceting stage is officially ready to begin. The printed master blueprint acts as a roadmap at the faceting station, displaying the exact indexing coordinates (from 0 to 96) and precise angle requirements for each of the crown and pavilion tiers. From here, the first physical cuts can be made to rough out the true symmetry of the final gem.
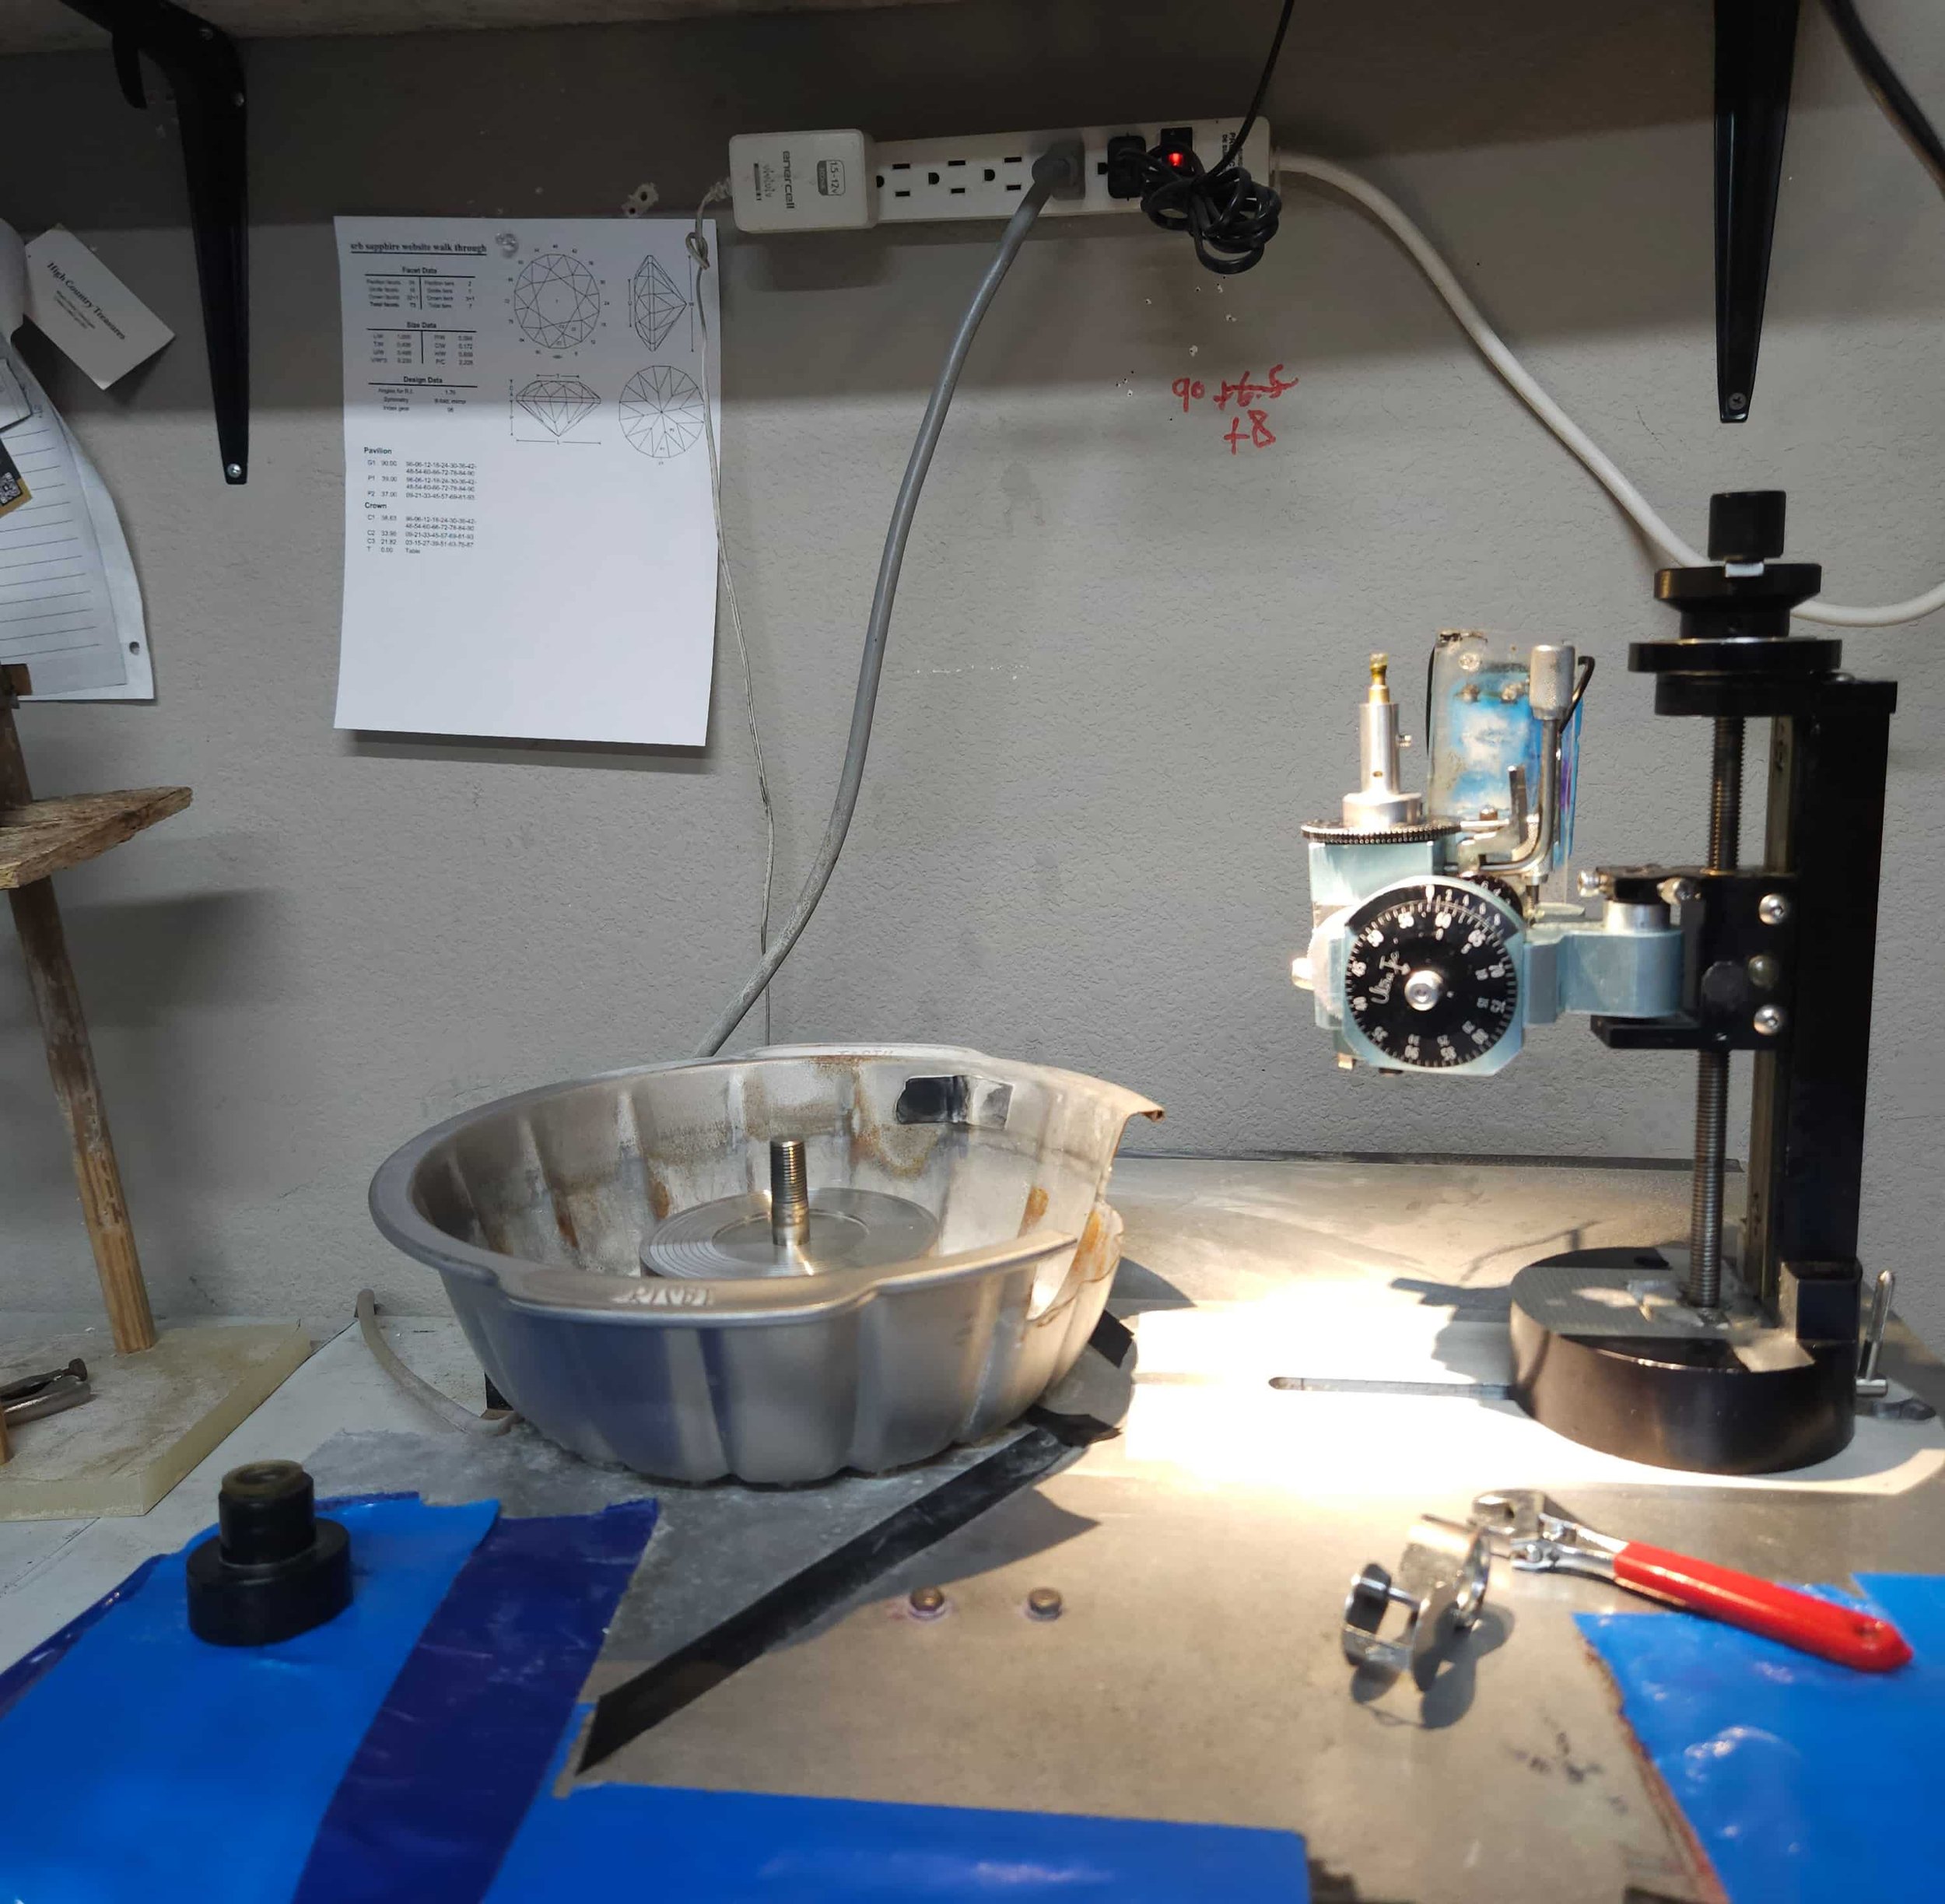
The setup complete. The faceting station is fully prepared, with all technical components organized and in position. The master design blueprint is posted directly on the wall for quick reference of the cutting coordinates, while the precision faceting machine, alignment gears, and surrounding workshop tools are calibrated. With the workstation dialed in, the stone can now be introduced to the lap to begin the physical grinding and polishing stages.
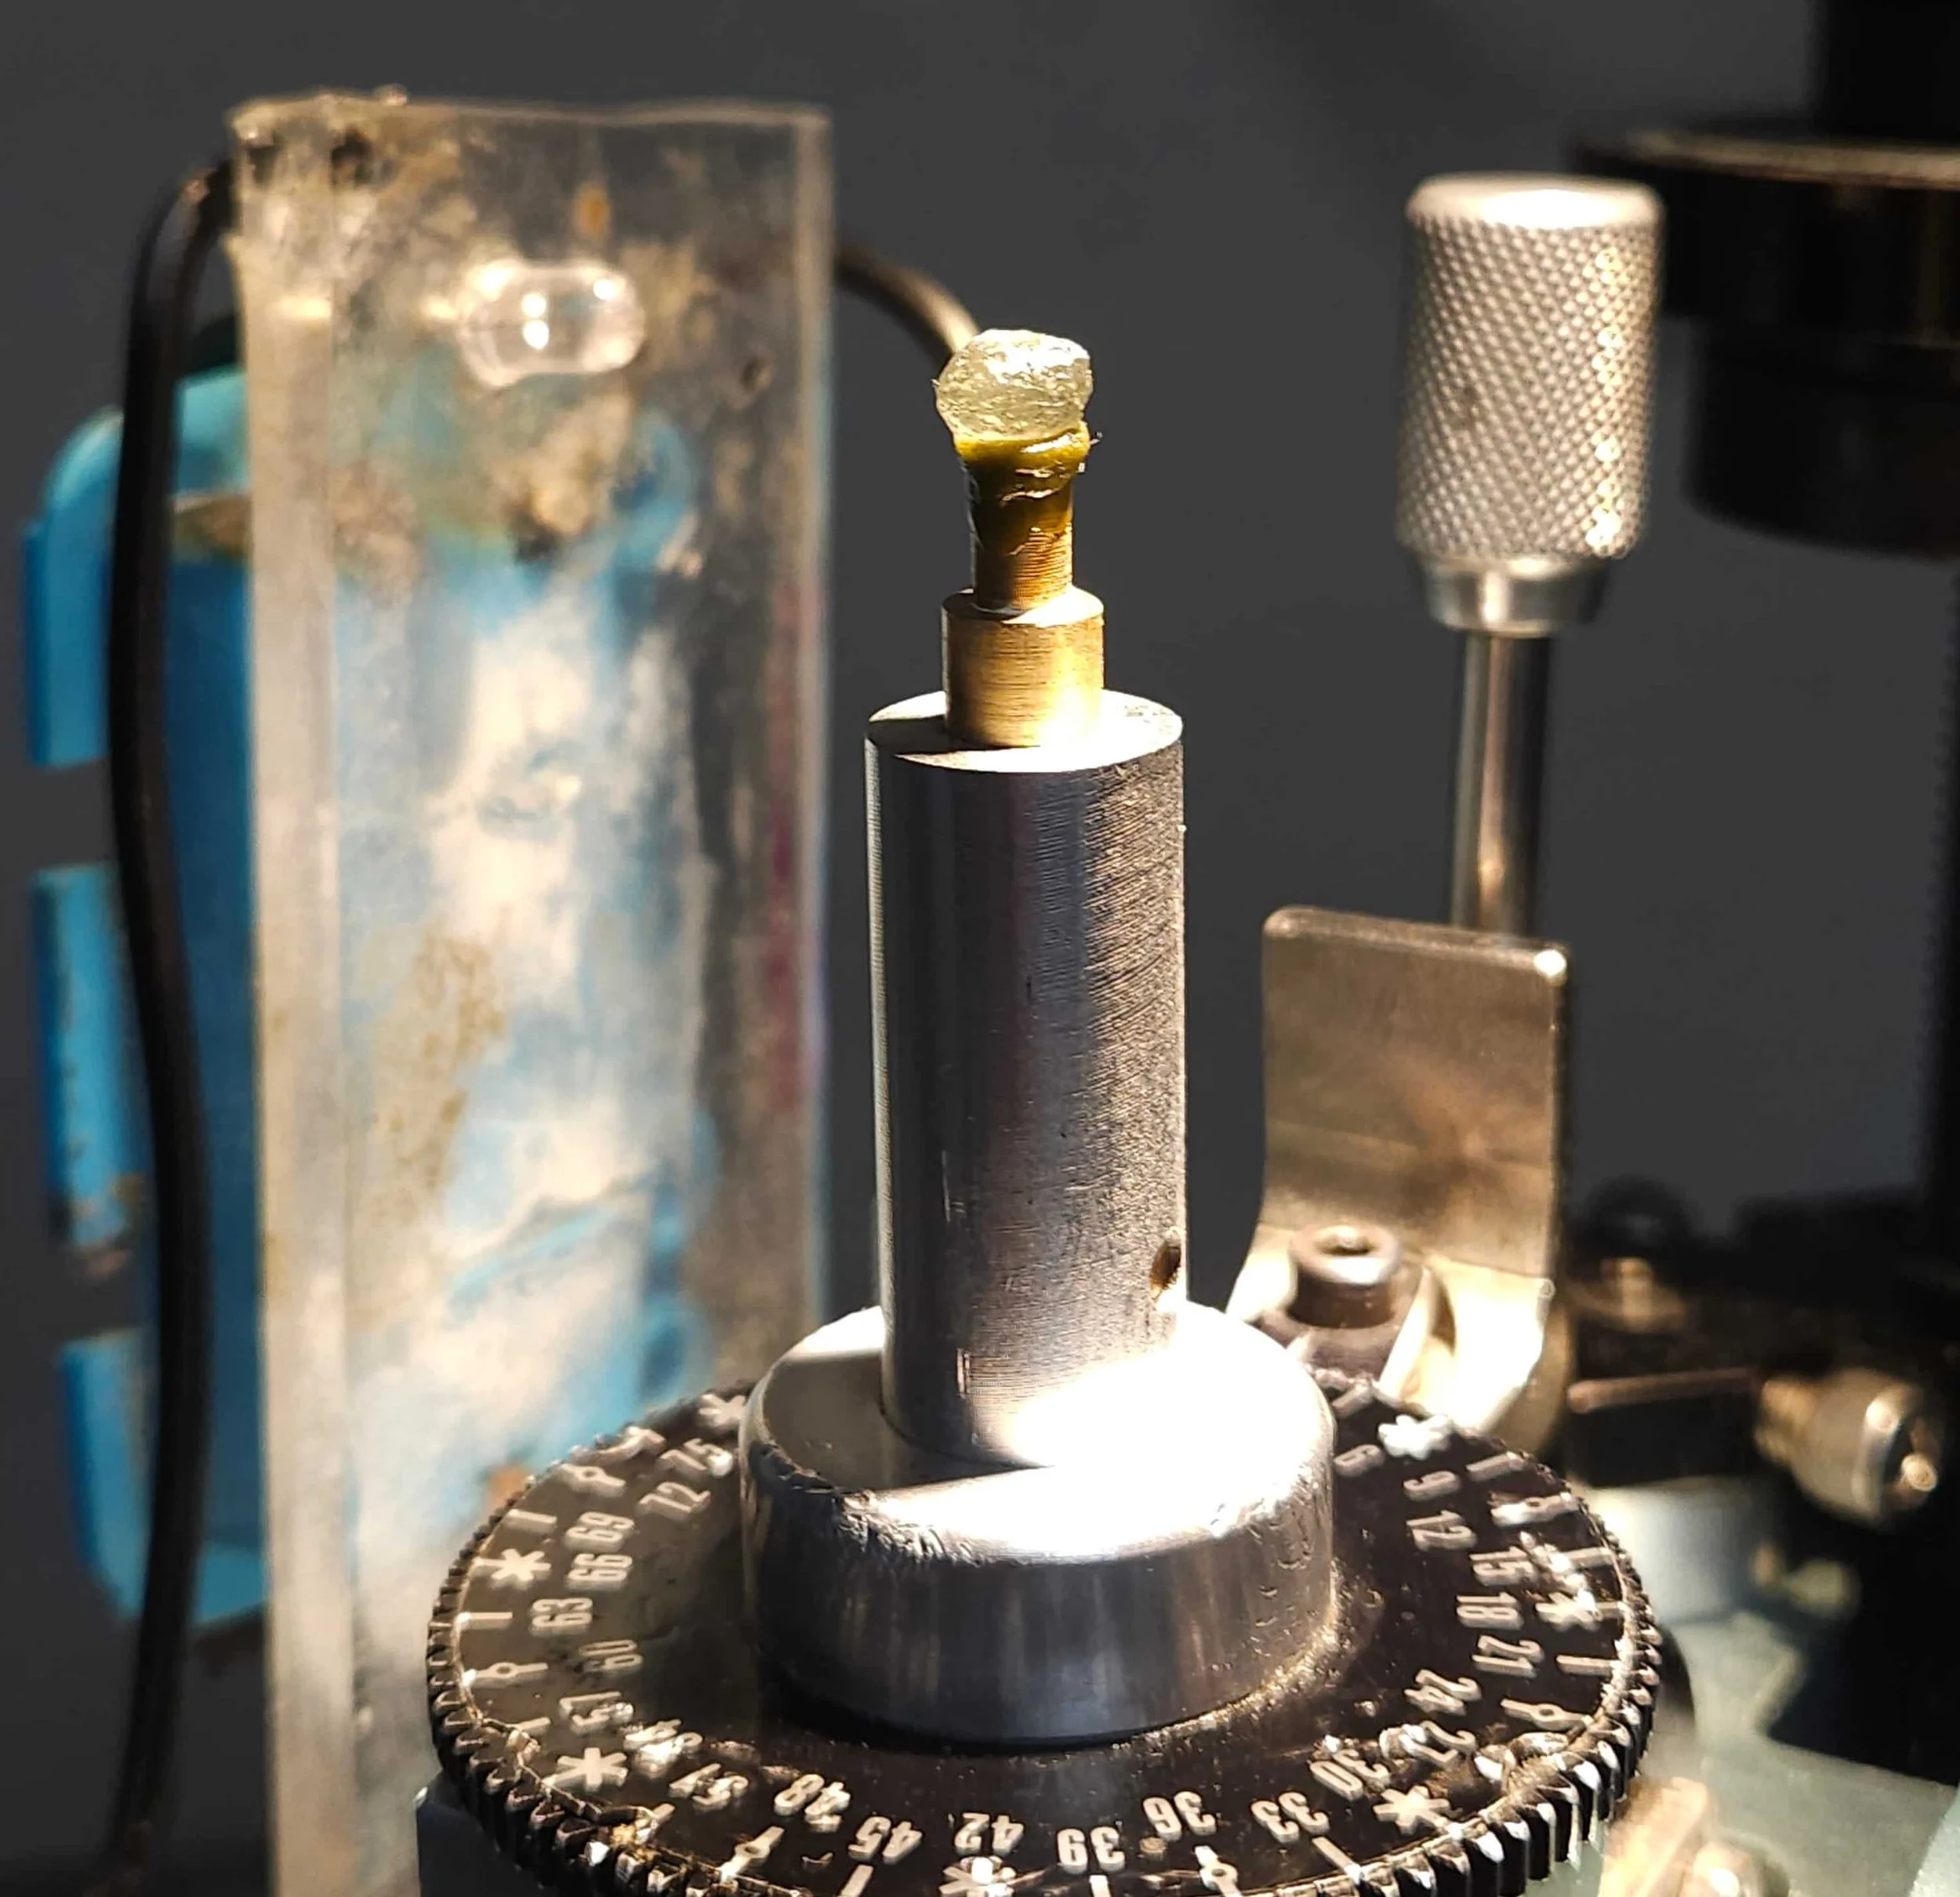
Let’s start cutting! Locked into the quill of the precision faceting machine, the doped sapphire rough is perfectly aligned over the index gear. With the exact angles programmed and the cutting wheel ready to spin, the first physical grinds are about to begin, transforming this raw piece of rough into a highly reflective, custom-faceted gemstone.
Faceting the stone
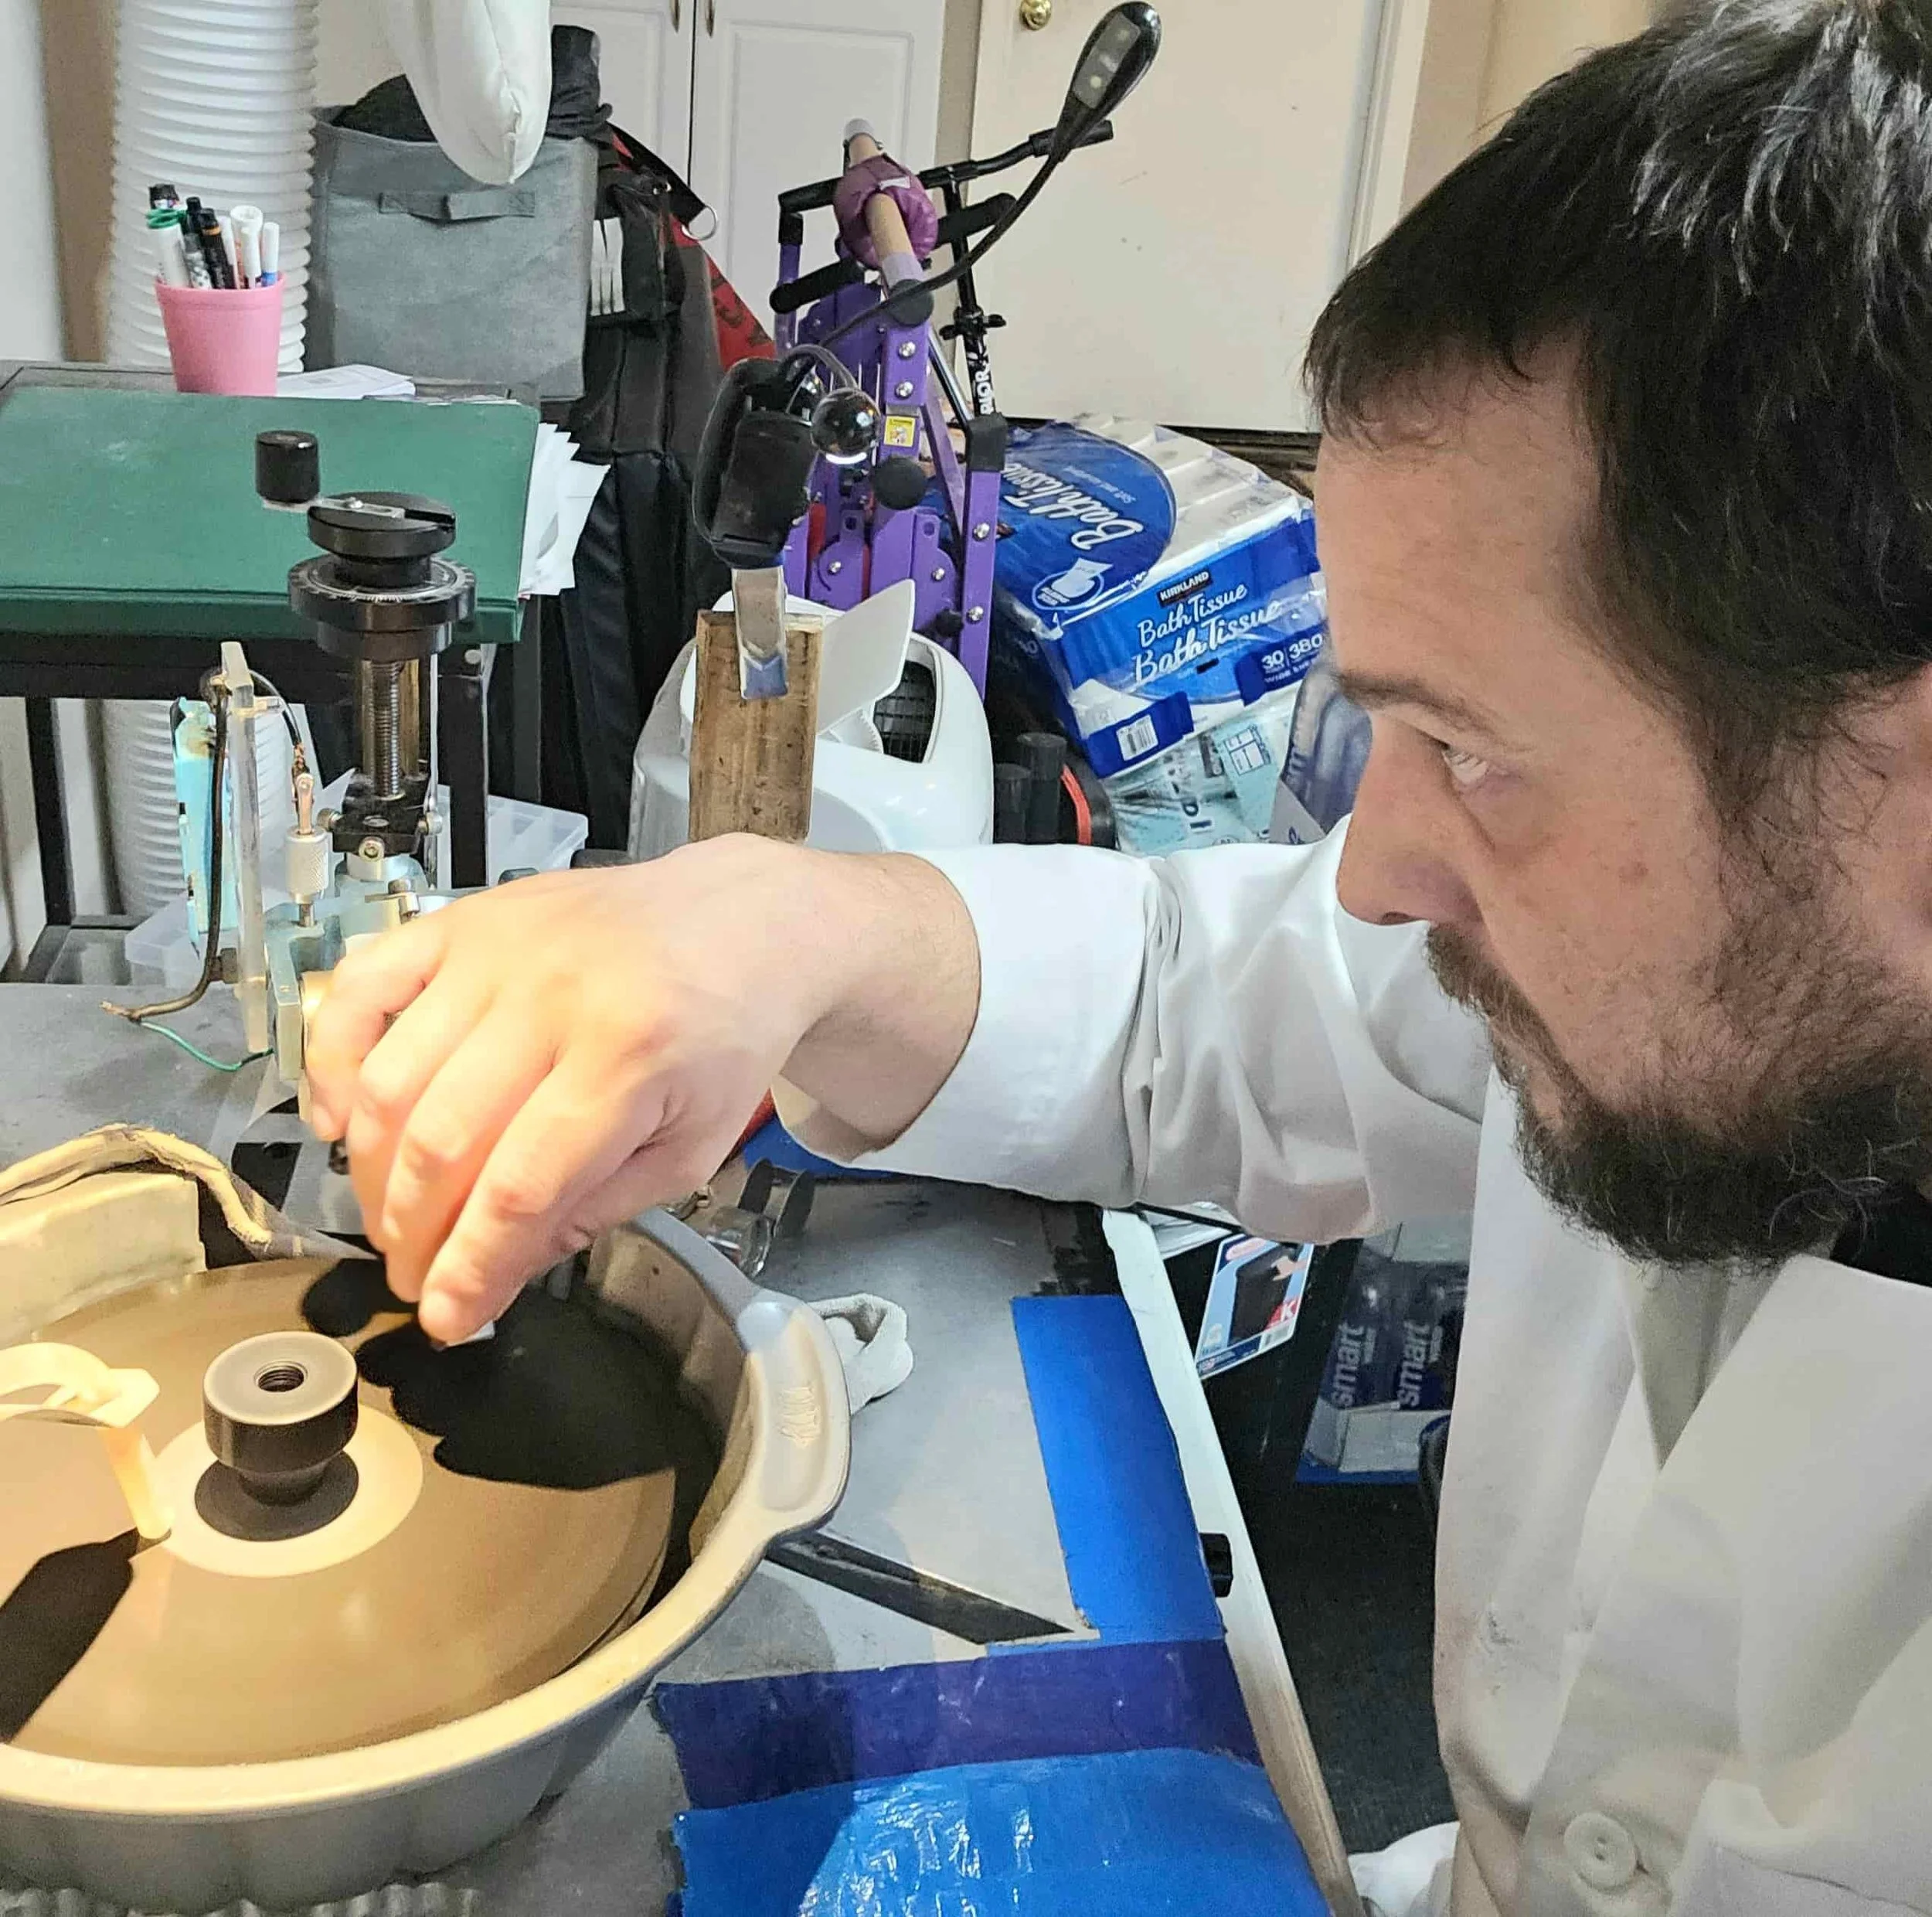
Precision to the millimeter. The physical faceting process requires absolute concentration as the stone meets the grinding lap. While executing each facet, close attention is paid directly to the machine's depth indicator. This specialized gauge allows the gem cutter to monitor the material removal down to fractions of a millimeter, ensuring perfect meet-points where the corners of the facets intersect without over-cutting the rough.
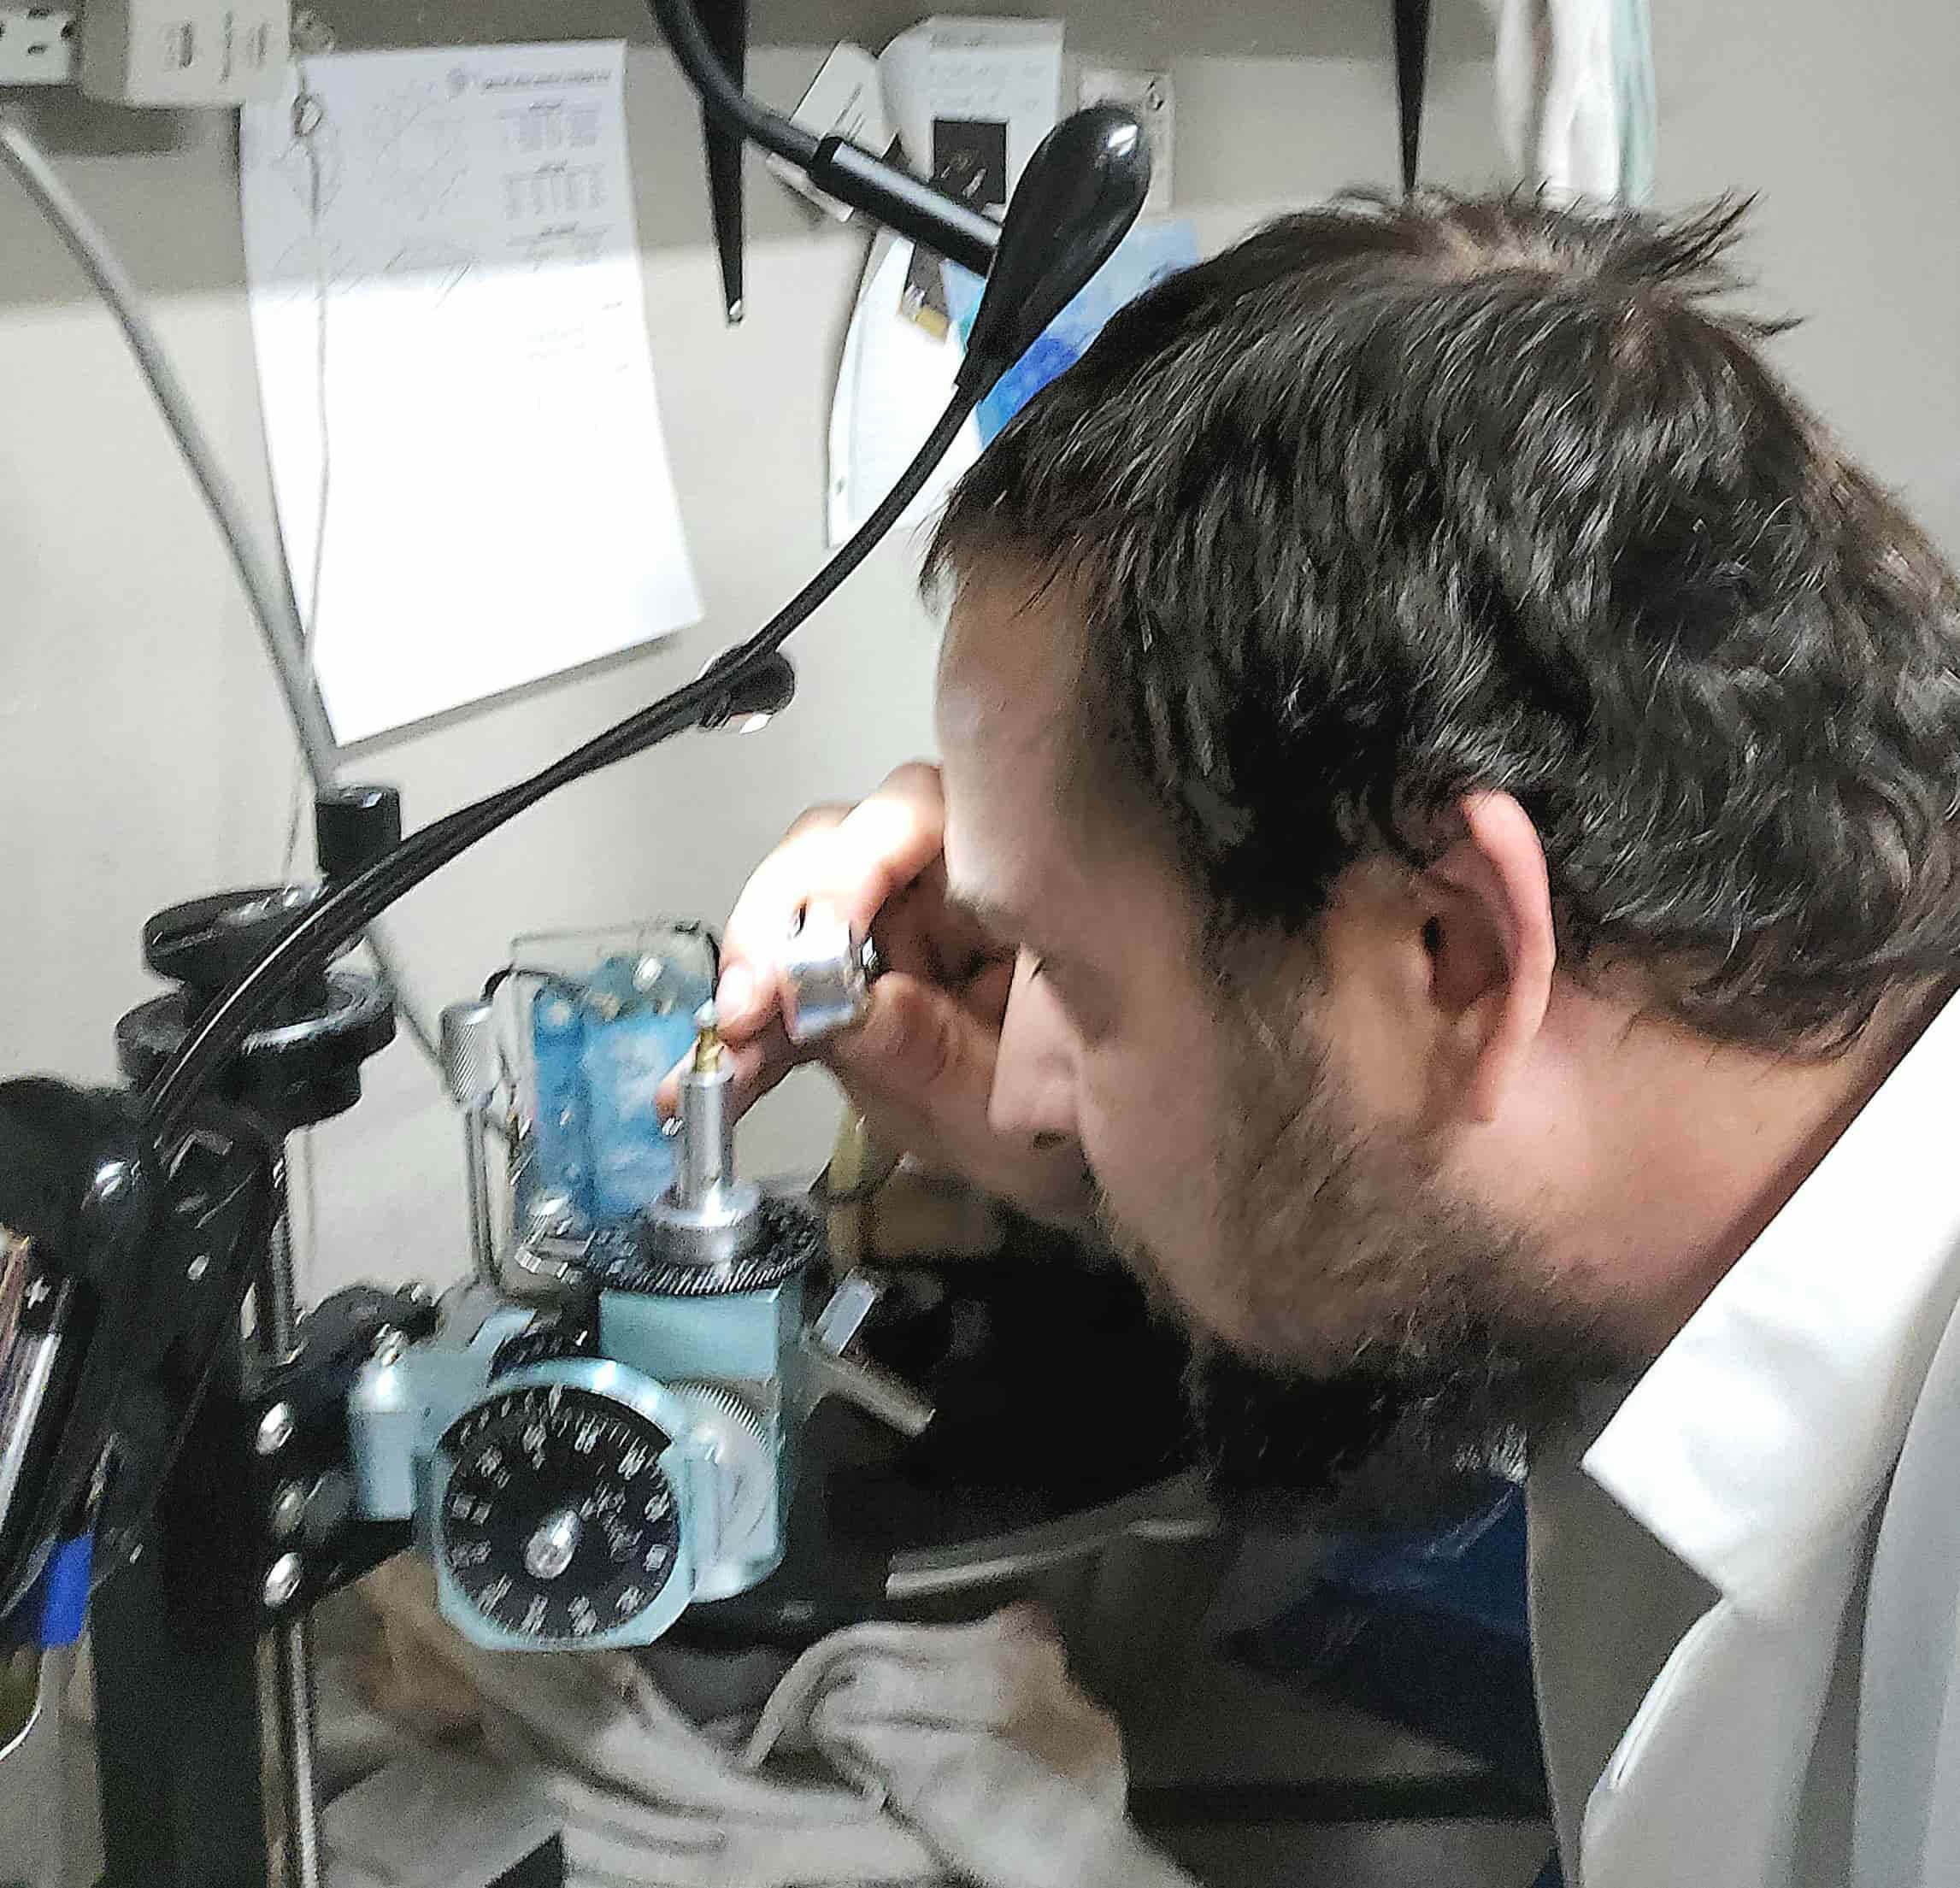
The critical eye. Precision cutting relies heavily on continuous quality checks throughout the faceting process. Using a high-magnification jeweler's loupe under direct lighting, the gem cutter closely inspects the alignment of the facets on the machine. This step is essential for verifying that every facet meet-point is perfectly true and that the surface polish is completely flawless before proceeding to the next tier of cuts.
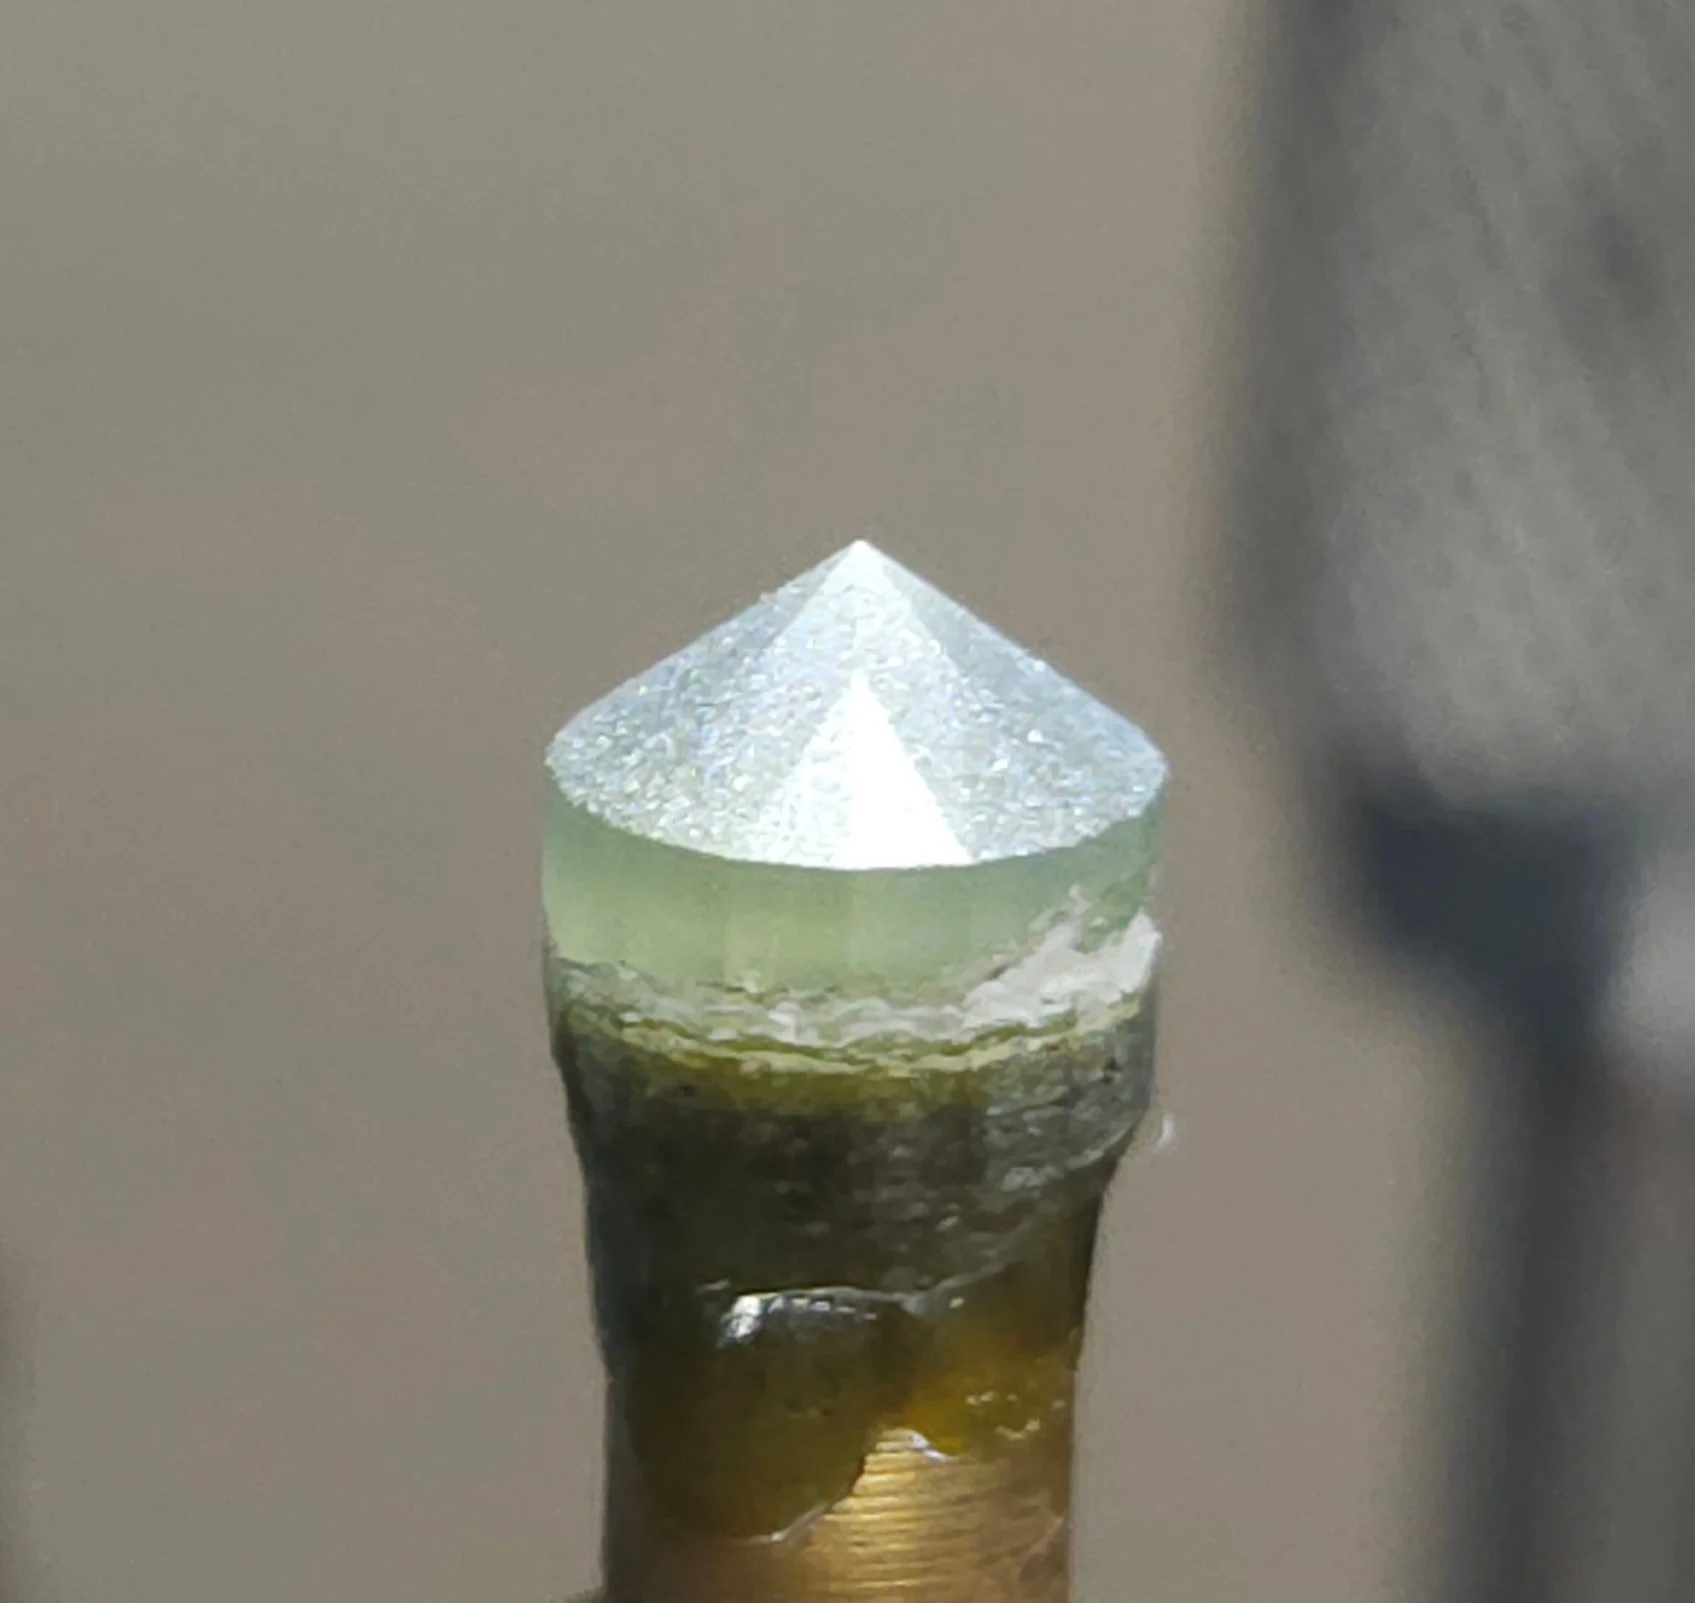
Establishing the geometry. This macro view reveals the rough-cut pavilion facets freshly ground with a 250-grit diamond lap. At this initial stage, the focus is entirely on establishing the stone's primary geometry and establishing clean meet-points. The frosted texture left by the coarse grit will be systematically refined and smoothed out during the subsequent pre-polishing and final polishing phases.
The reflection takes shape. With the pavilion facets fully refined and polished, the stone's internal optics begin to come alive. This stage of the process highlights the mirror-finish surface quality necessary to bounce light efficiently back through the sapphire. Witnessing the transformation from a frosted, rough geometry to this high-luster polish is where the true brilliance of the gem is established.
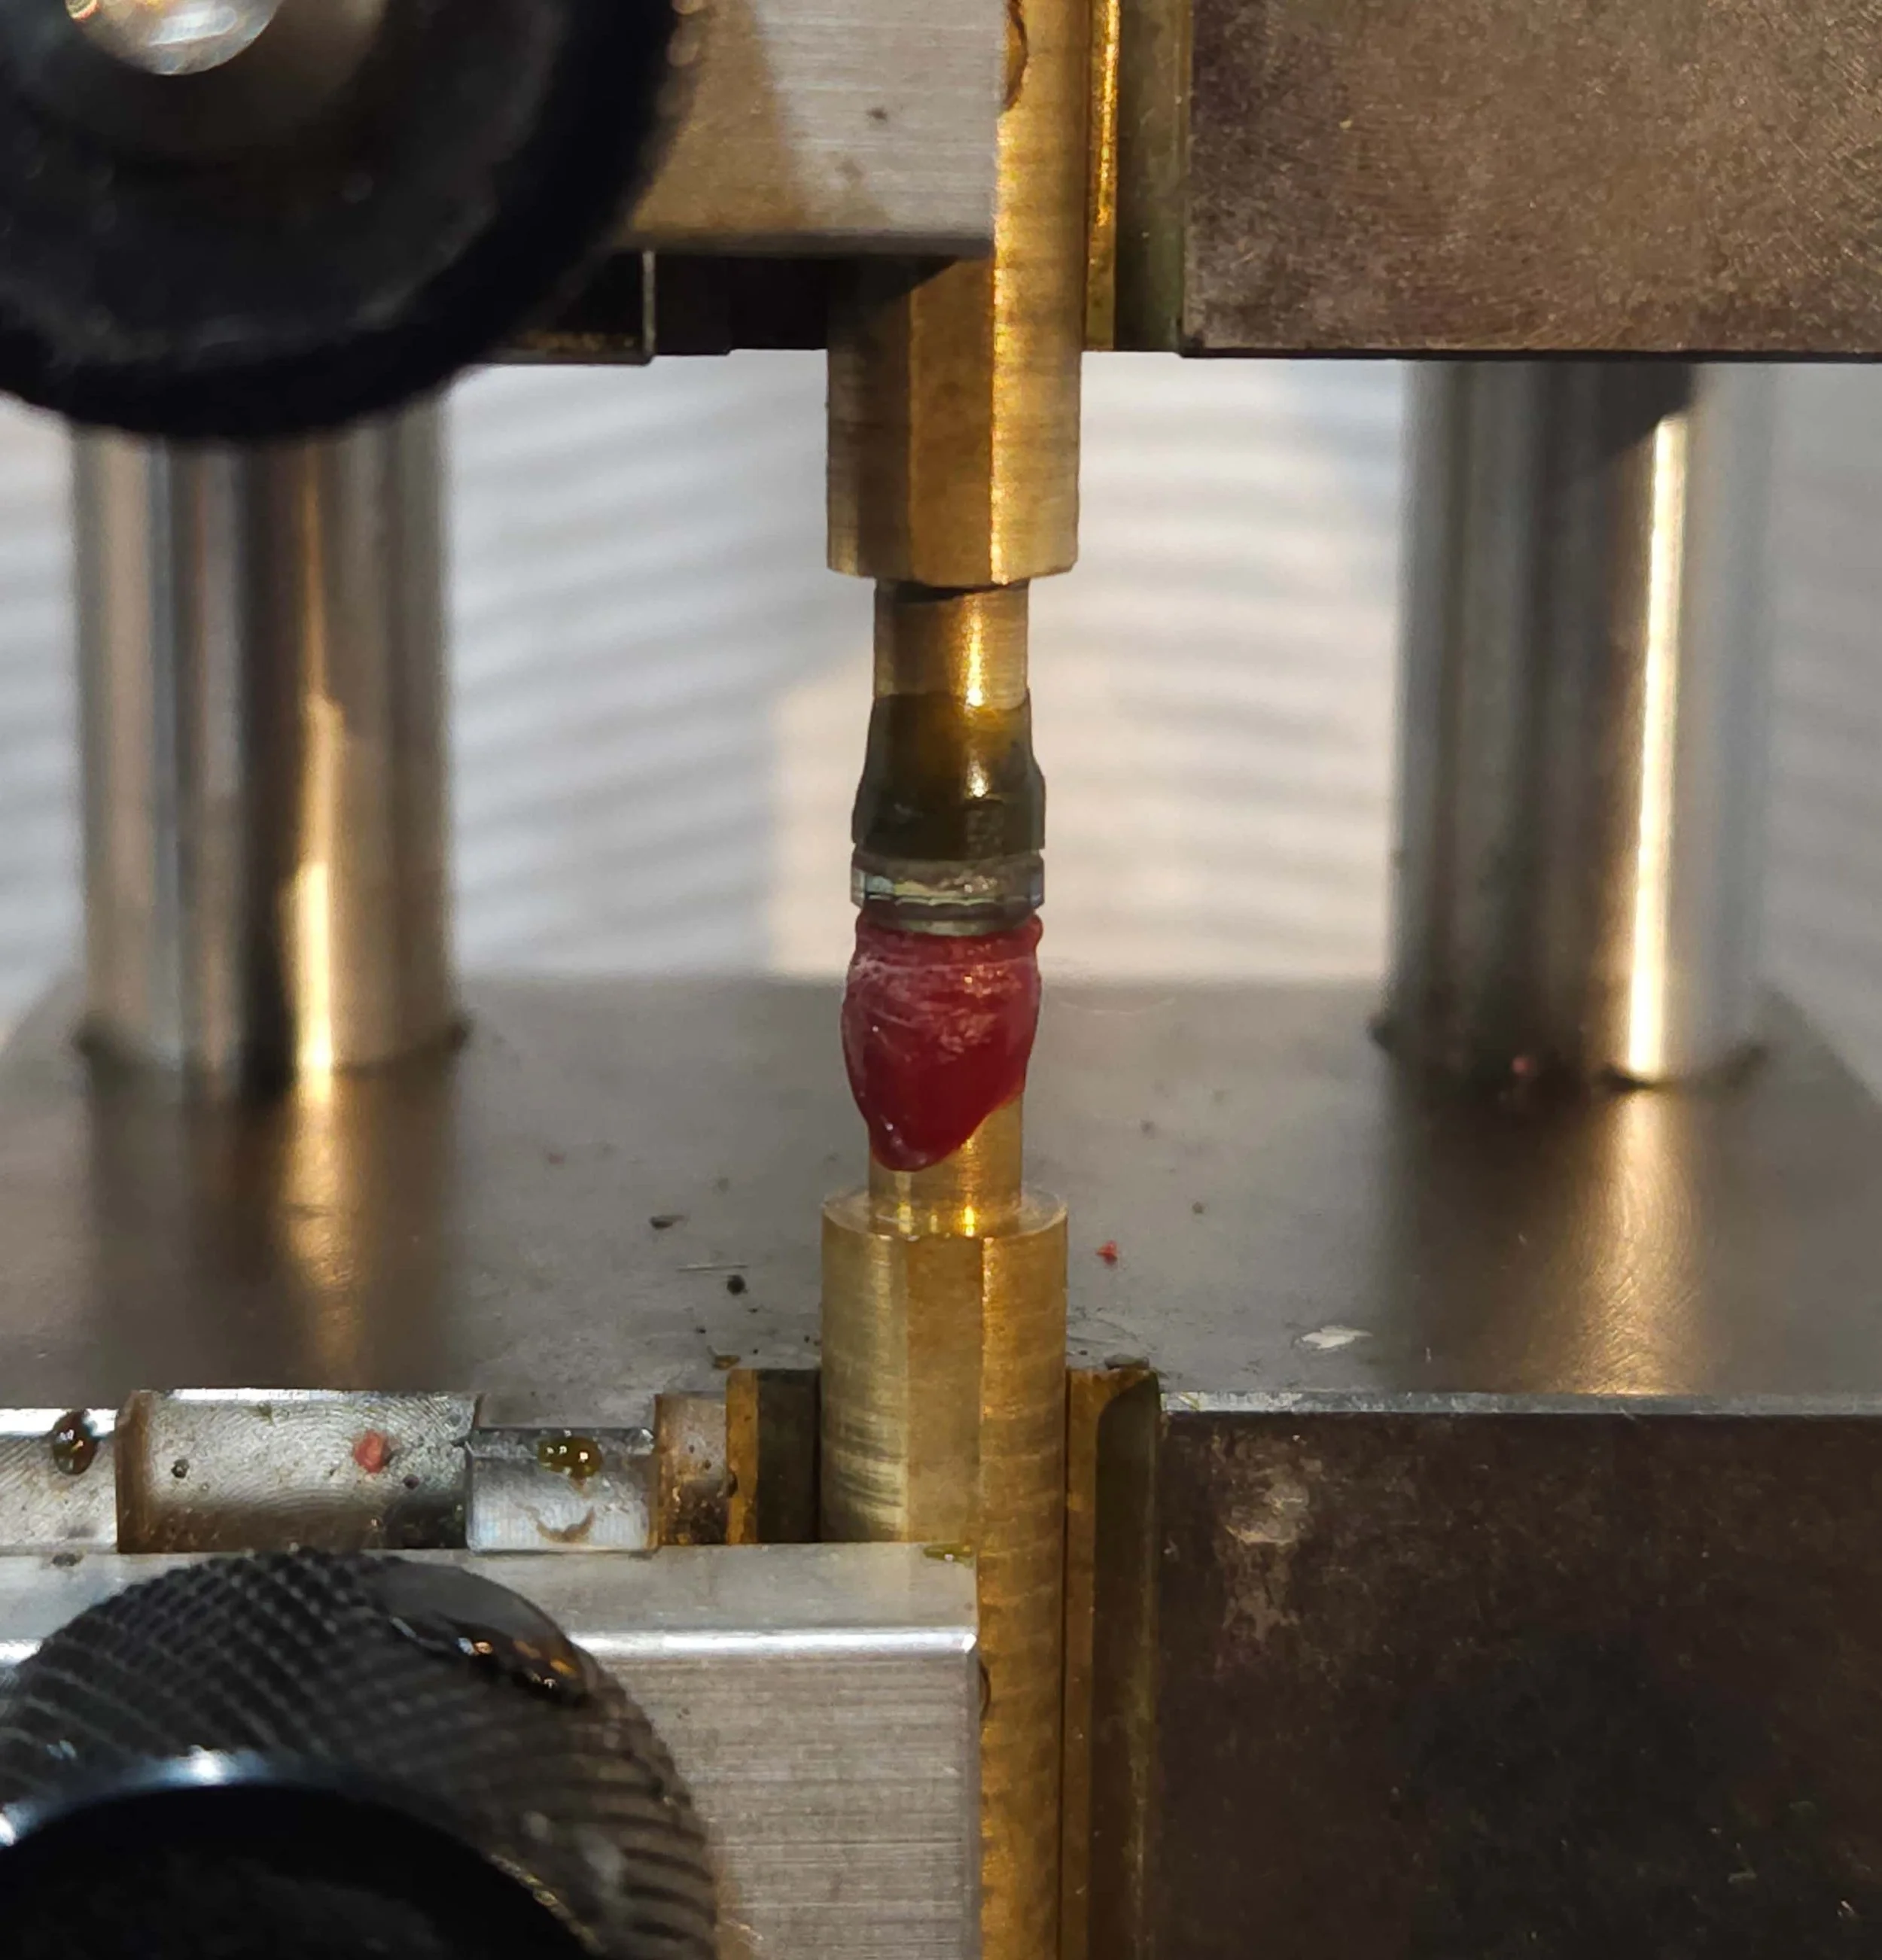
The transfer process. With the pavilion facets completely cut and polished, the stone must be transferred to a new dop stick to allow access to the top portion (the crown). Utilizing a specialized mechanical transfer jig ensures that the new dop block aligns perfectly with the exact central axis of the stone. Once the new adhesive bond cures on the opposite side, the original dop can be safely removed, maintaining absolute geometric symmetry for the final stages of faceting.
Unlocking the crown's brilliance. With the crown facets fully cut and polished to a flawless mirror finish, the sapphire's true color and light return begin to take center stage. The stone remains securely mounted to the dop stick for one final, critical step: polishing the main table facet to perfectly connect the entire optical design.
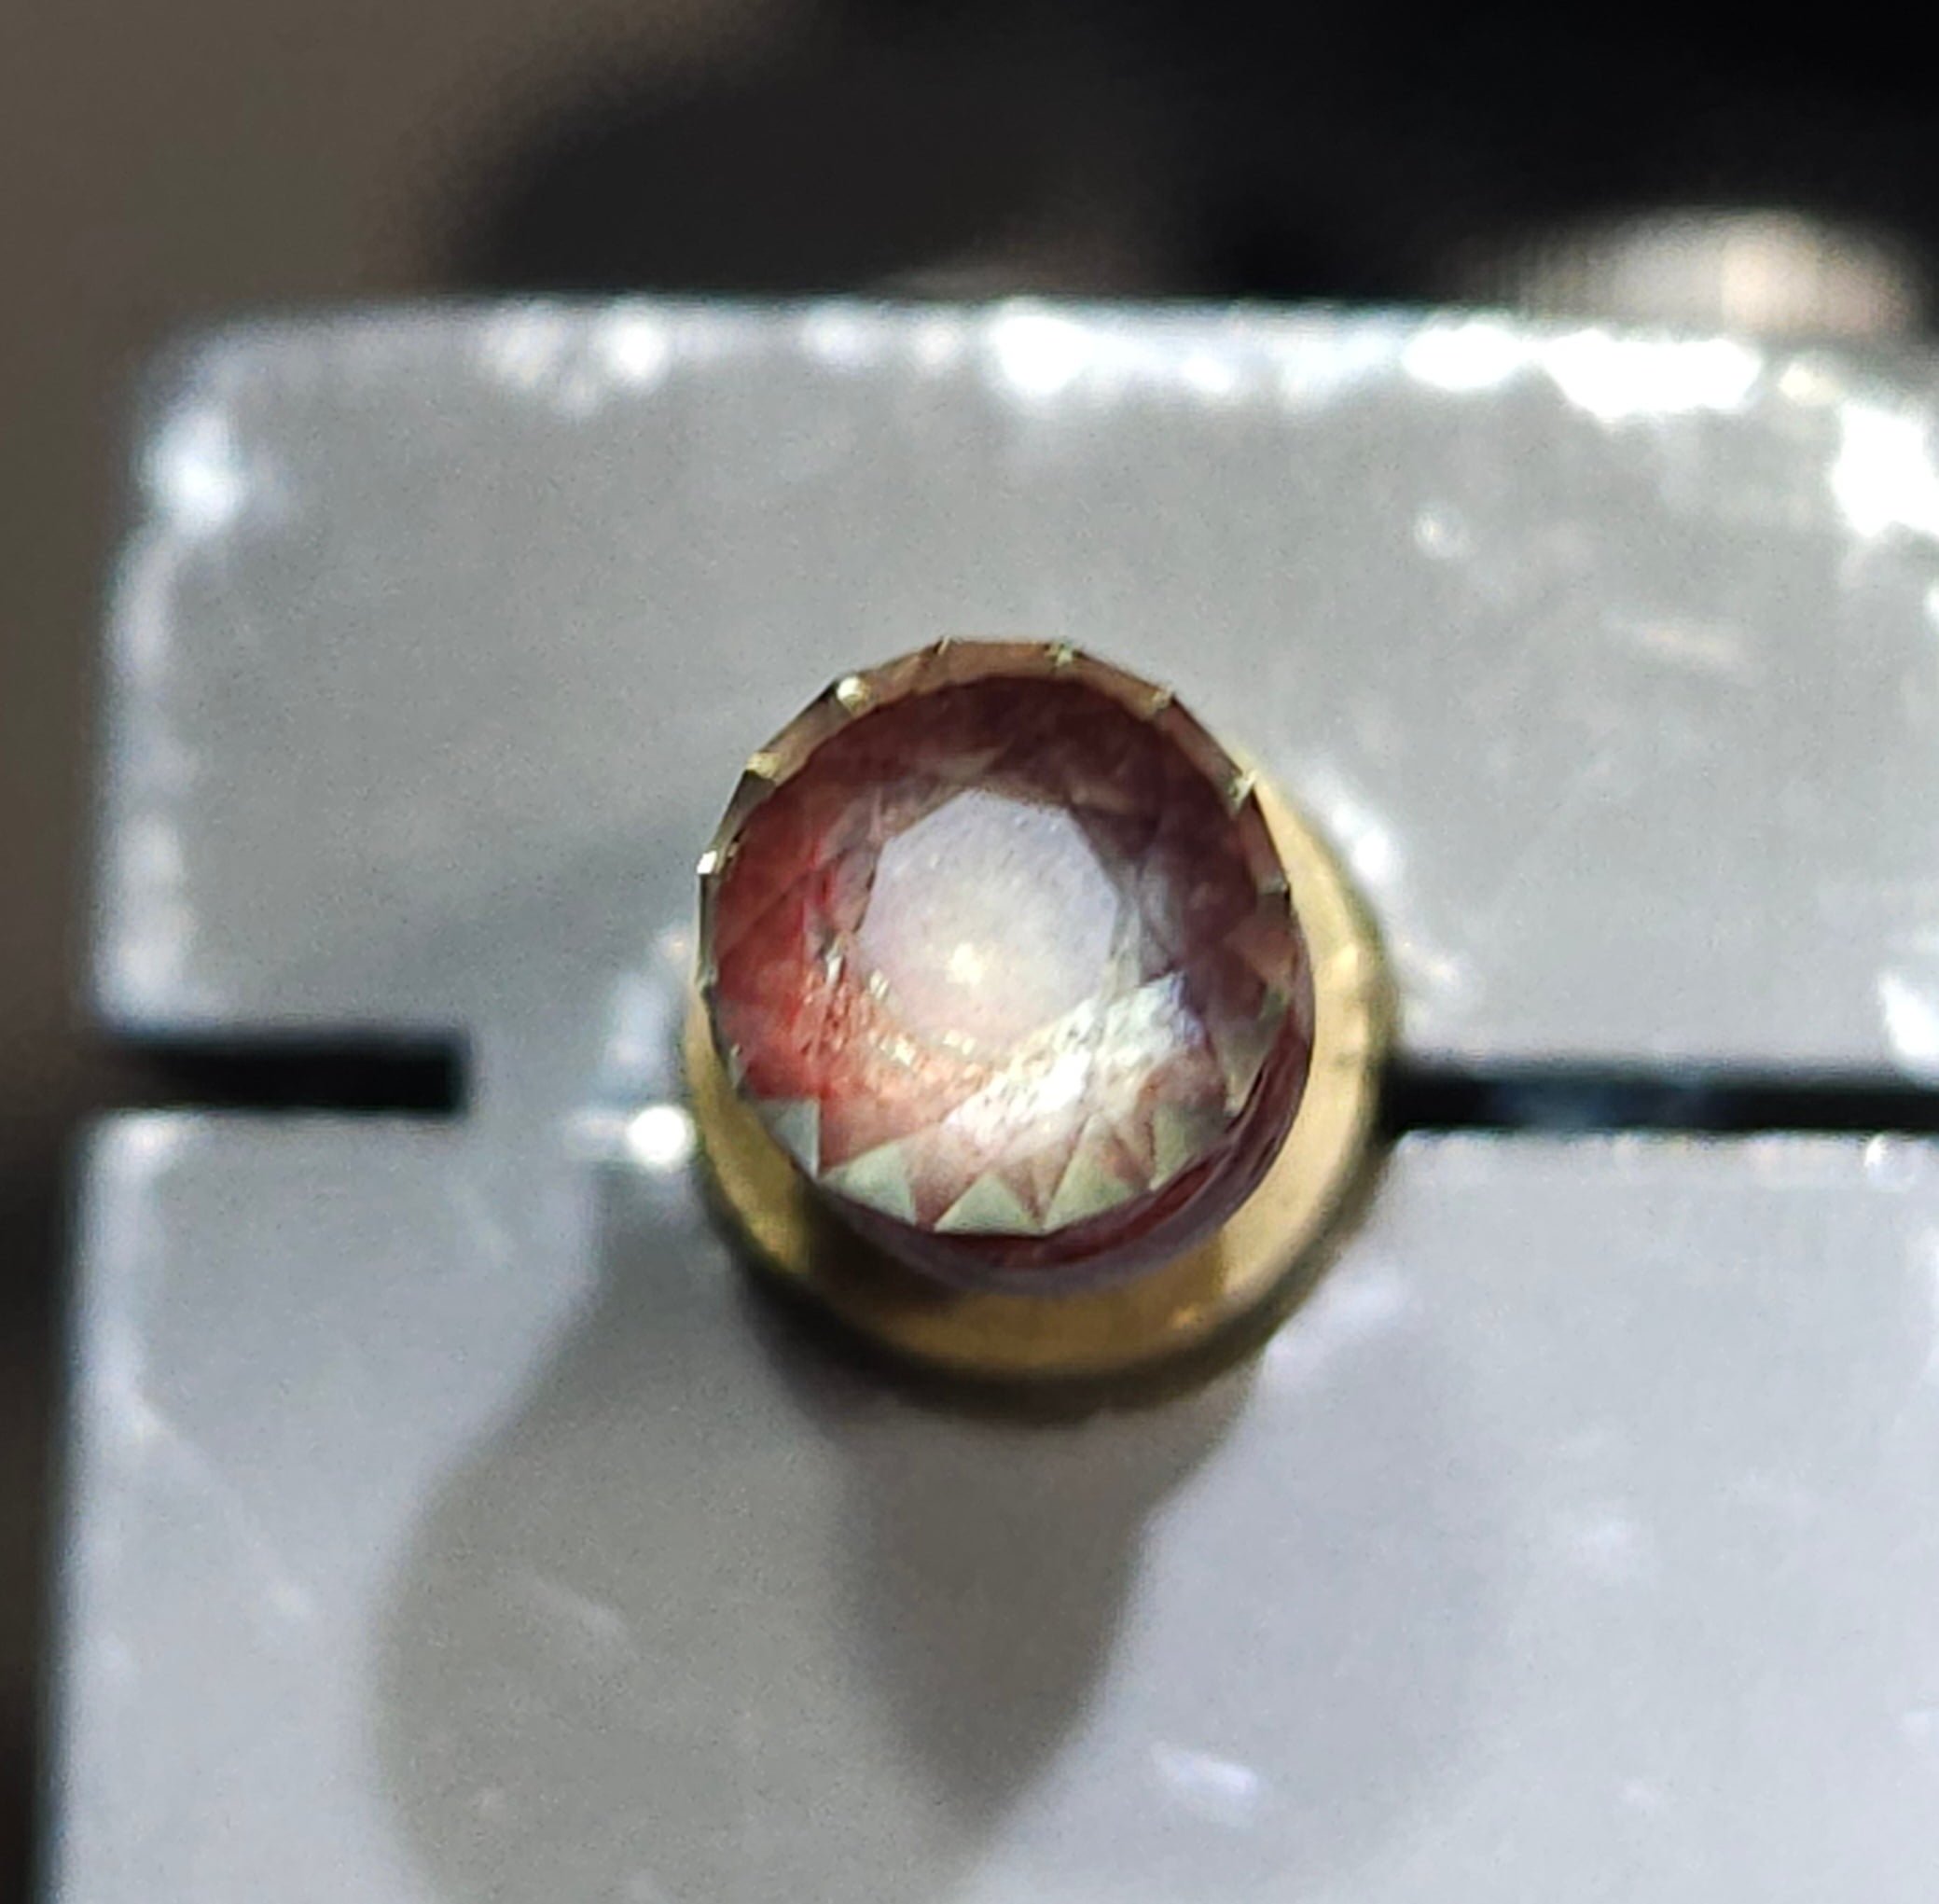
Cutting and polishing the table on a sapphire. Because sapphire is a dense, hard material (Mohs 9), achieving a flawless mirror finish on the large surface area of the table requires meticulous speed control and perfect alignment on the lap. Impeccable meet-points and technical symmetry are standard for every custom faceting project.
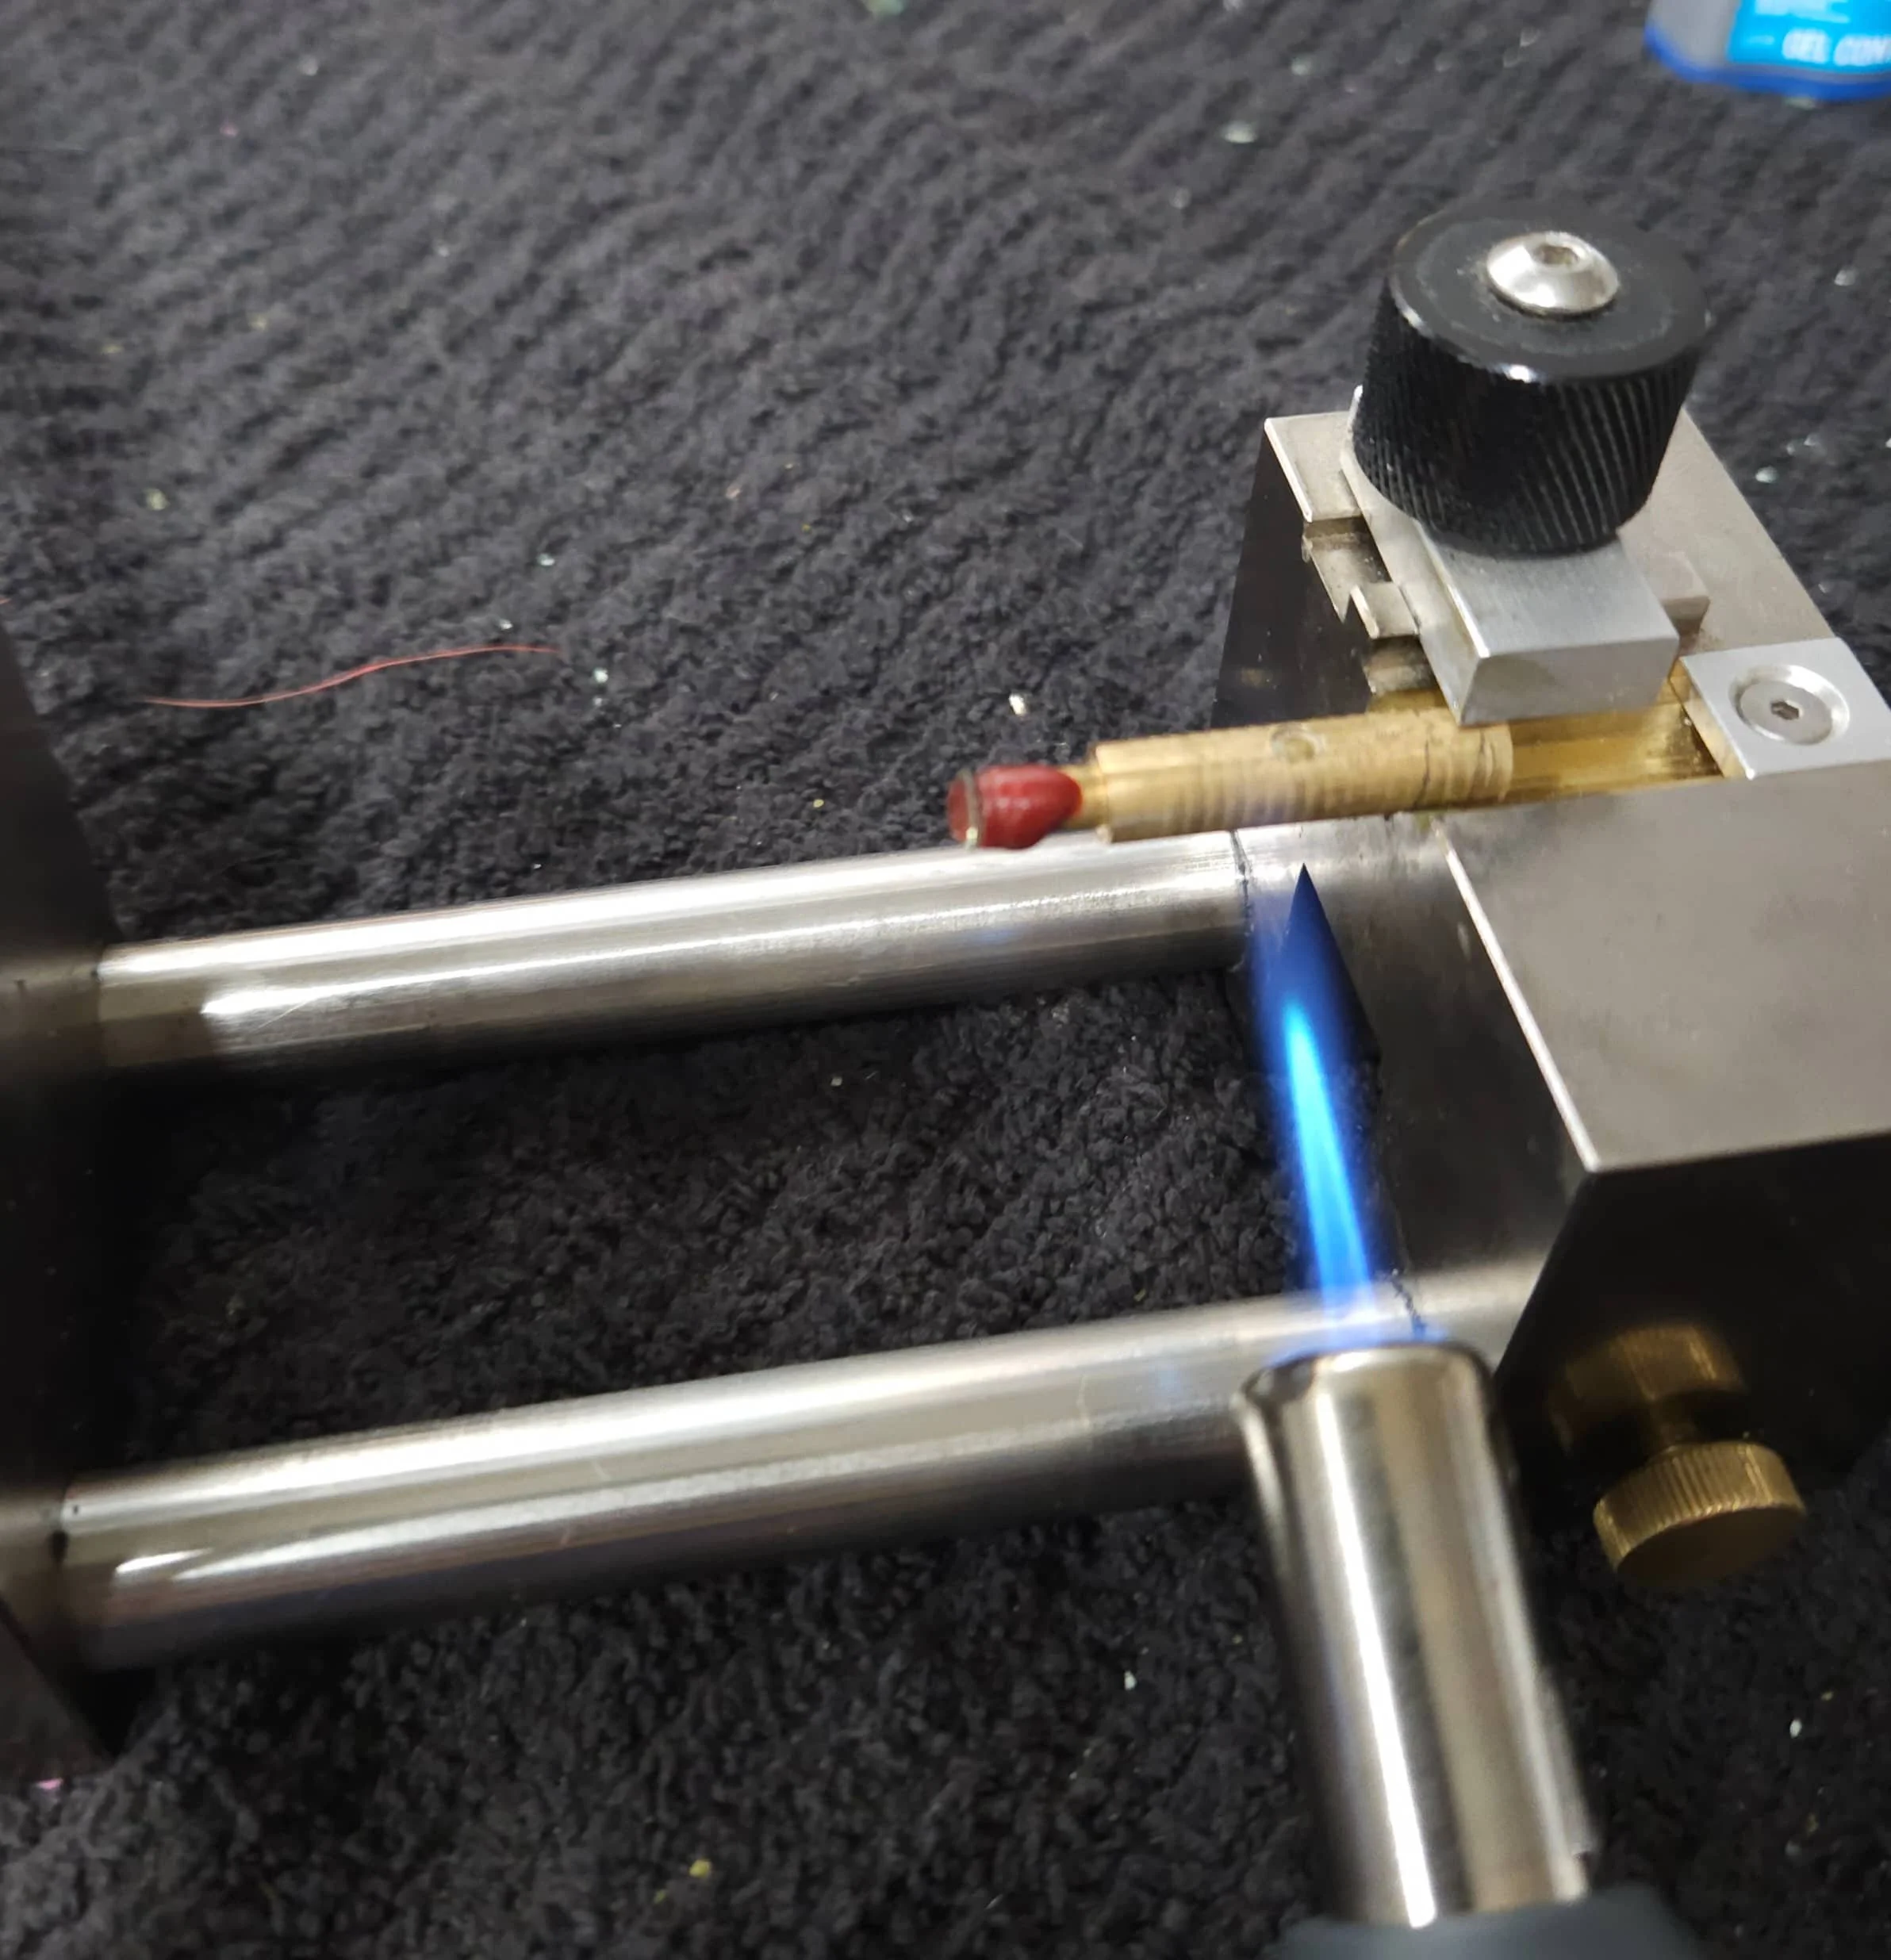
The culmination of the faceting process. Here, gentle, controlled heat is applied to the brass dop stick to soften the dop wax, allowing the finished sapphire to release cleanly. Precision temperature control is crucial during this stage to prevent thermal shock to the newly polished gemstone.
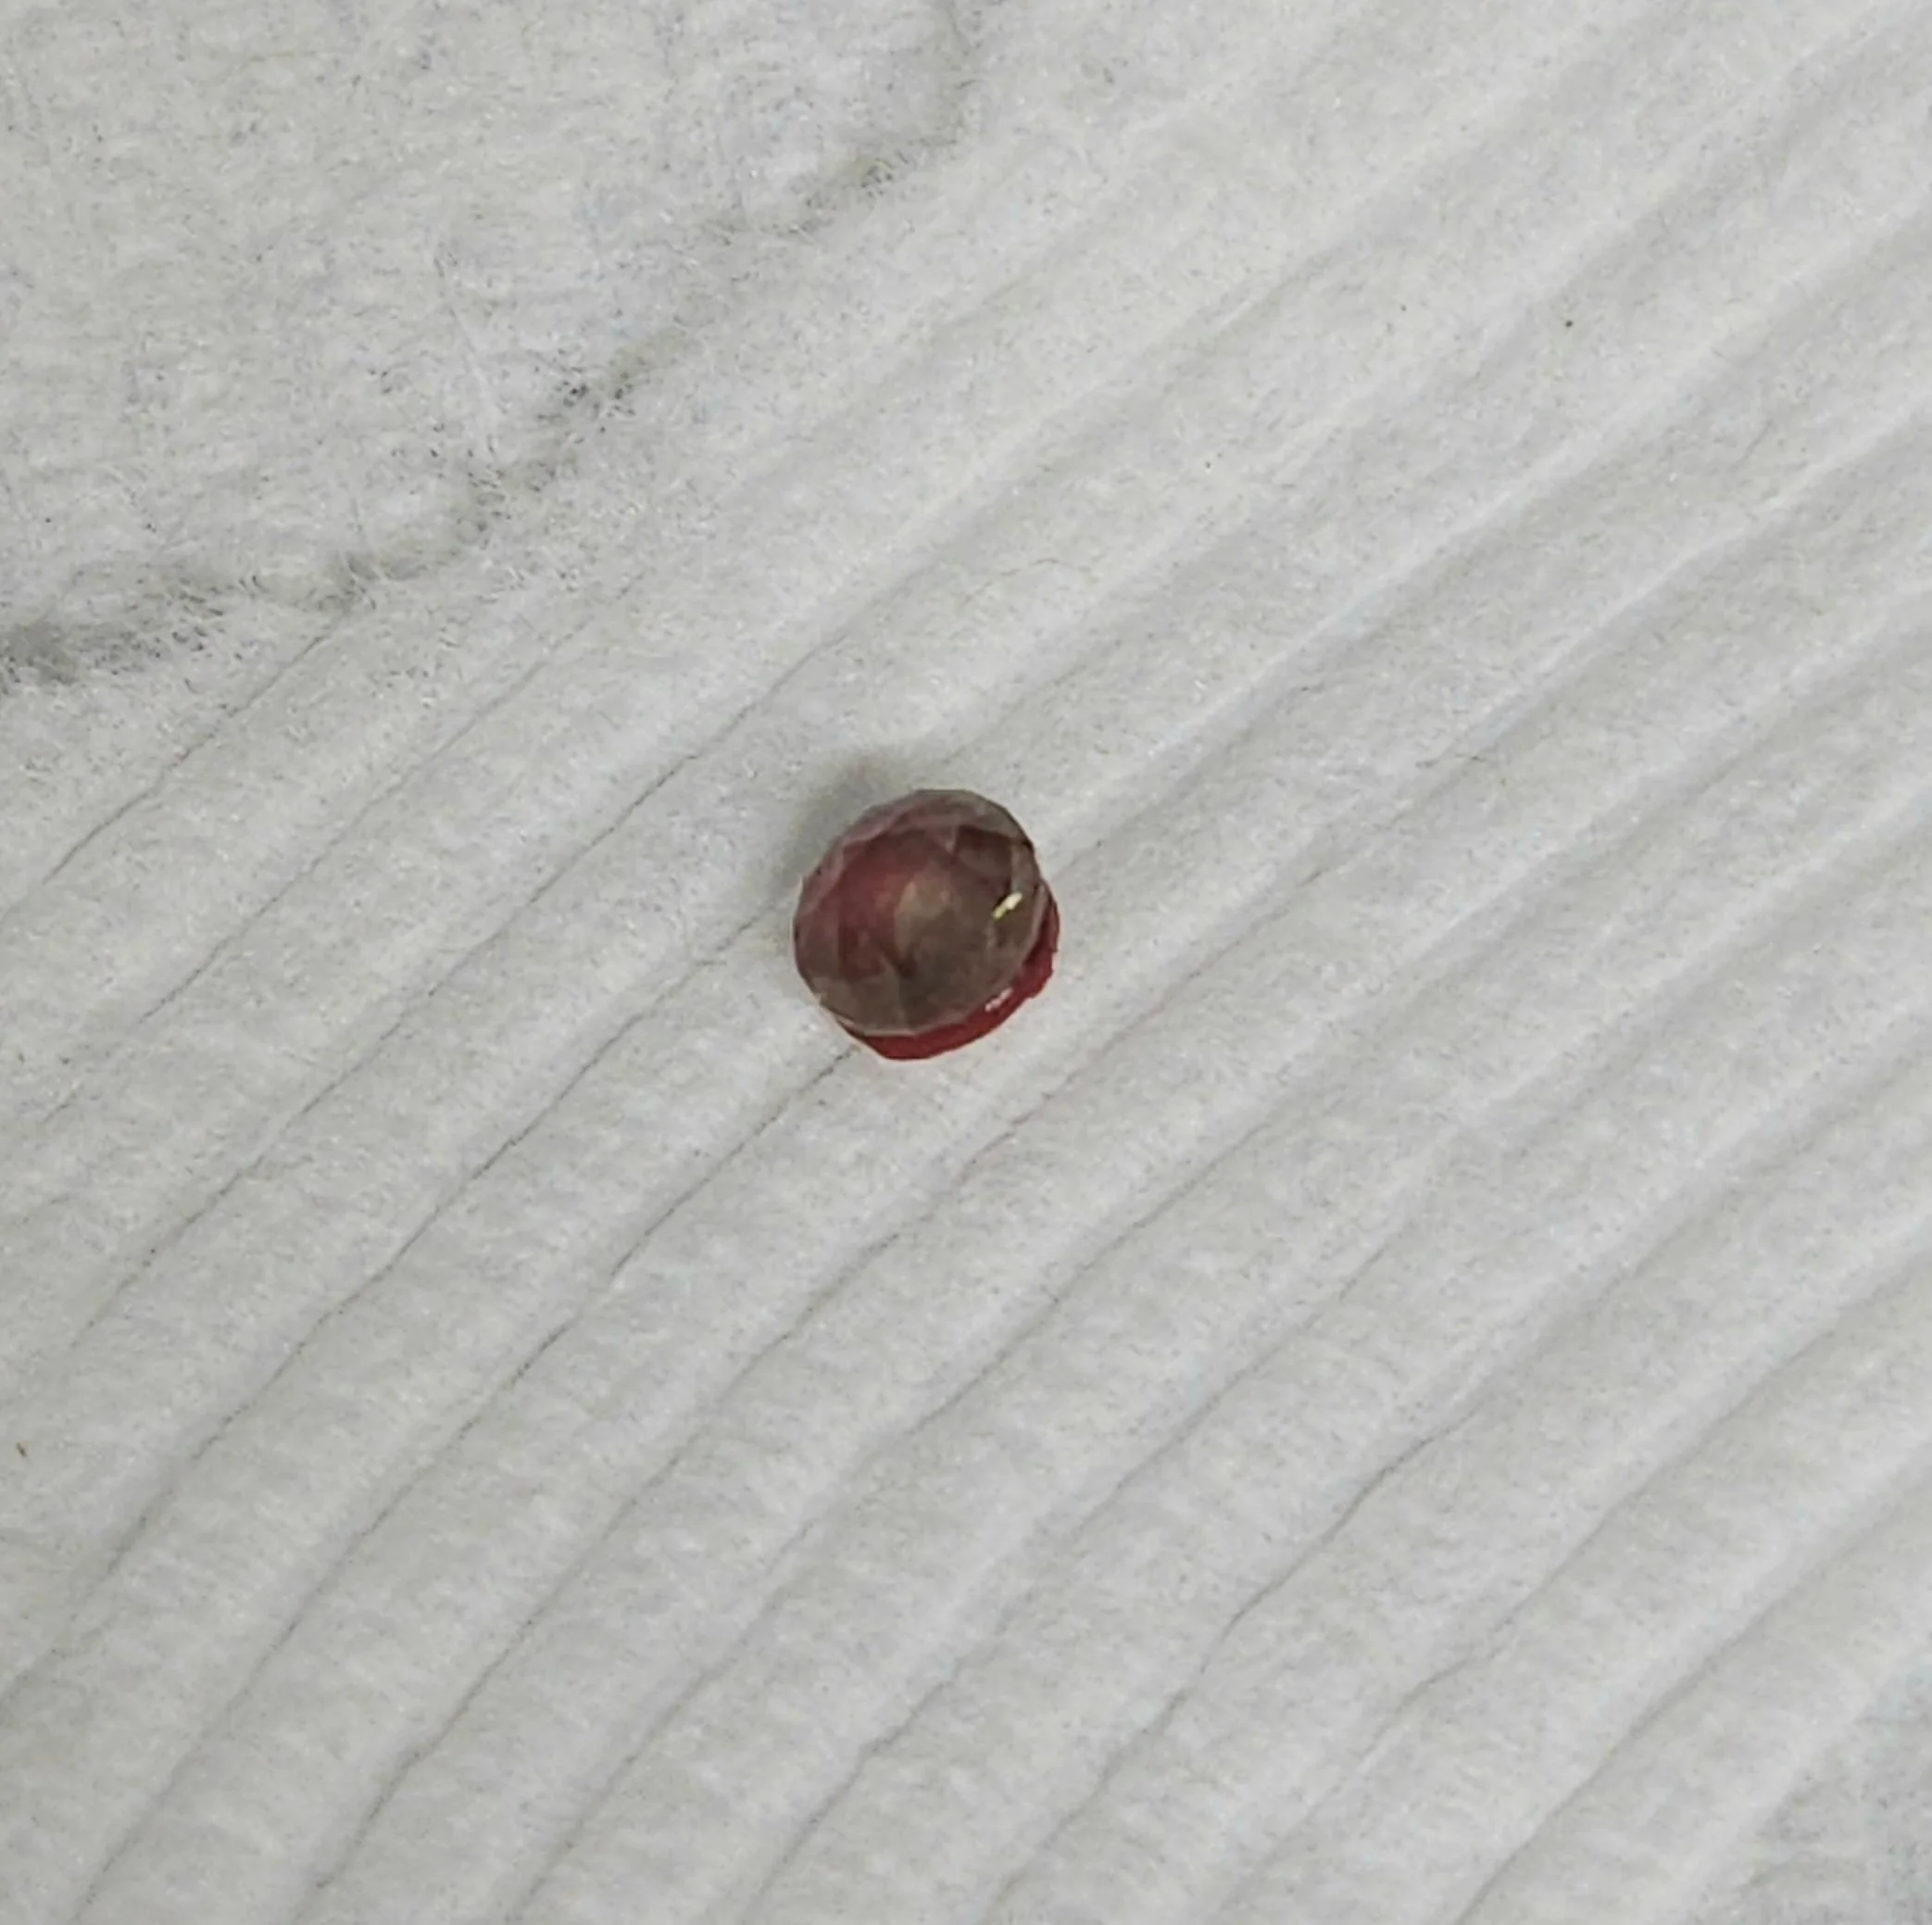
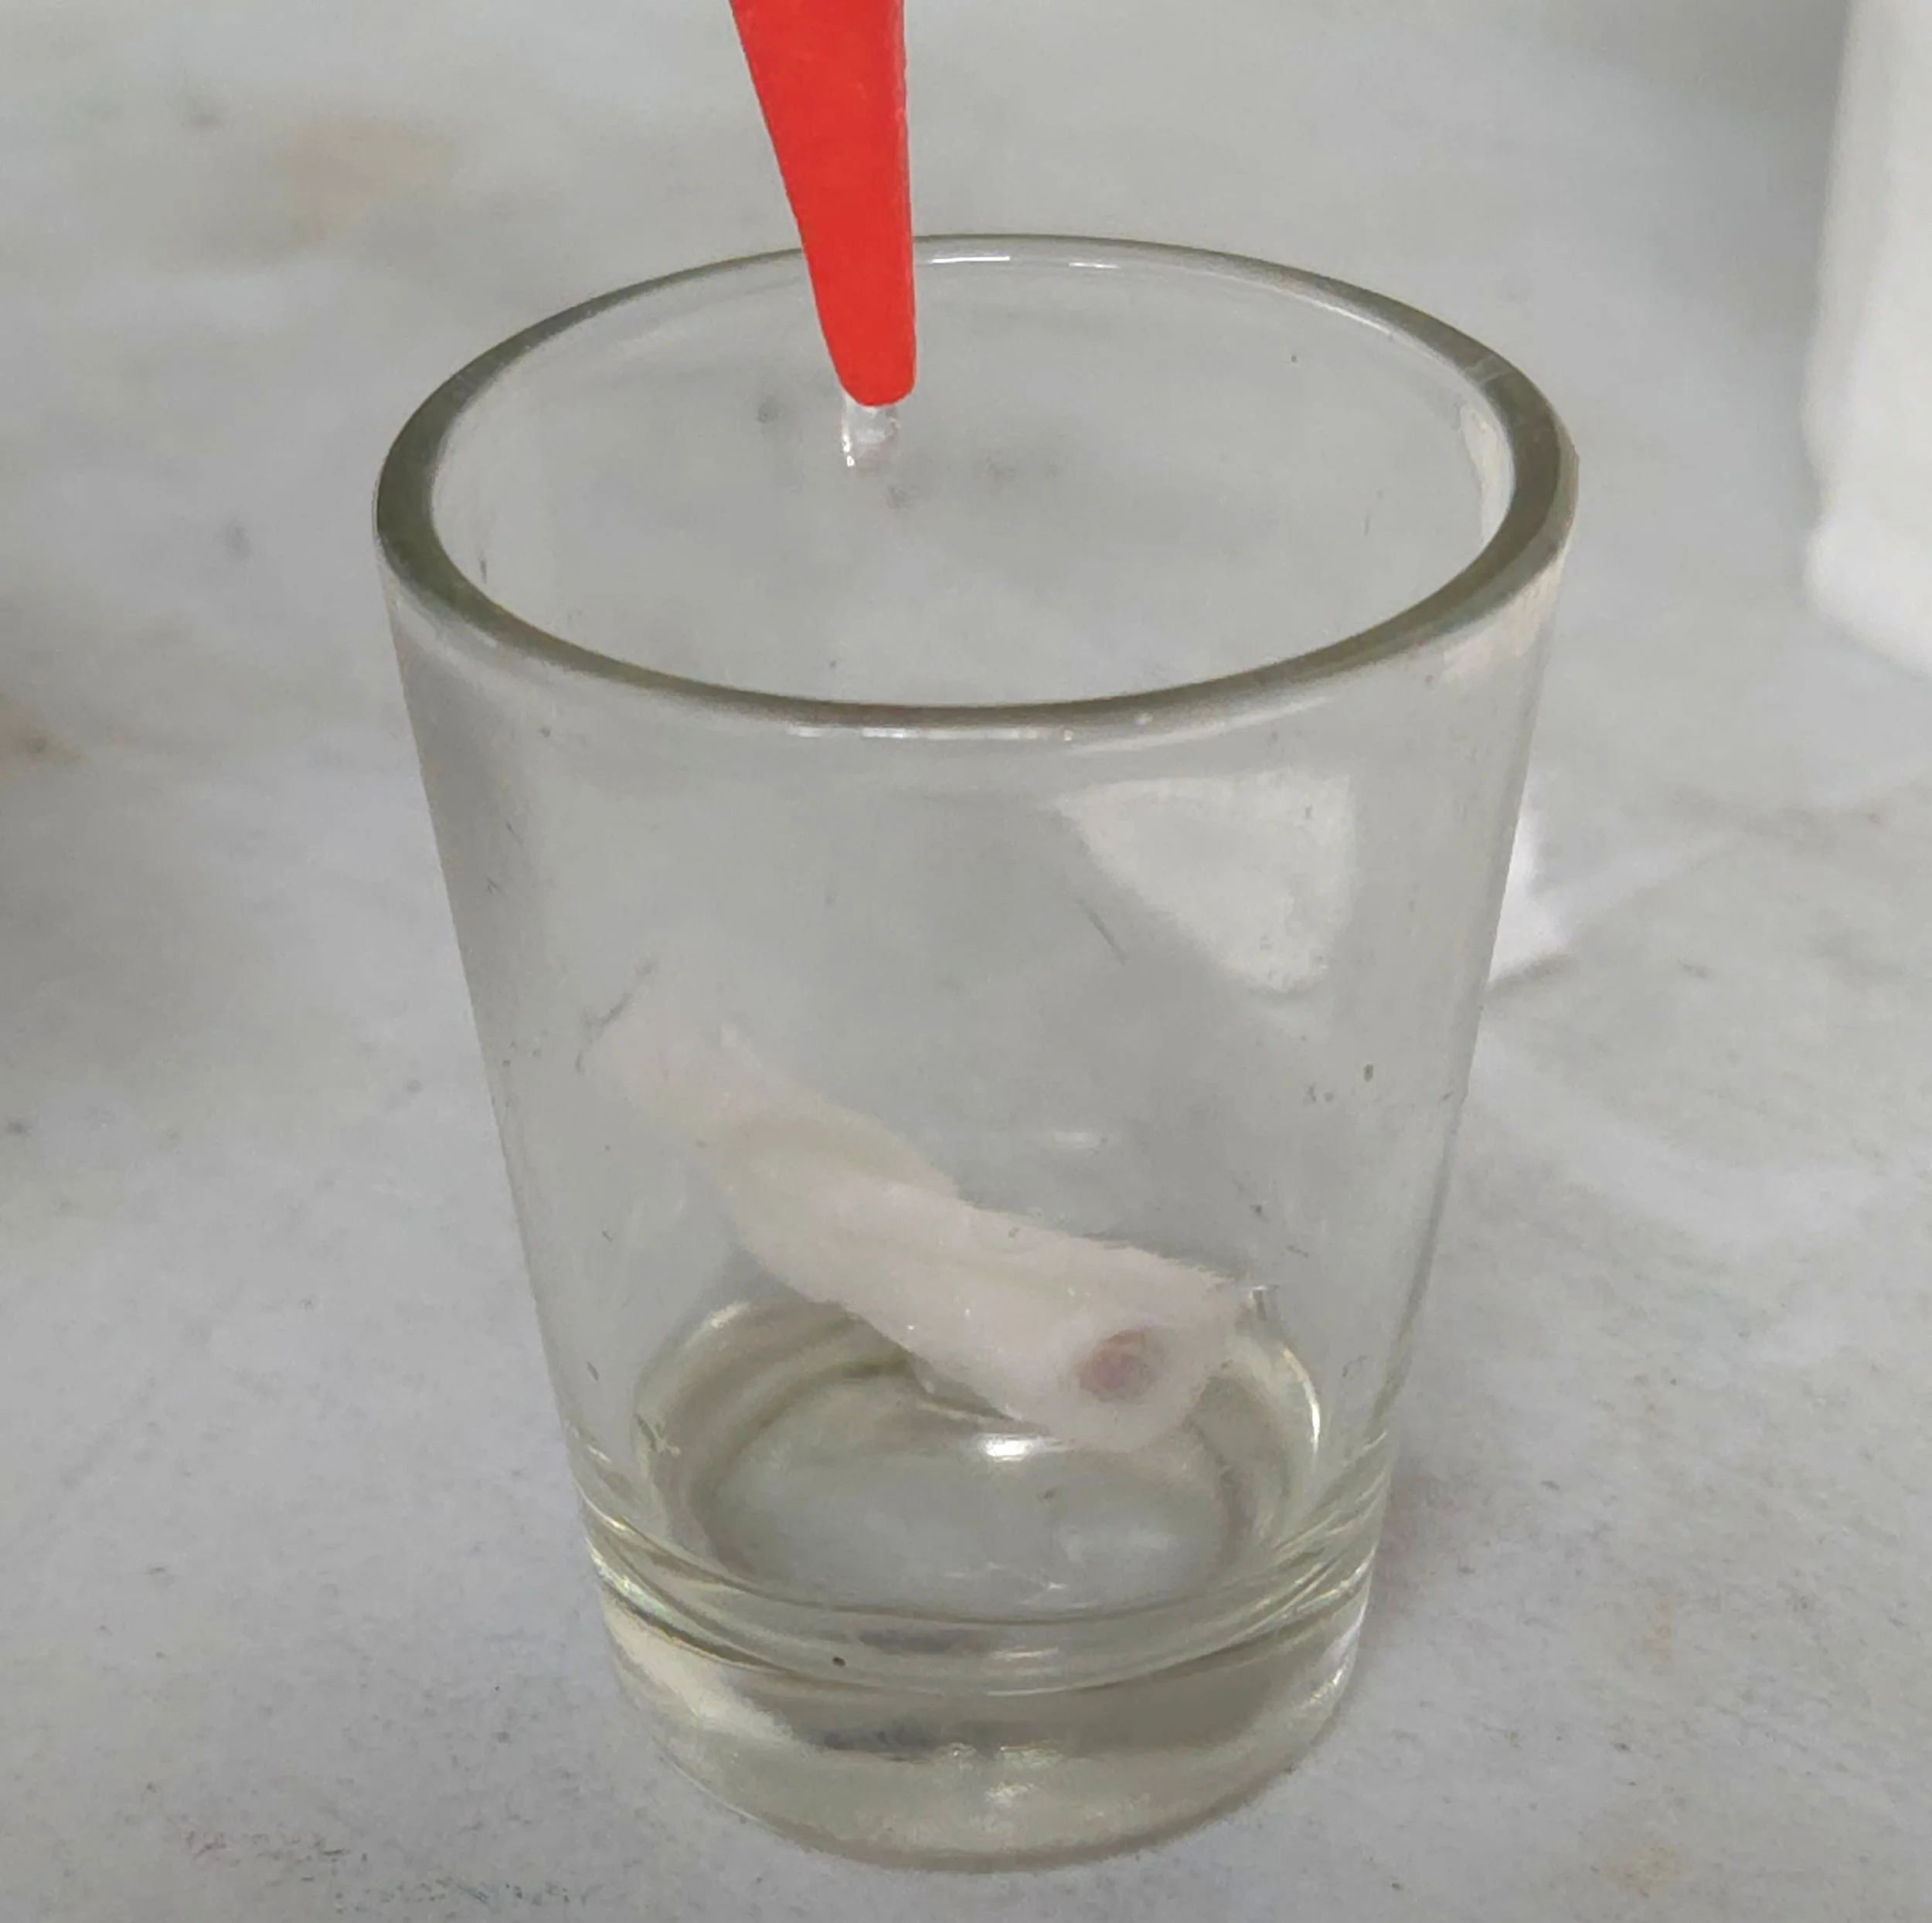
Fresh off the dop stick. Once the sapphire is released, a small amount of residual dop wax remains on the table. To remove this without scratching the pristine new facets, the gemstone is wrapped safely and placed in an alcohol or acetone solvent bath to dissolve the remaining wax completely
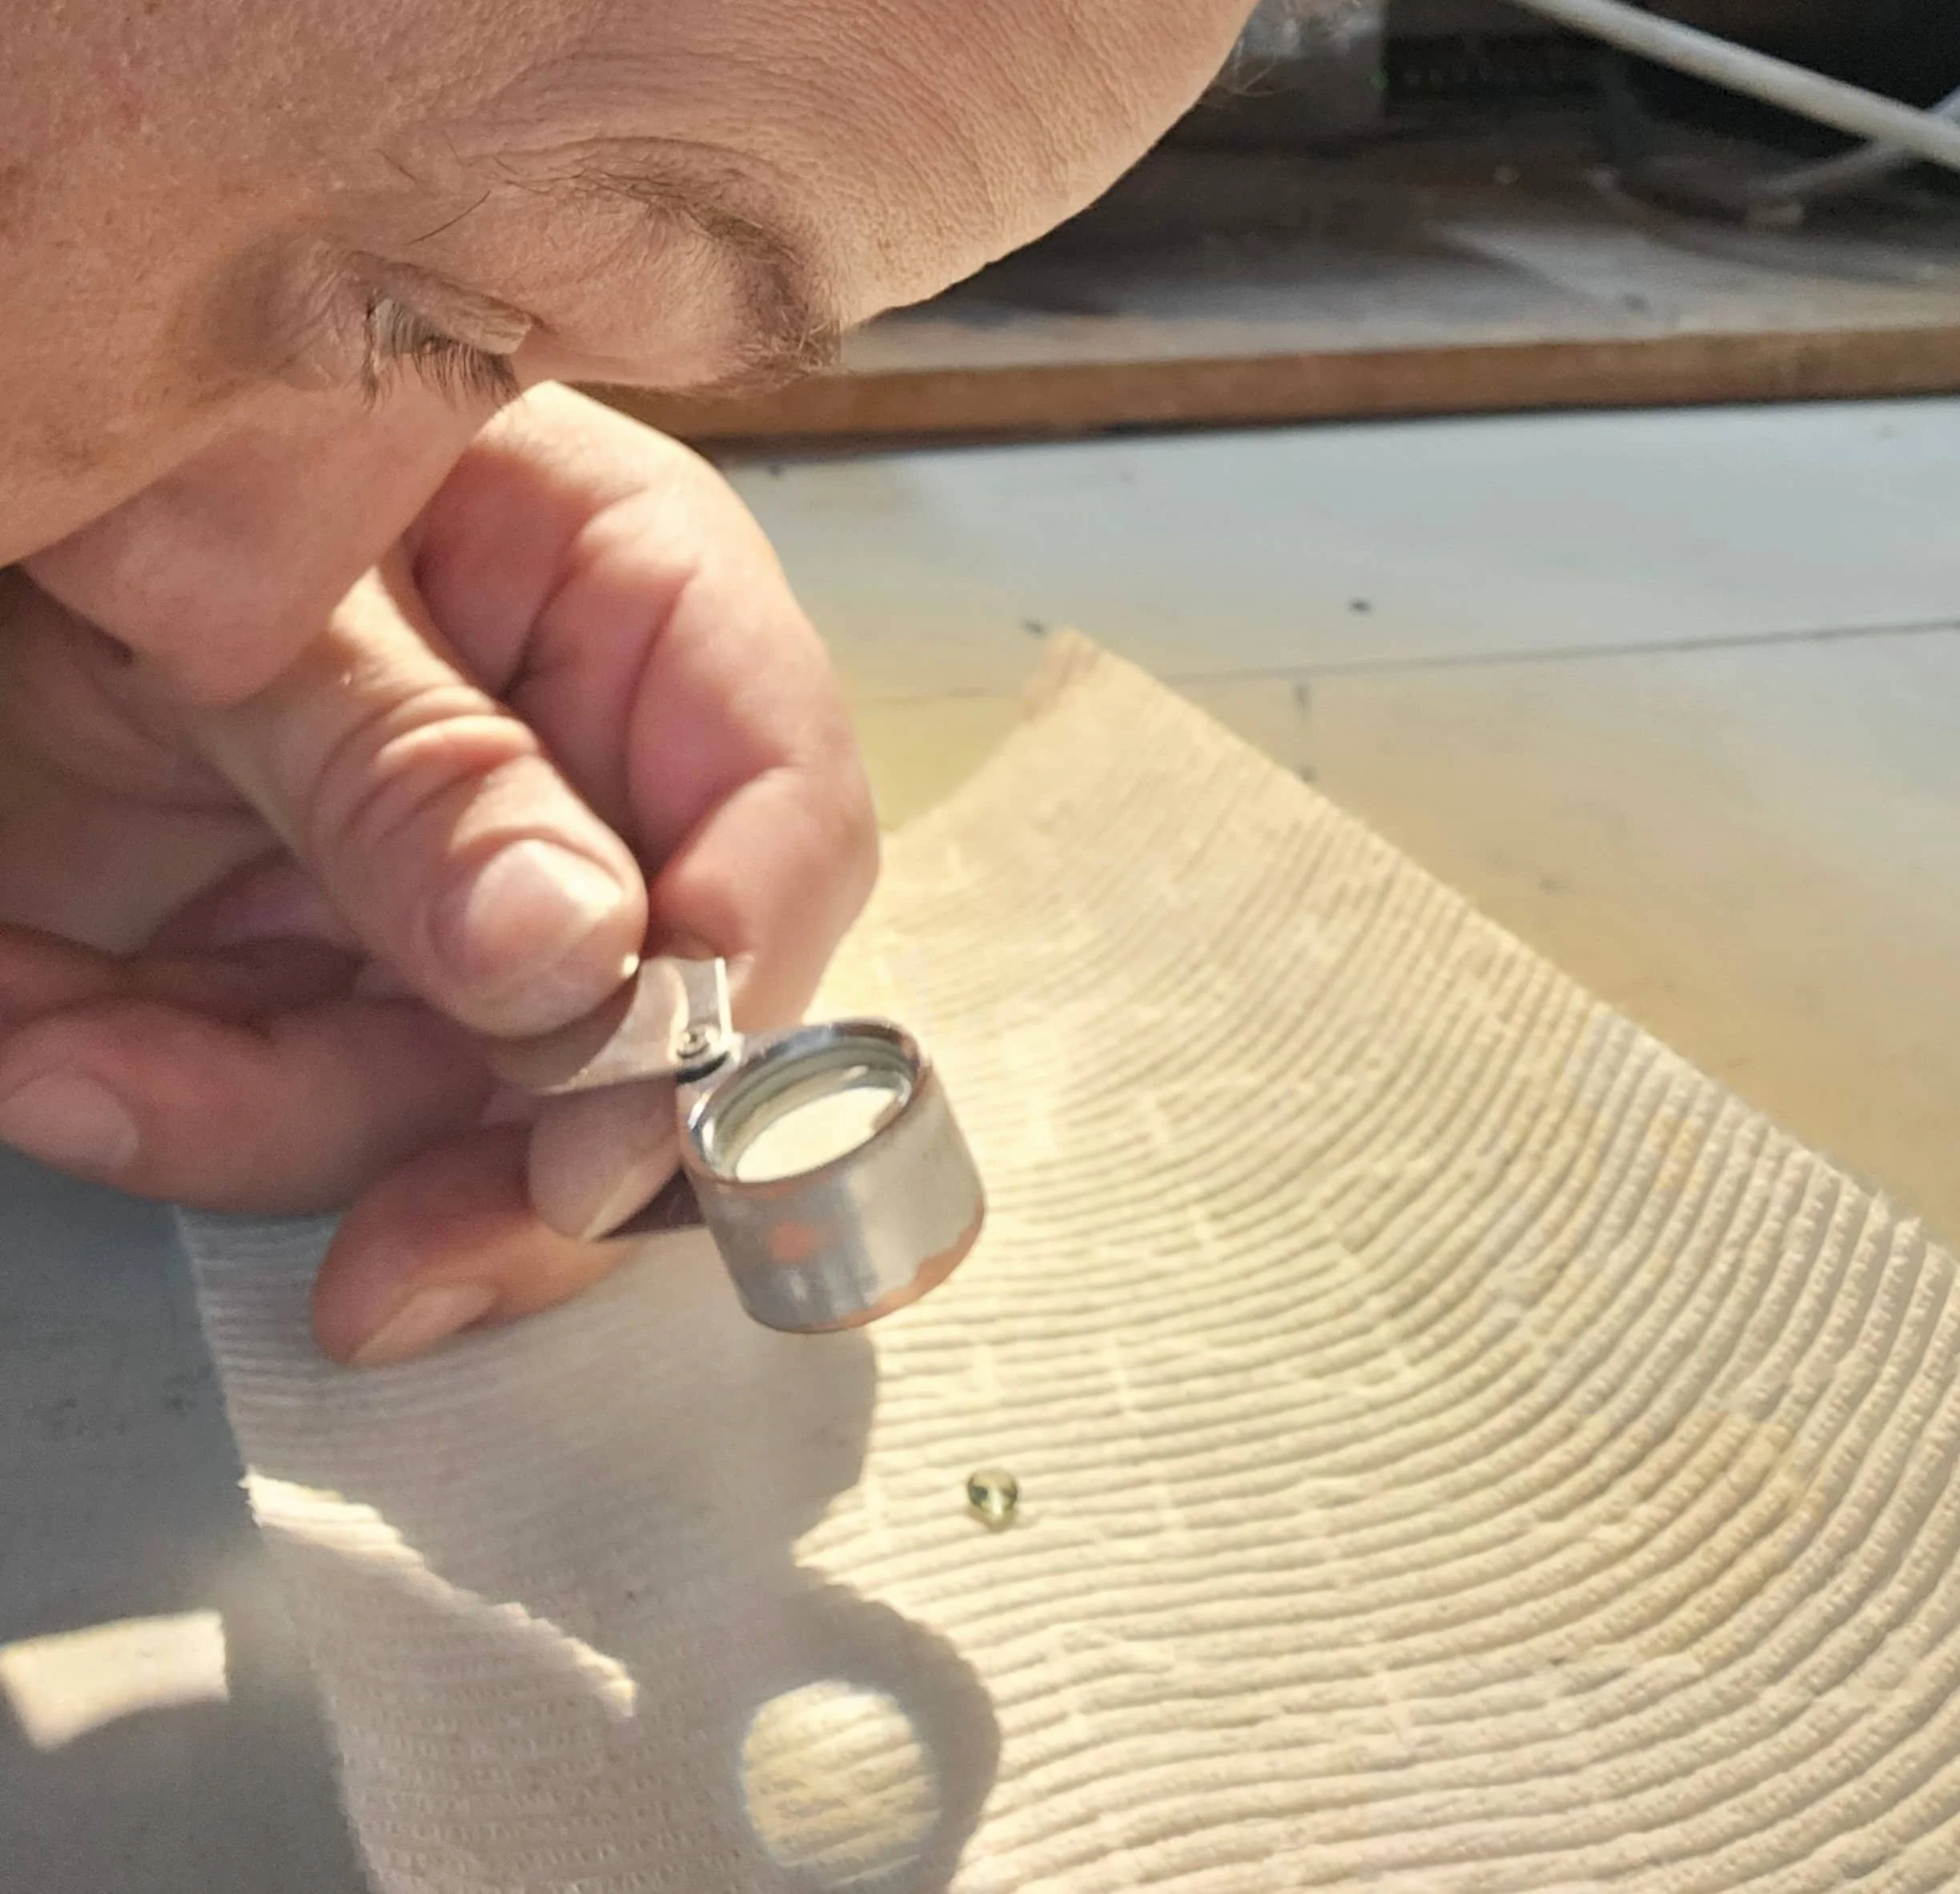
The Final Inspection: Quality Control Under 10x Magnification "Every gemstone that leaves our office undergoes a rigorous final inspection. Using a loupe, we carefully examine the facets to ensure that all traces of transfer adhesives, superglue, or dop wax have been completely cleared from the stone. Only a perfectly clean gem can be accurately assessed for its final clarity, polish quality, and meet-point precision.
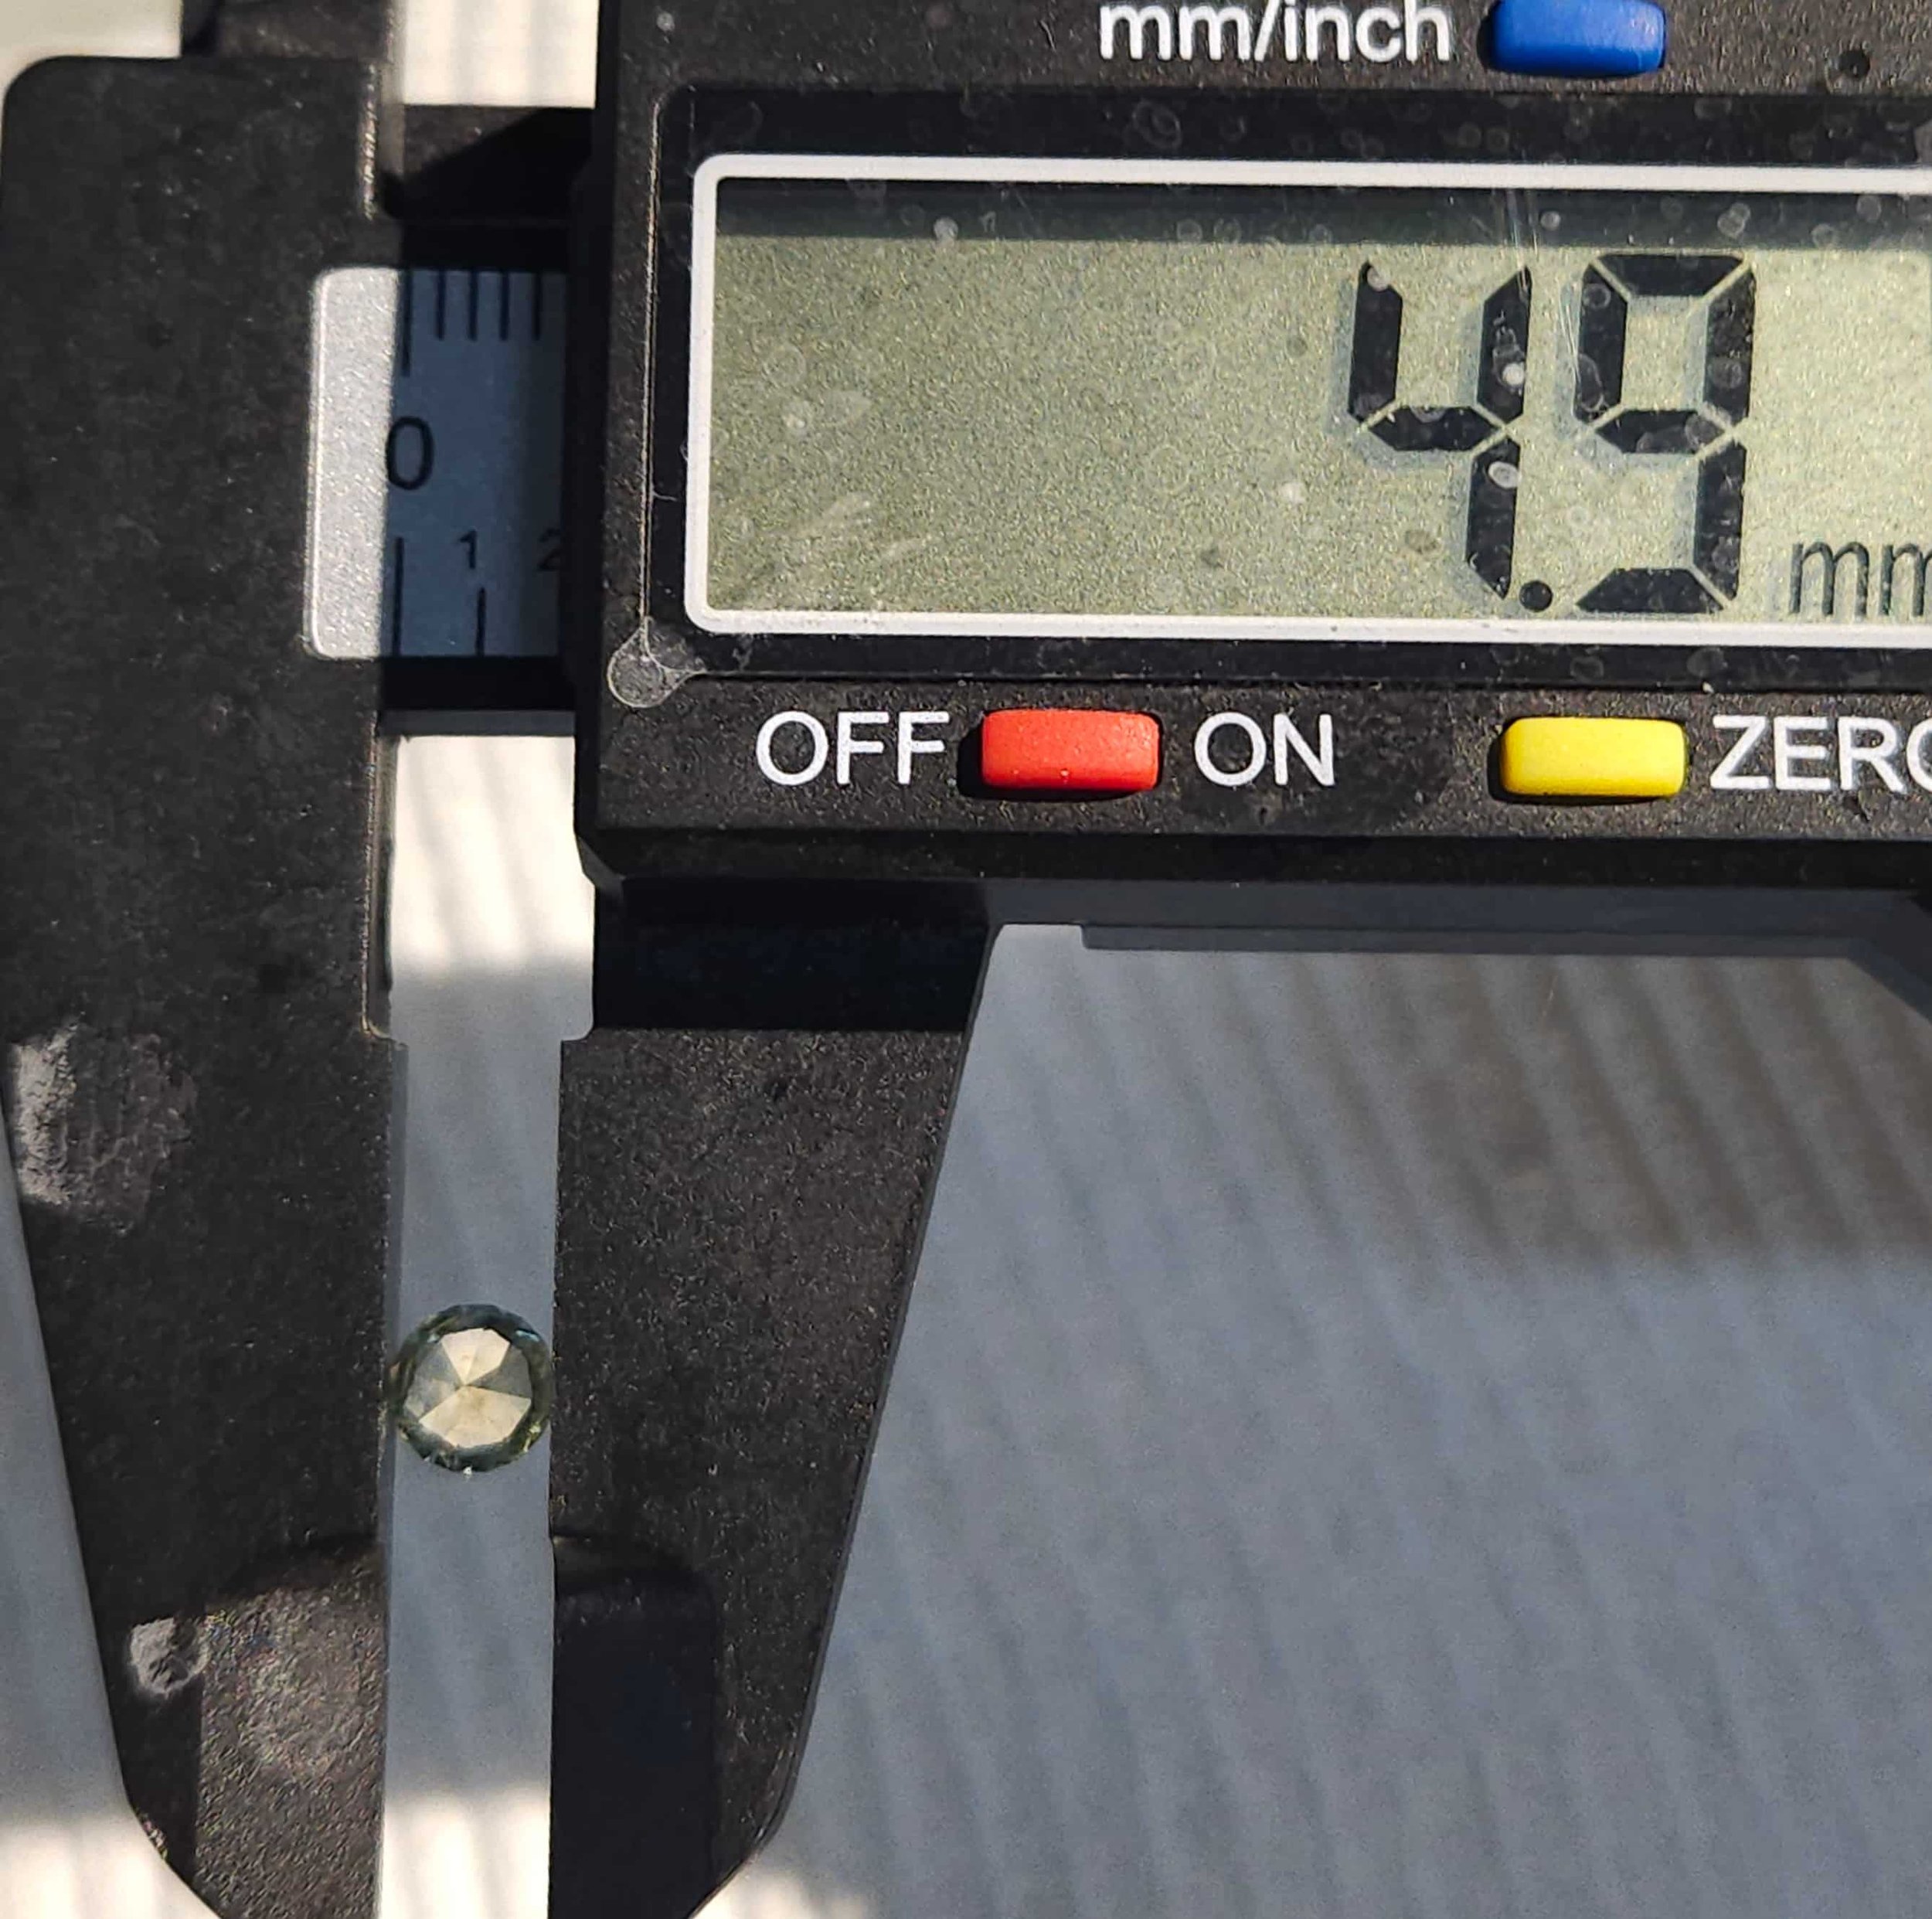
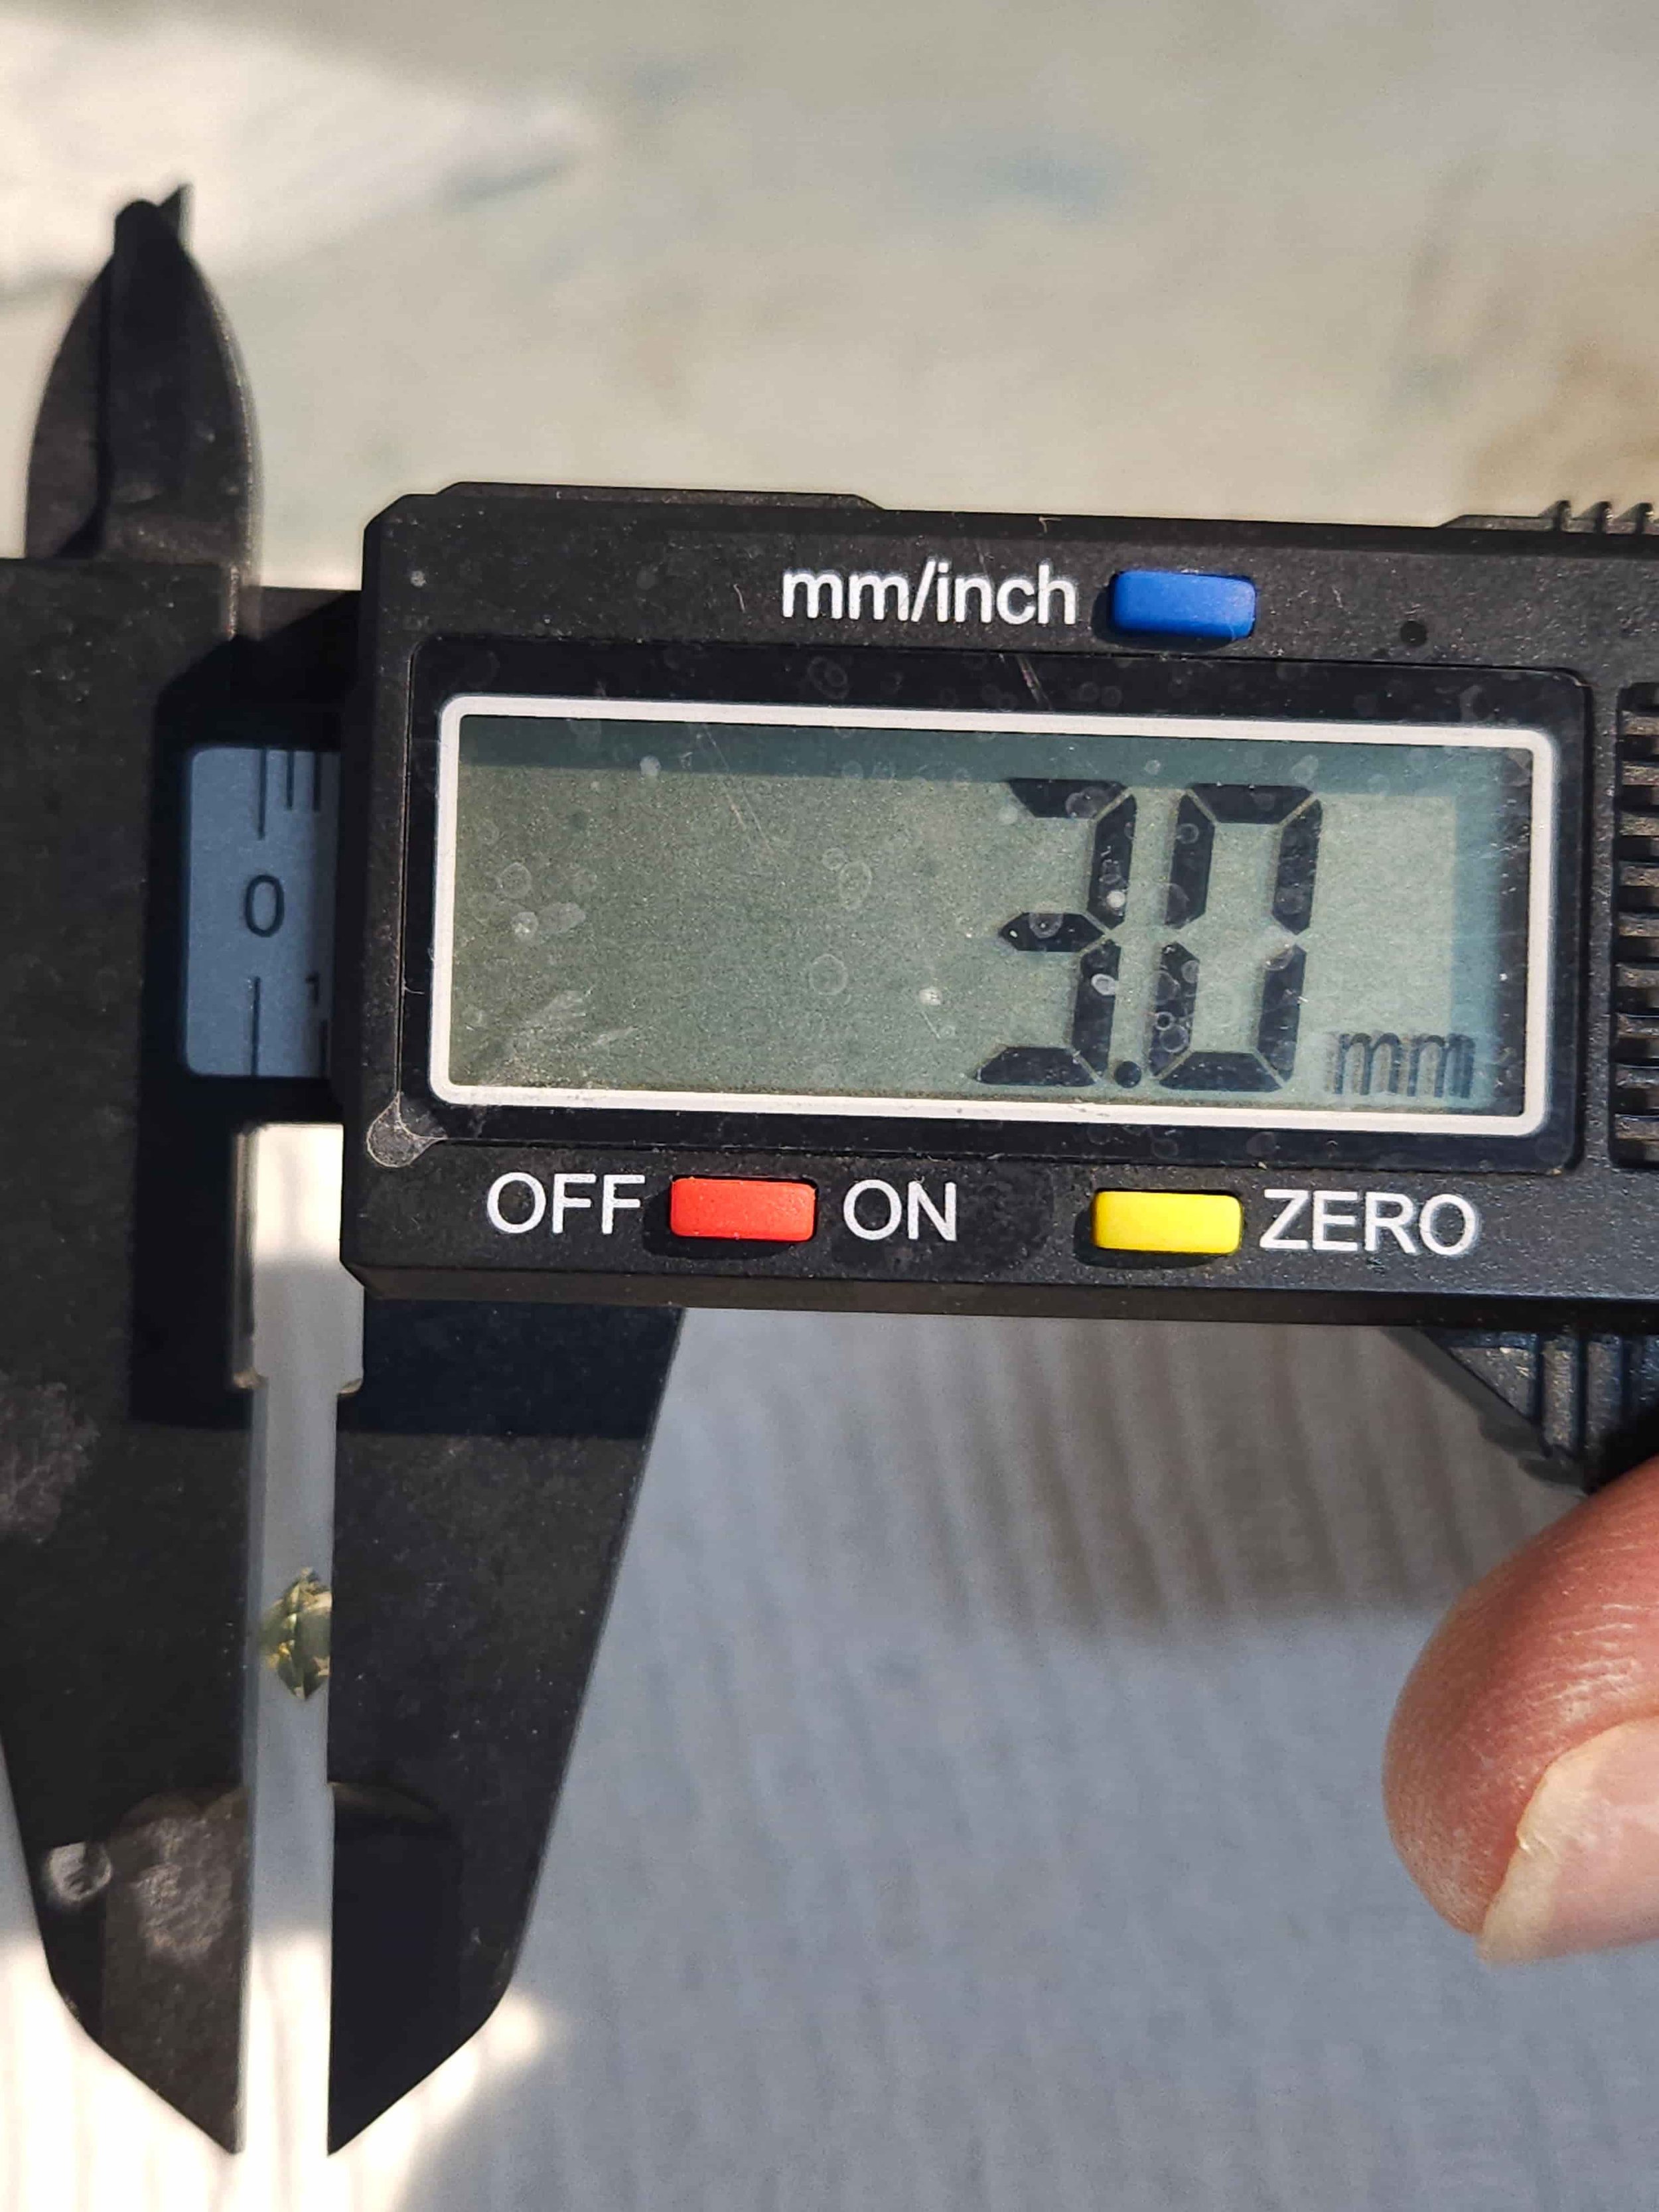
Verifying Dimensions: Final Quality Assurance "Documenting the exact physical specifications of the finished gemstone. Taking precise caliper measurements of both the width (girdle diameter) and total depth is an essential step in our quality control process. These exact metrics ensure the stone perfectly matches the design layout and provides jewelry setters with the critical data they need for a flawless custom mount.
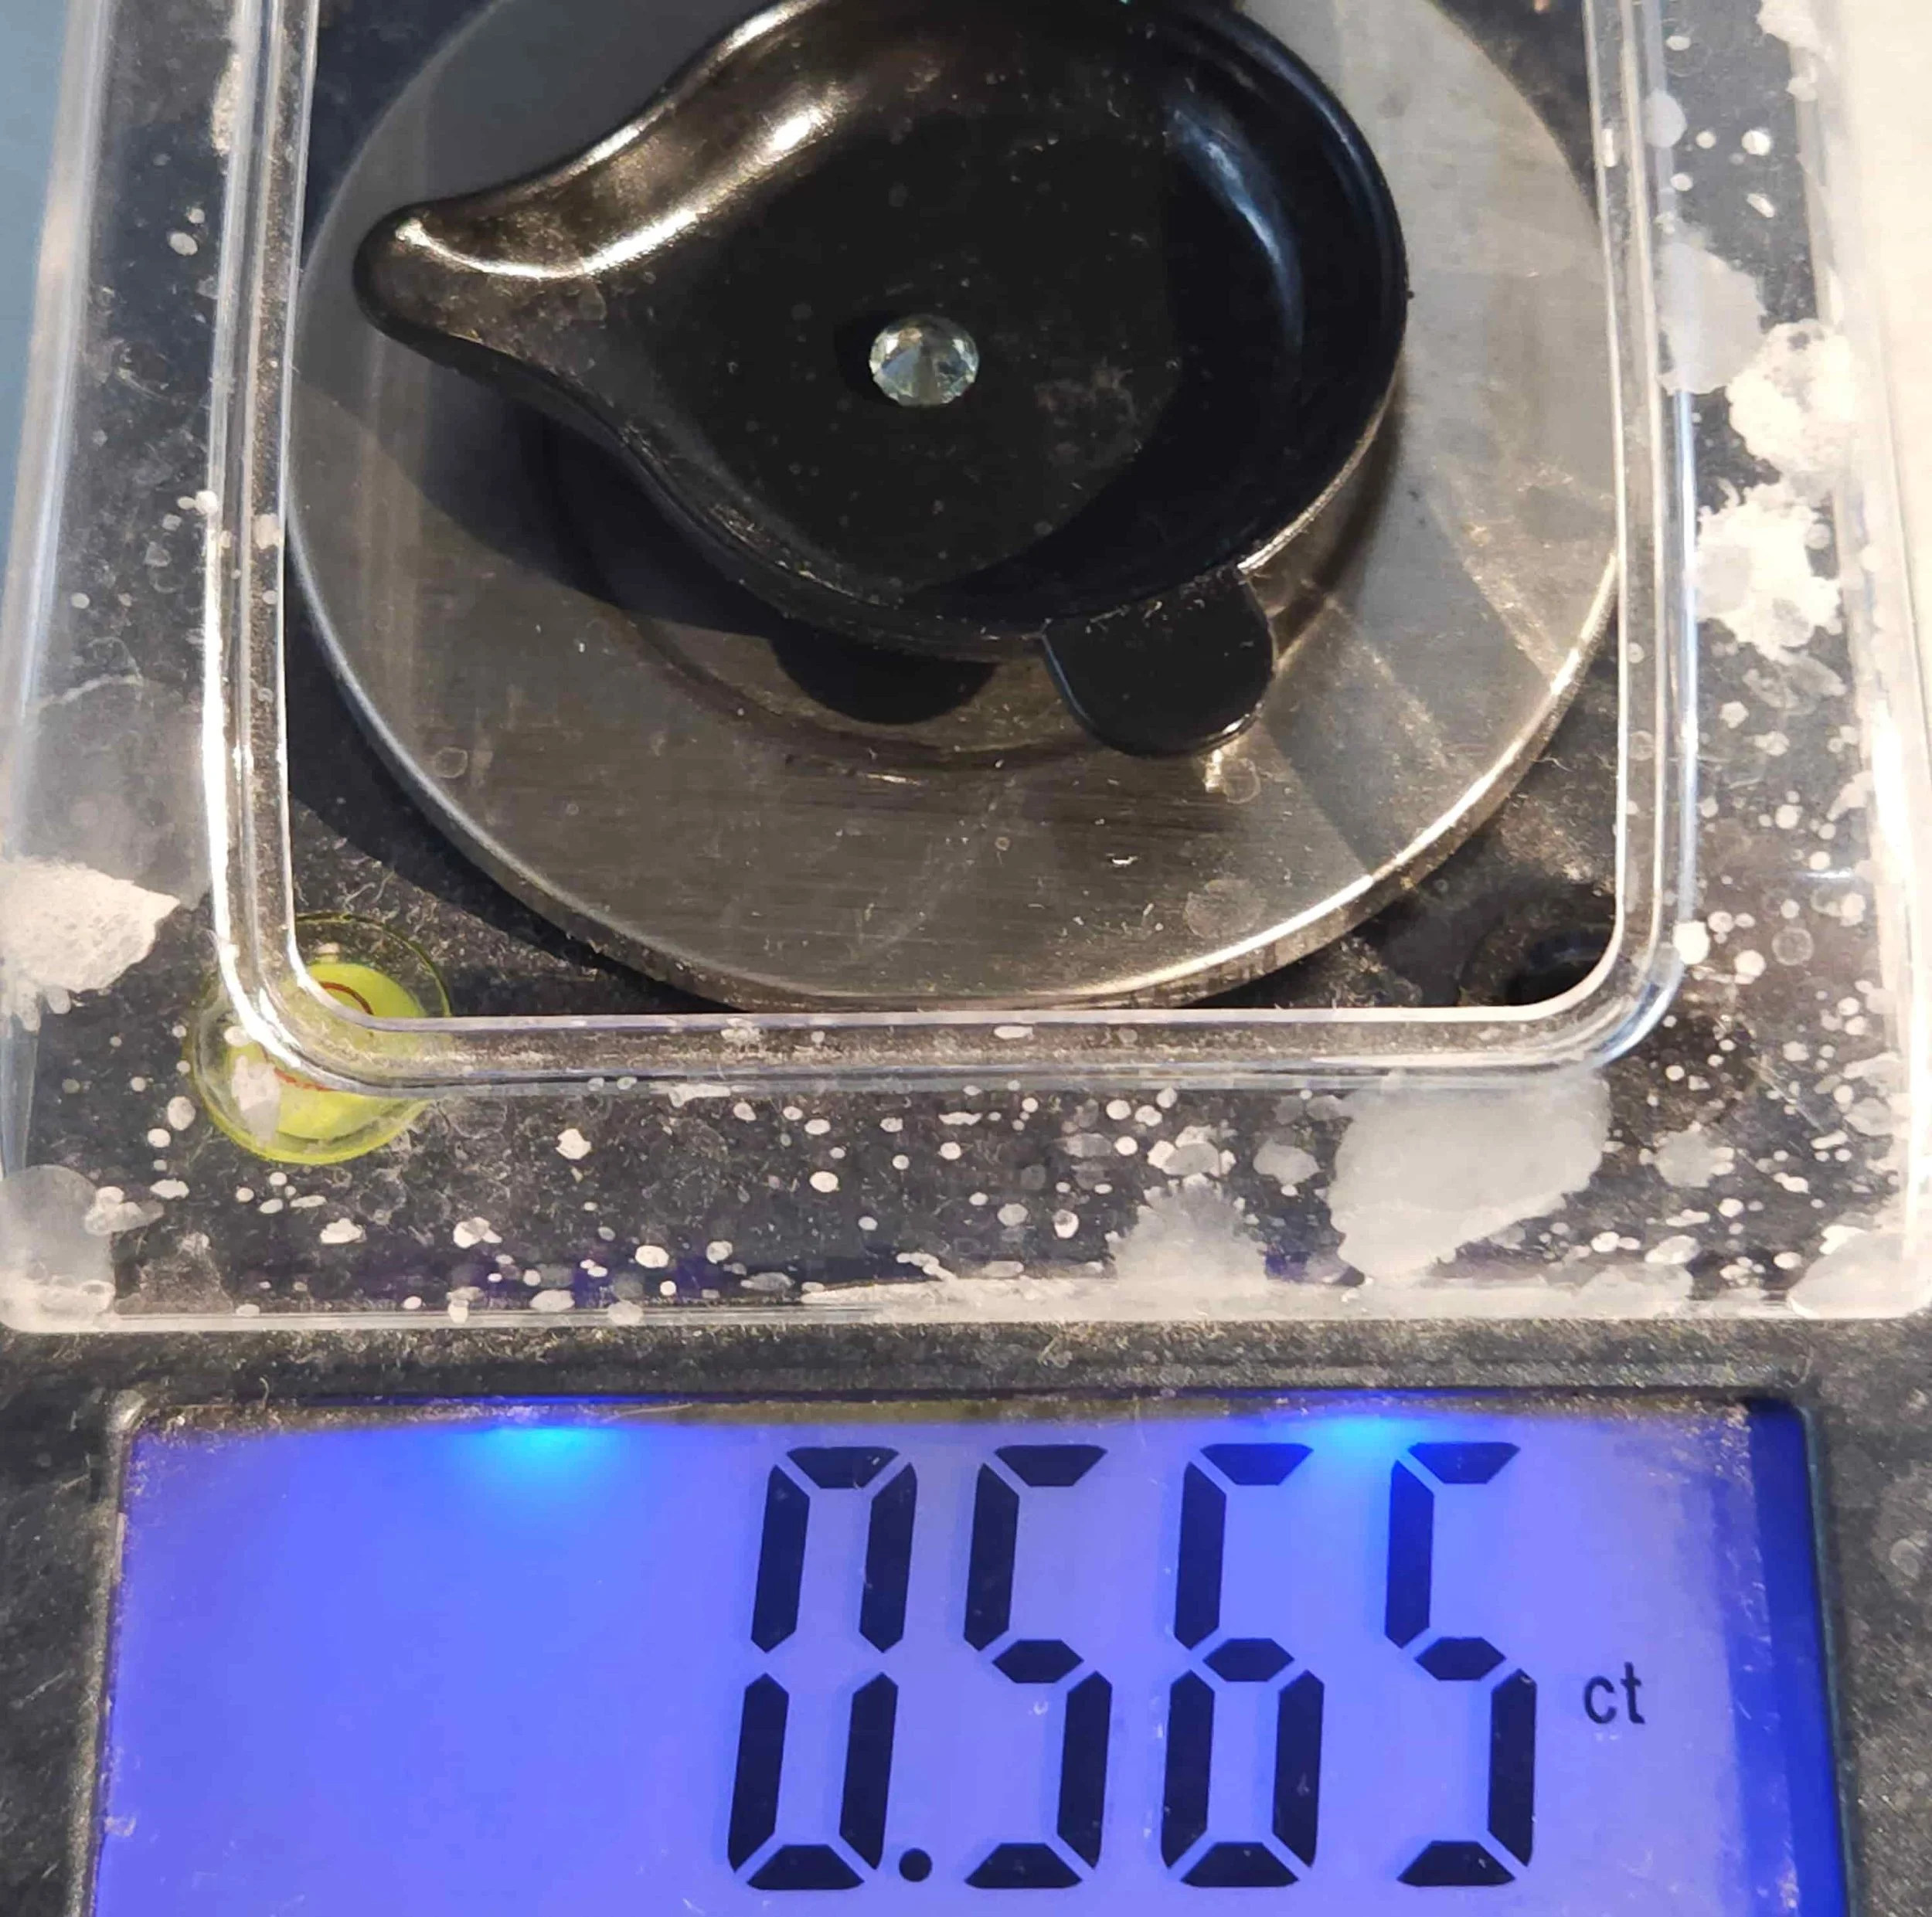
The Final Carat Weight: Optimizing Yield "The final weigh-in on the carat scale confirms a finished weight of 0.565 carats. In precision lapidary work, my goal is always to strike the perfect balance between maximizing the stone's final weight and cutting strictly to the mathematically ideal angles required for ultimate brightness and fire. in this case I hit about %38 return.
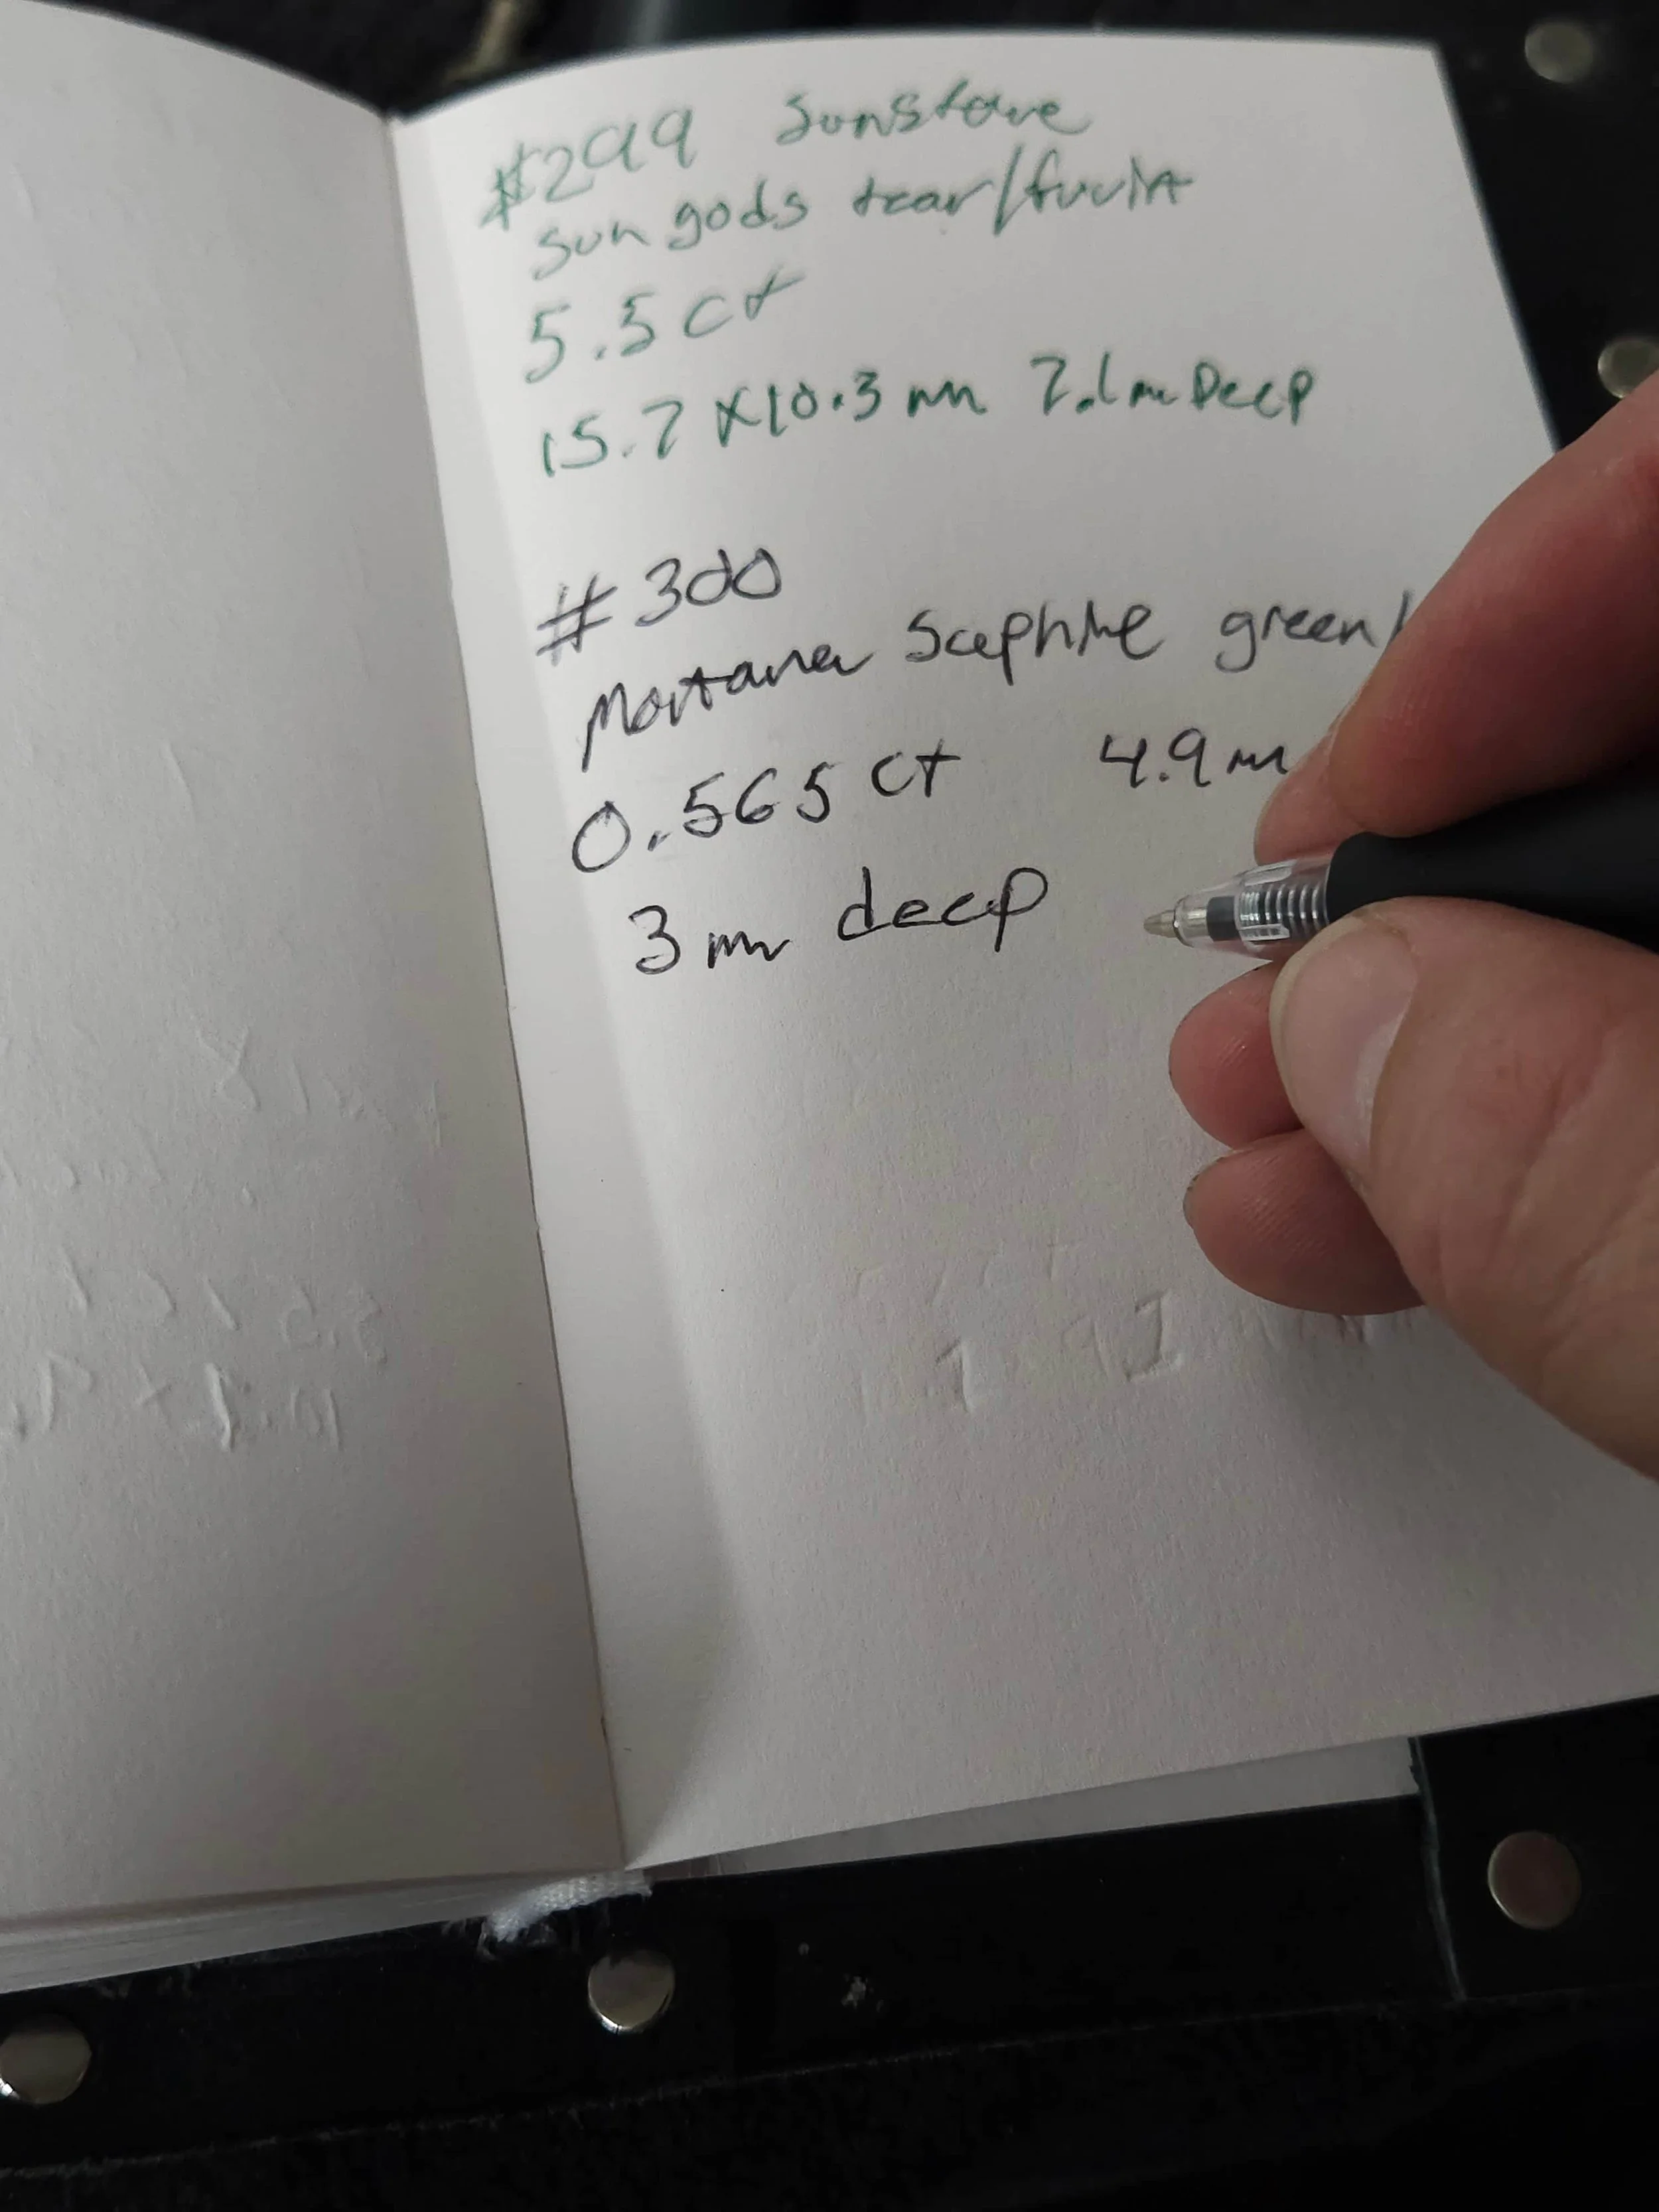
The final administrative step before moving to Step 4. Every gemstone faceted at The Lapidary Office is meticulously documented in my master logbook. Recording the final carat weight, species, origin, and exact millimeter dimensions ensures permanent traceability and consistent quality metrics across every custom project I handle.
Step 4: Final Media, Quality Approval, & Fulfillment
The culmination of our precision faceting process. Once your gemstone is logged and fully prepared, we capture high-definition studio photography and video to showcase its final light performance, meet-point accuracy, and true color payout. I will send this comprehensive media package directly to you for final approval, along with images of your gemstone securely housed in its protective gem jar. Following your review, the final balance invoice is issued, and upon settlement, your custom-cut masterpiece is securely packed and shipped insured for the job amount.
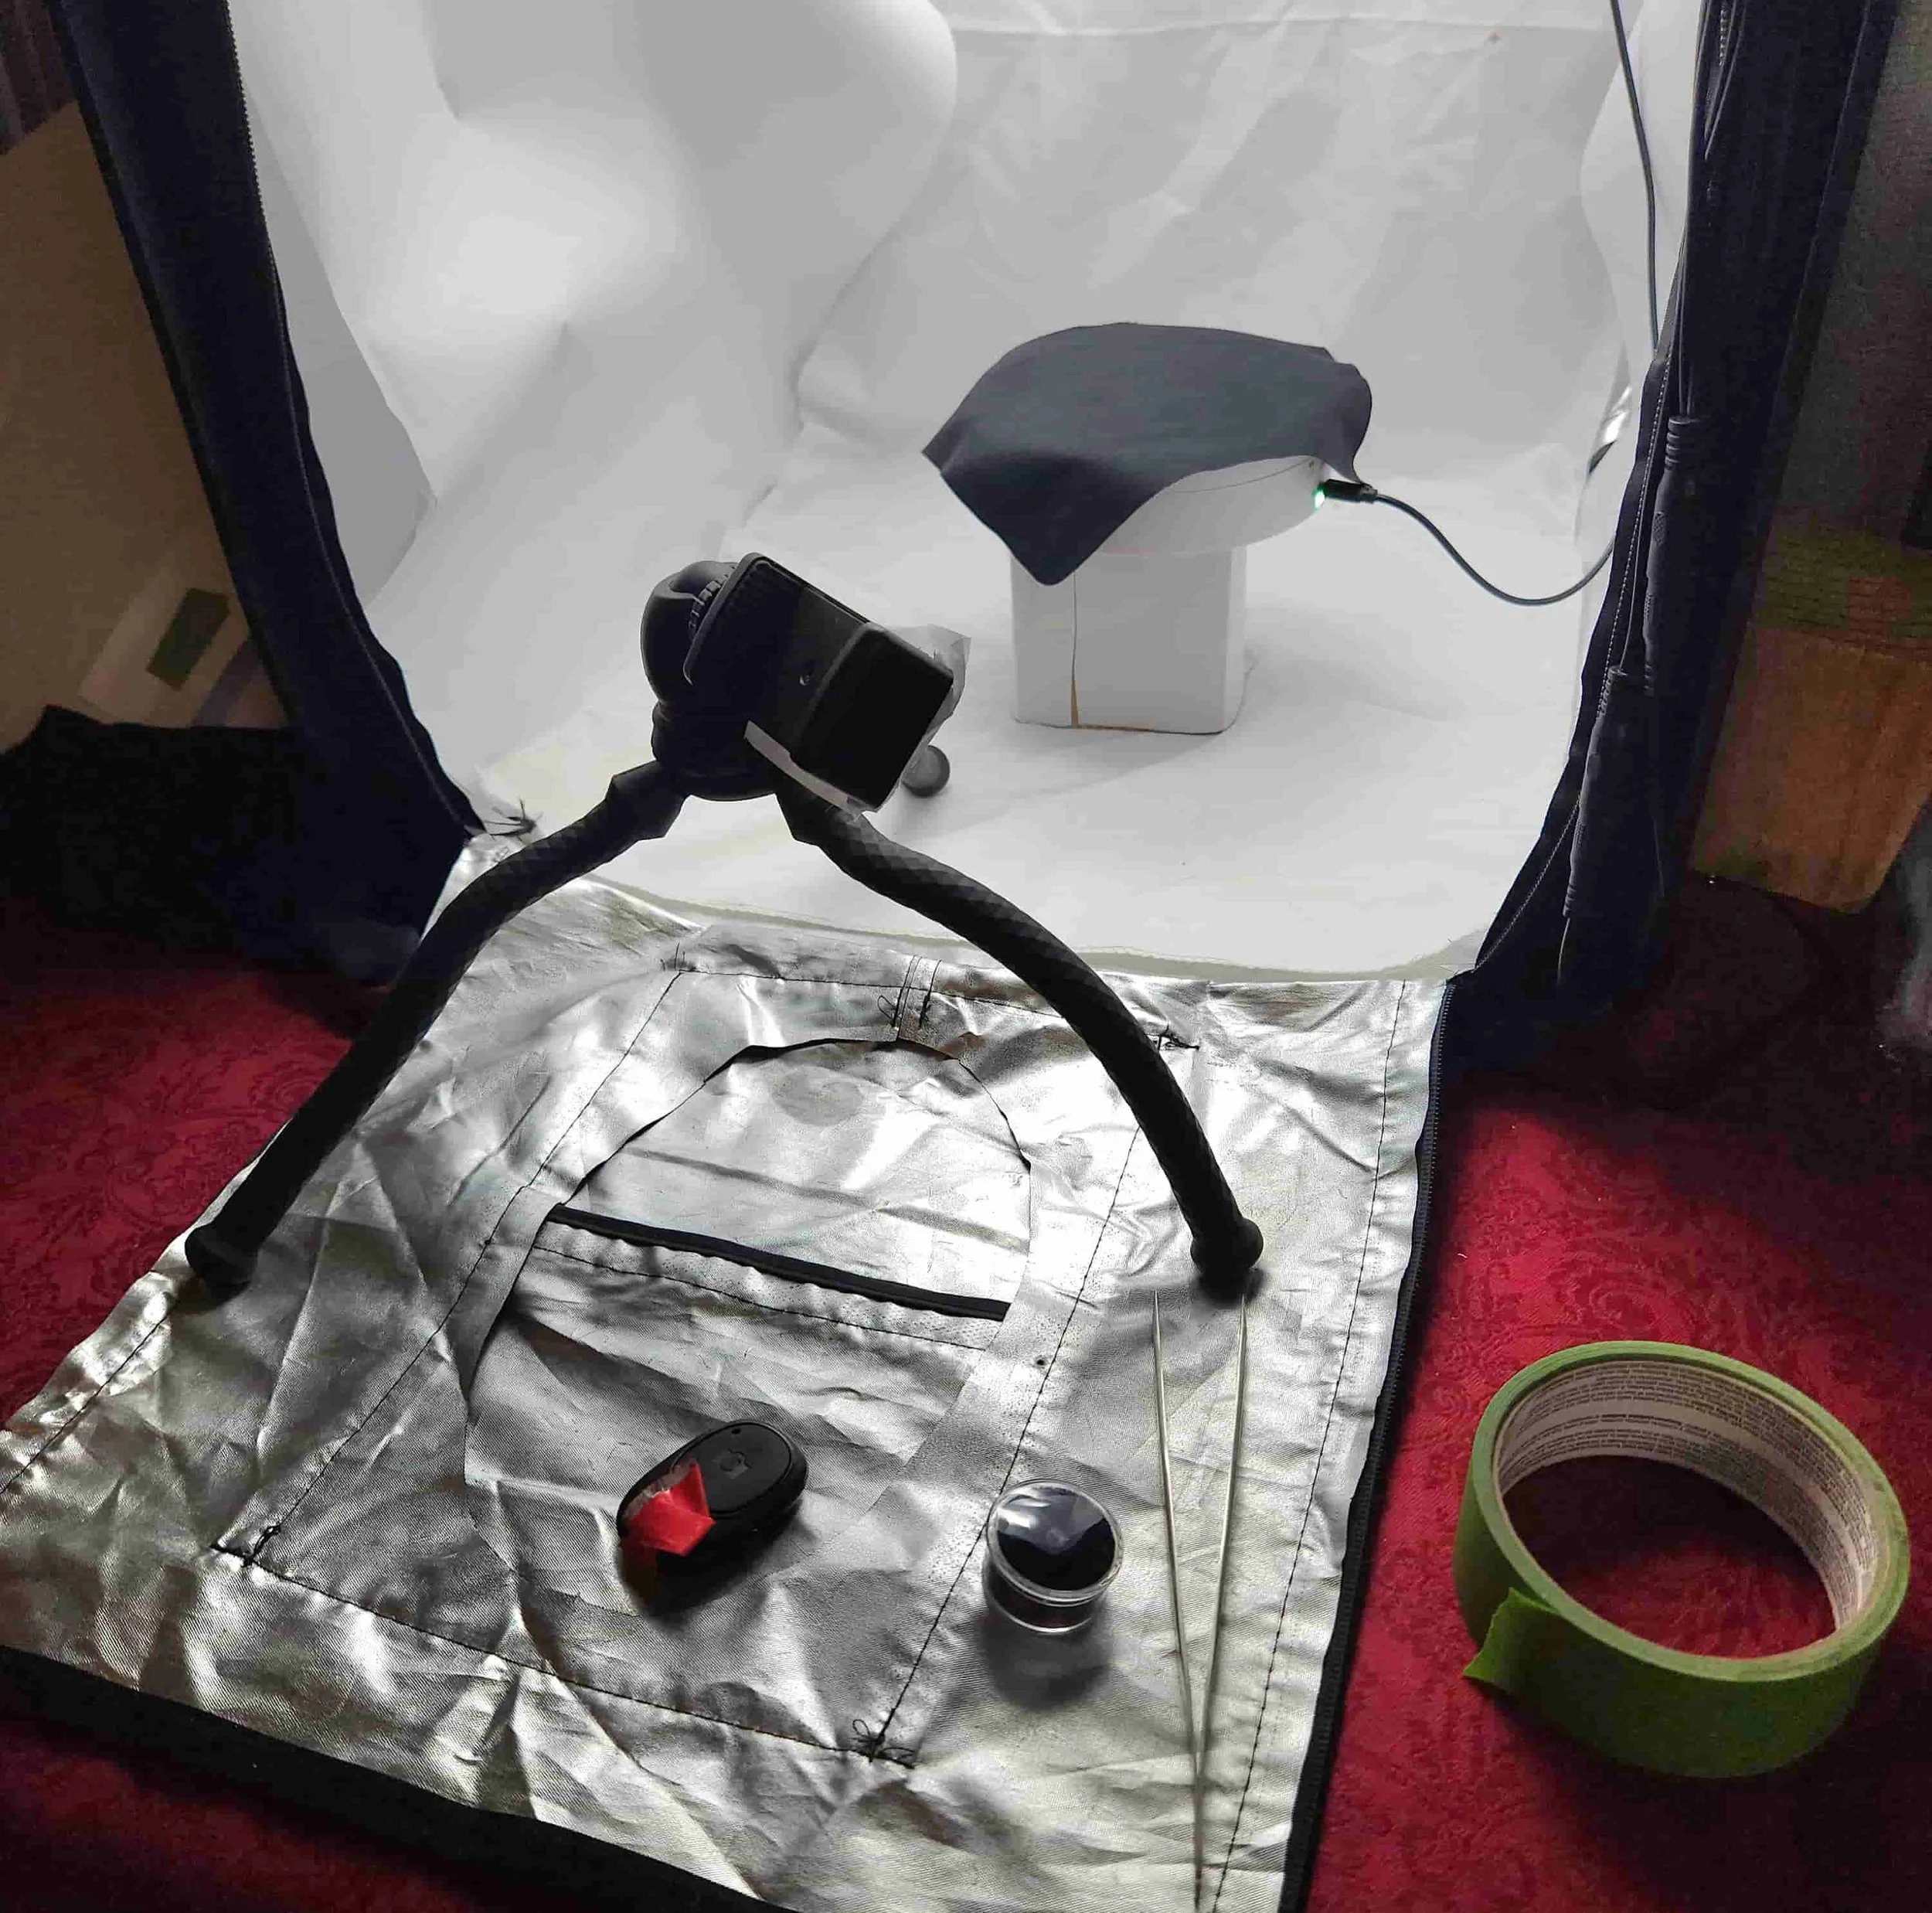
The final destination before packaging. Every gemstone I cut enters our macro-photography station to document its finished fire, clarity, and meet-point alignment. Providing high-resolution video and photos ensures our clients see exactly how the stone performs under optimal lighting before it is securely sealed for shipment.
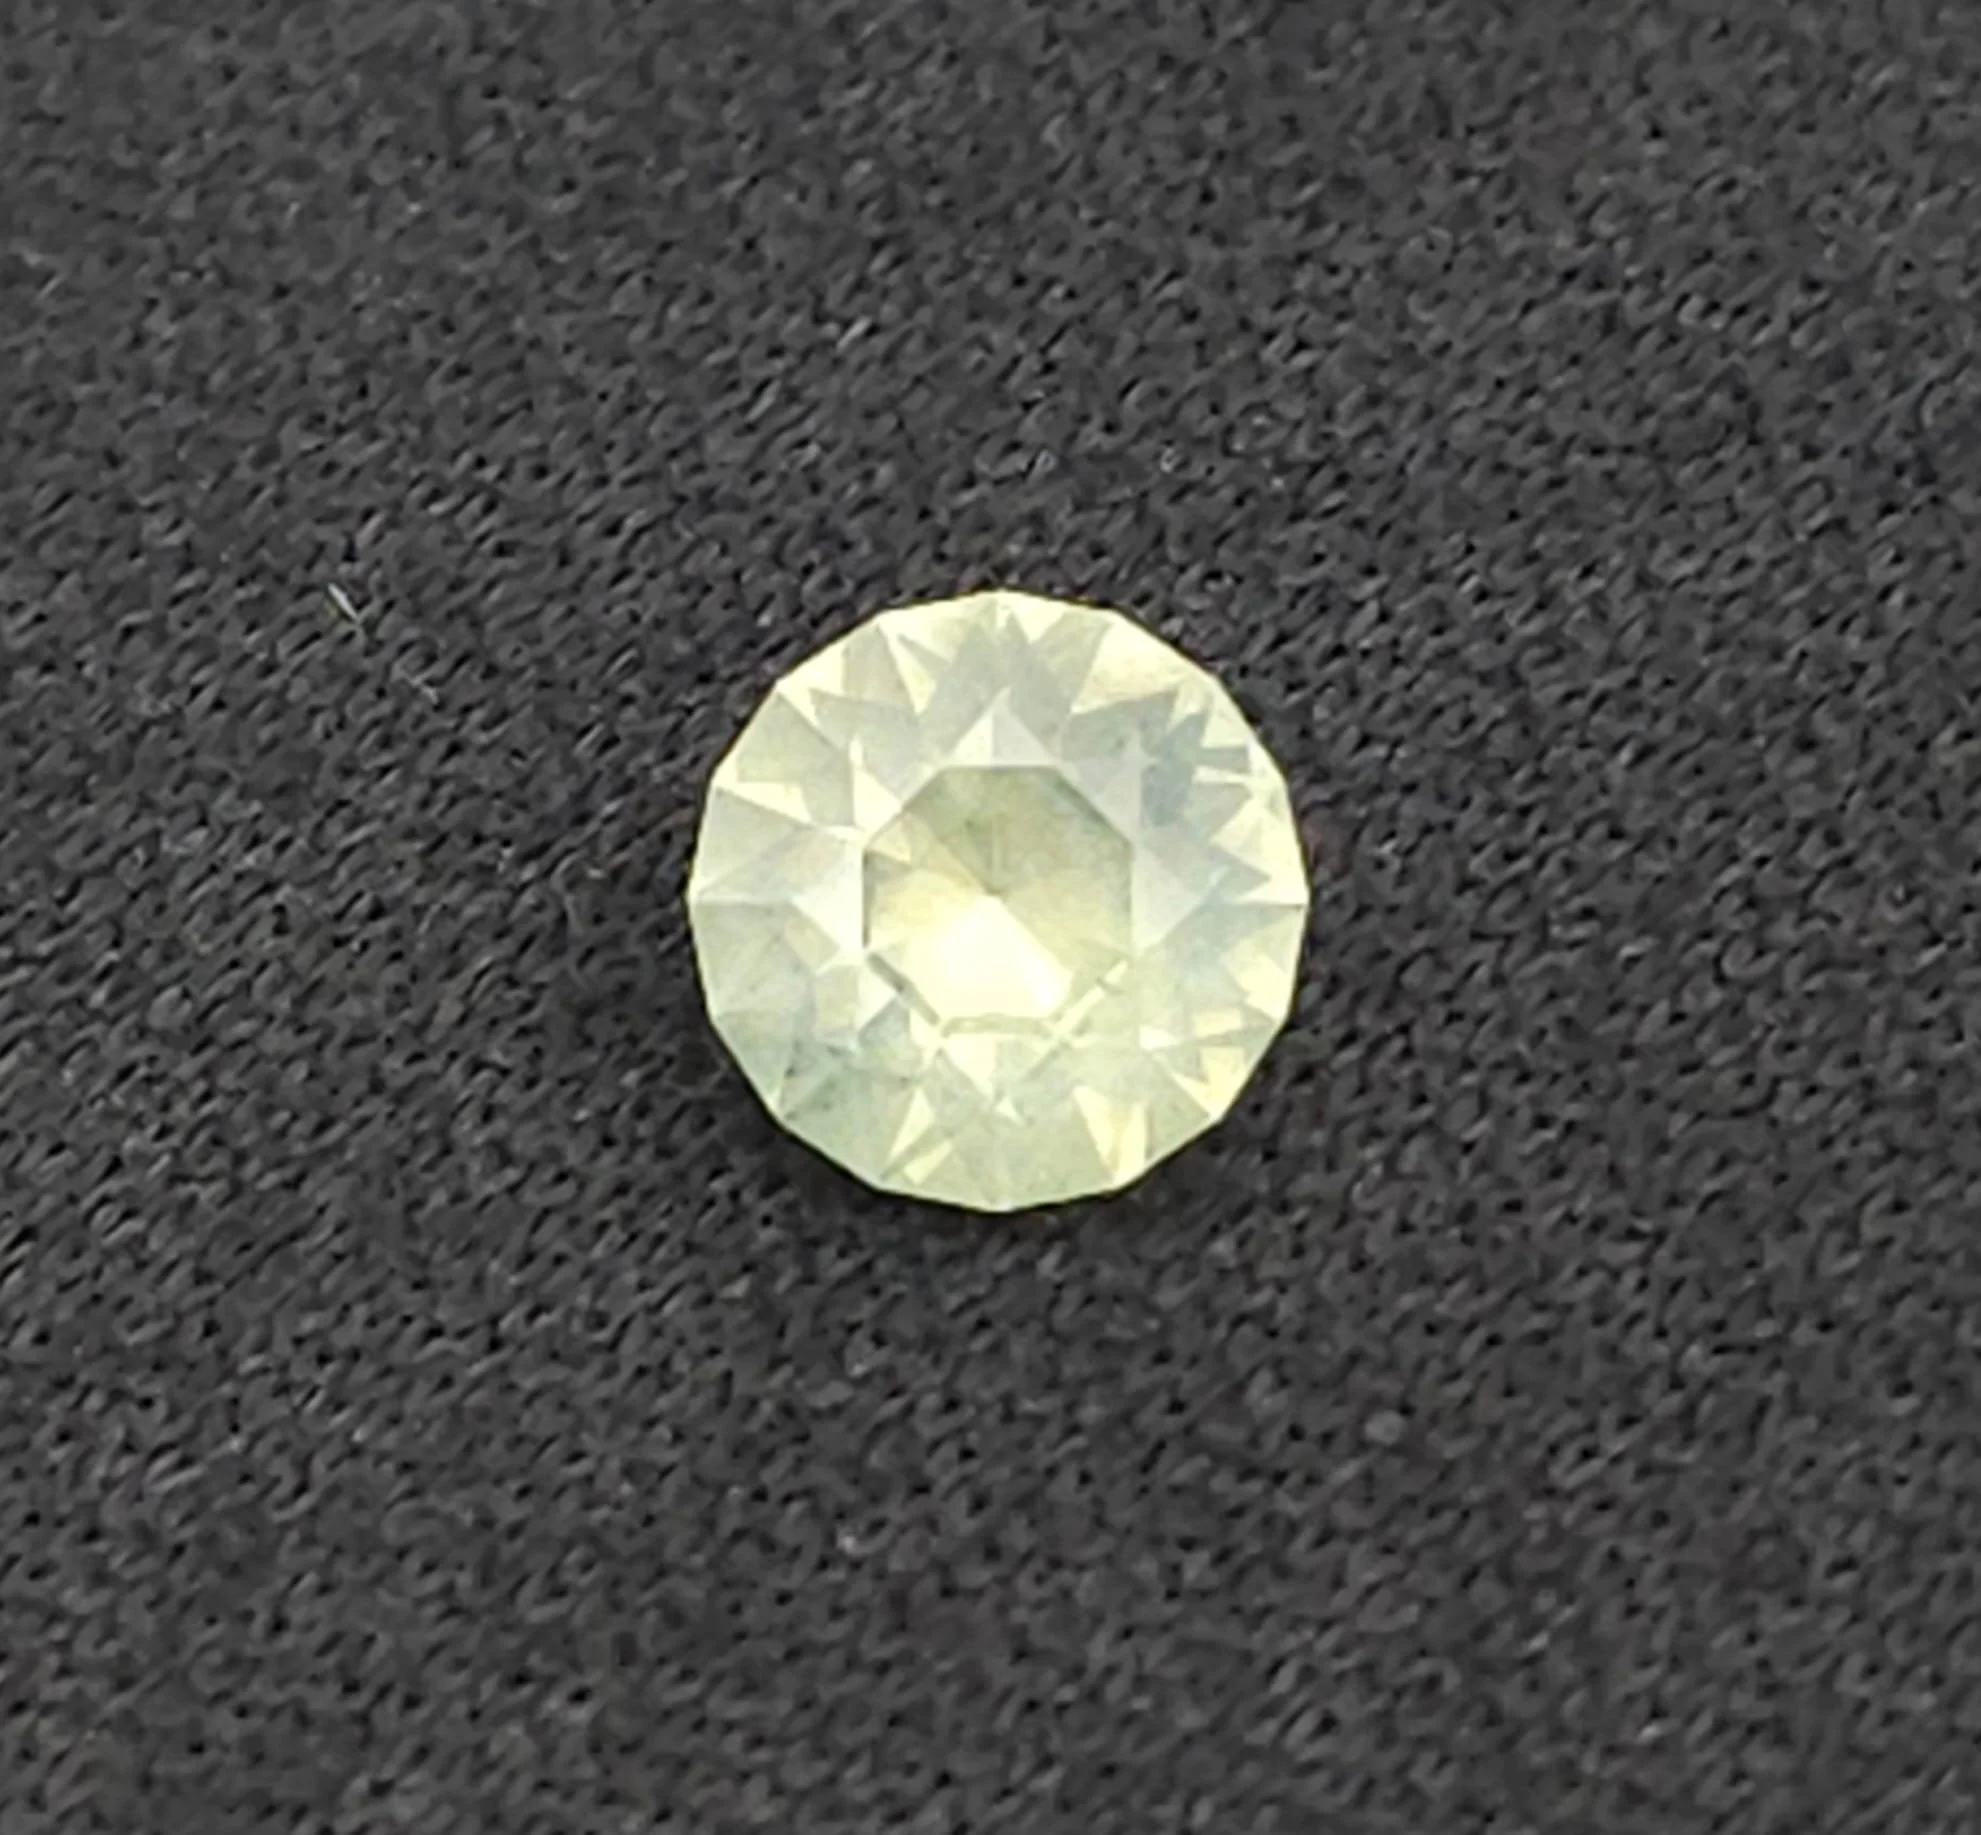
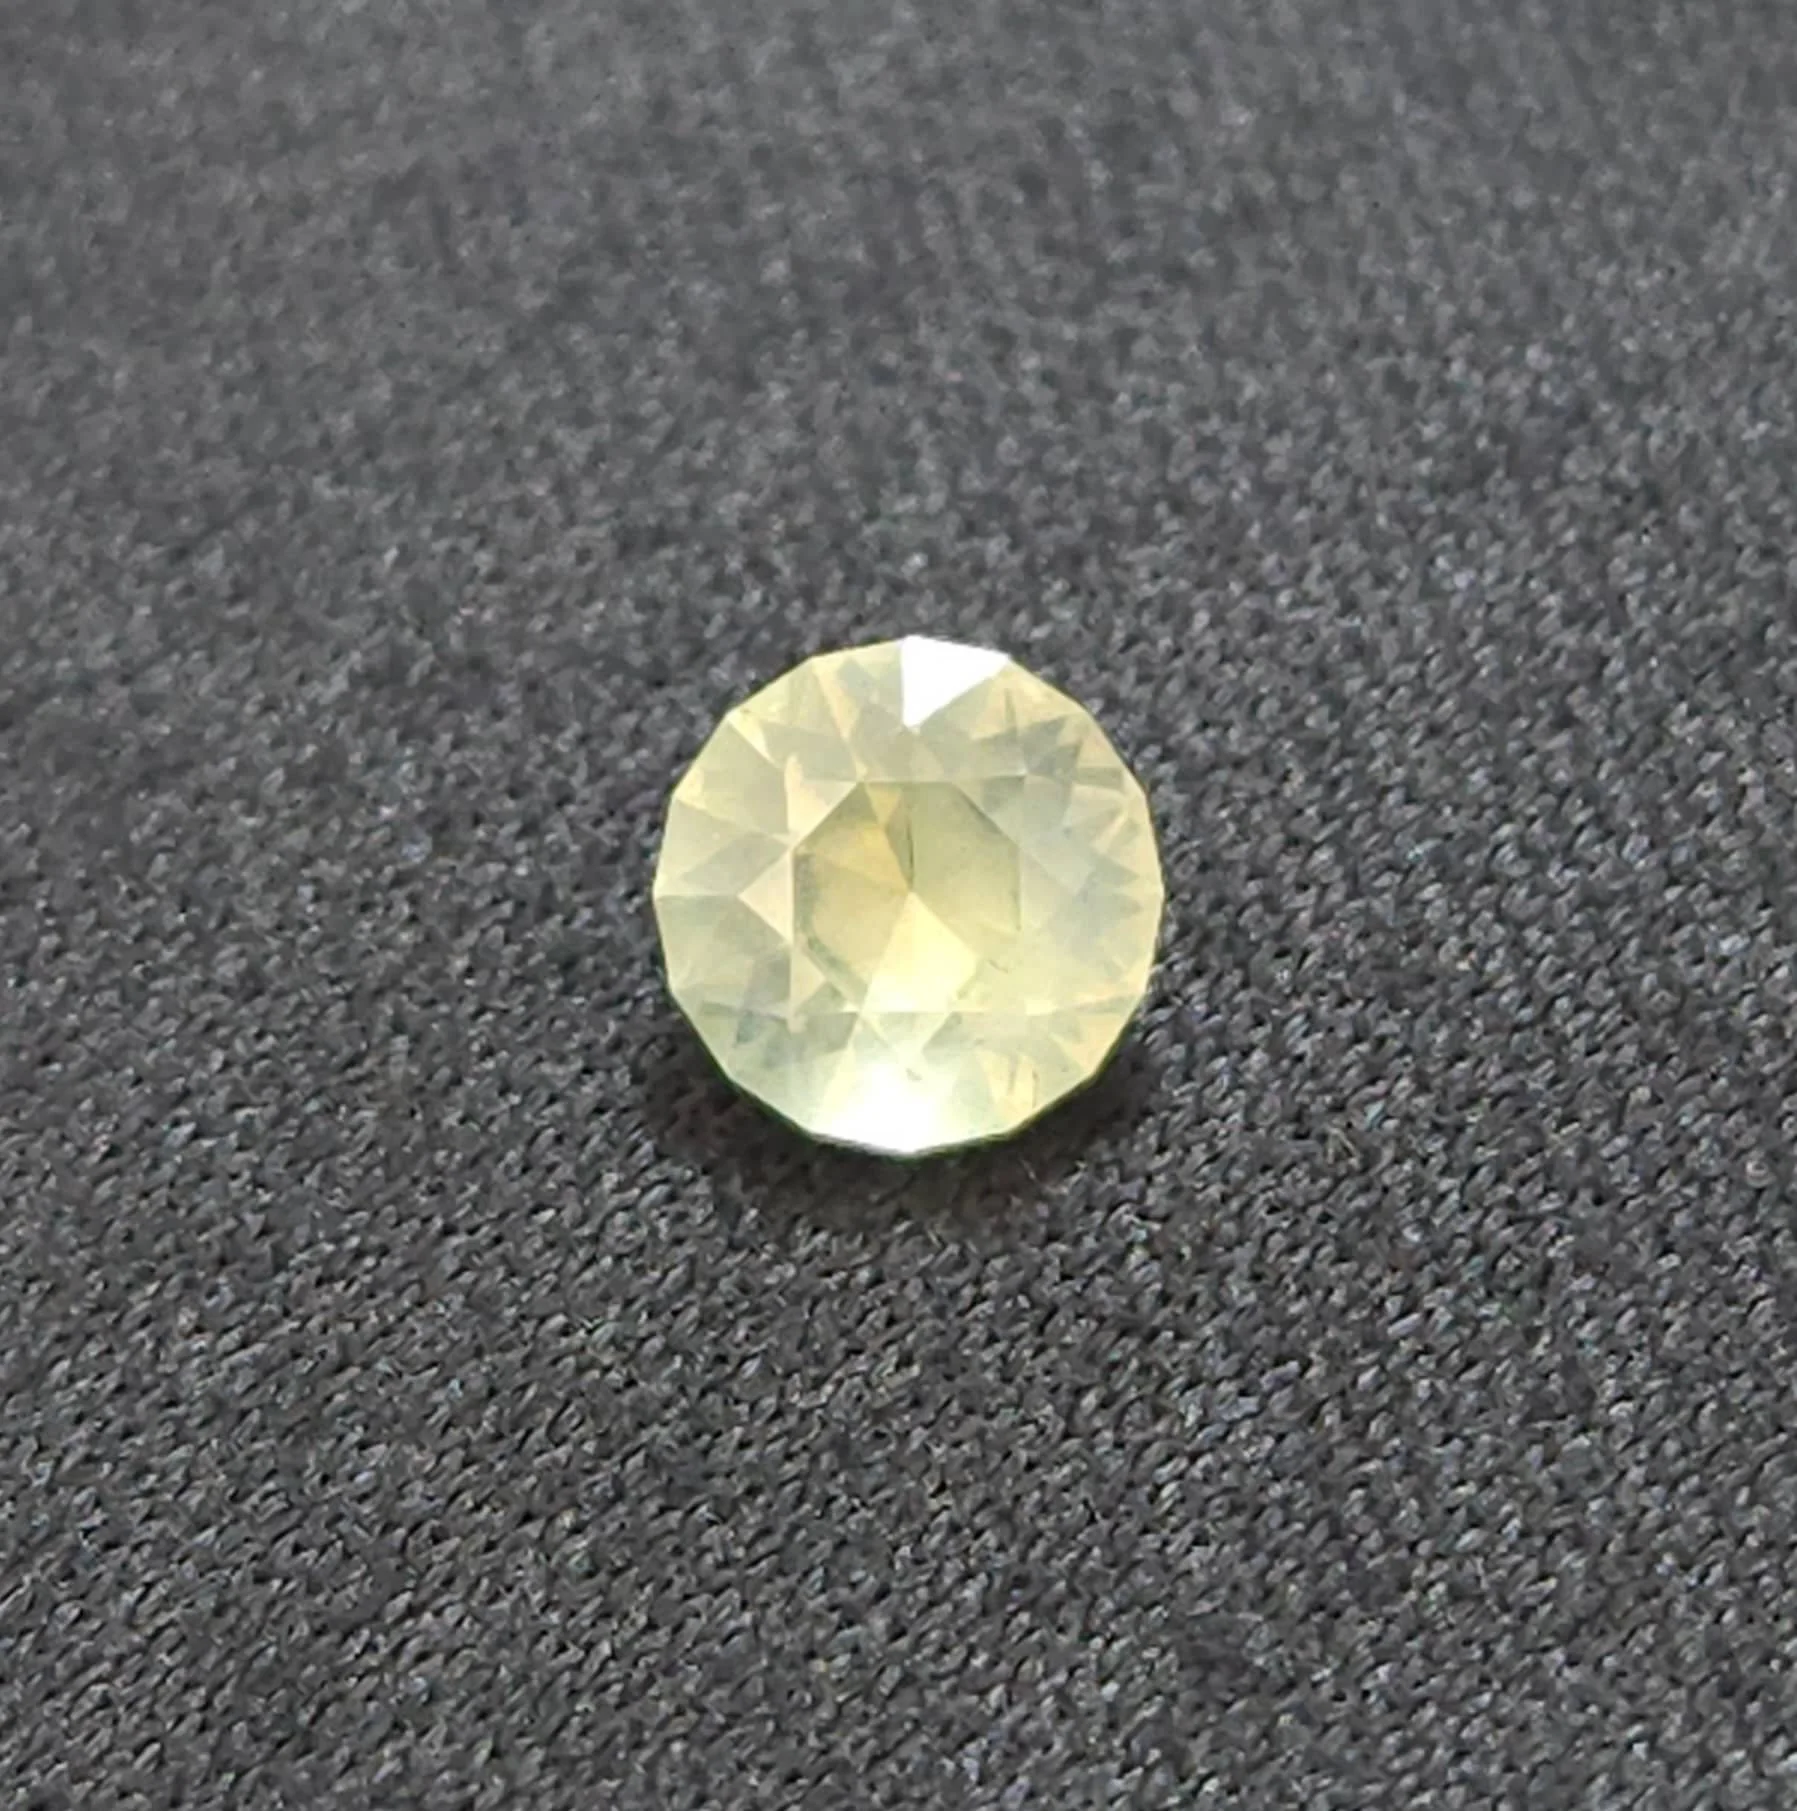
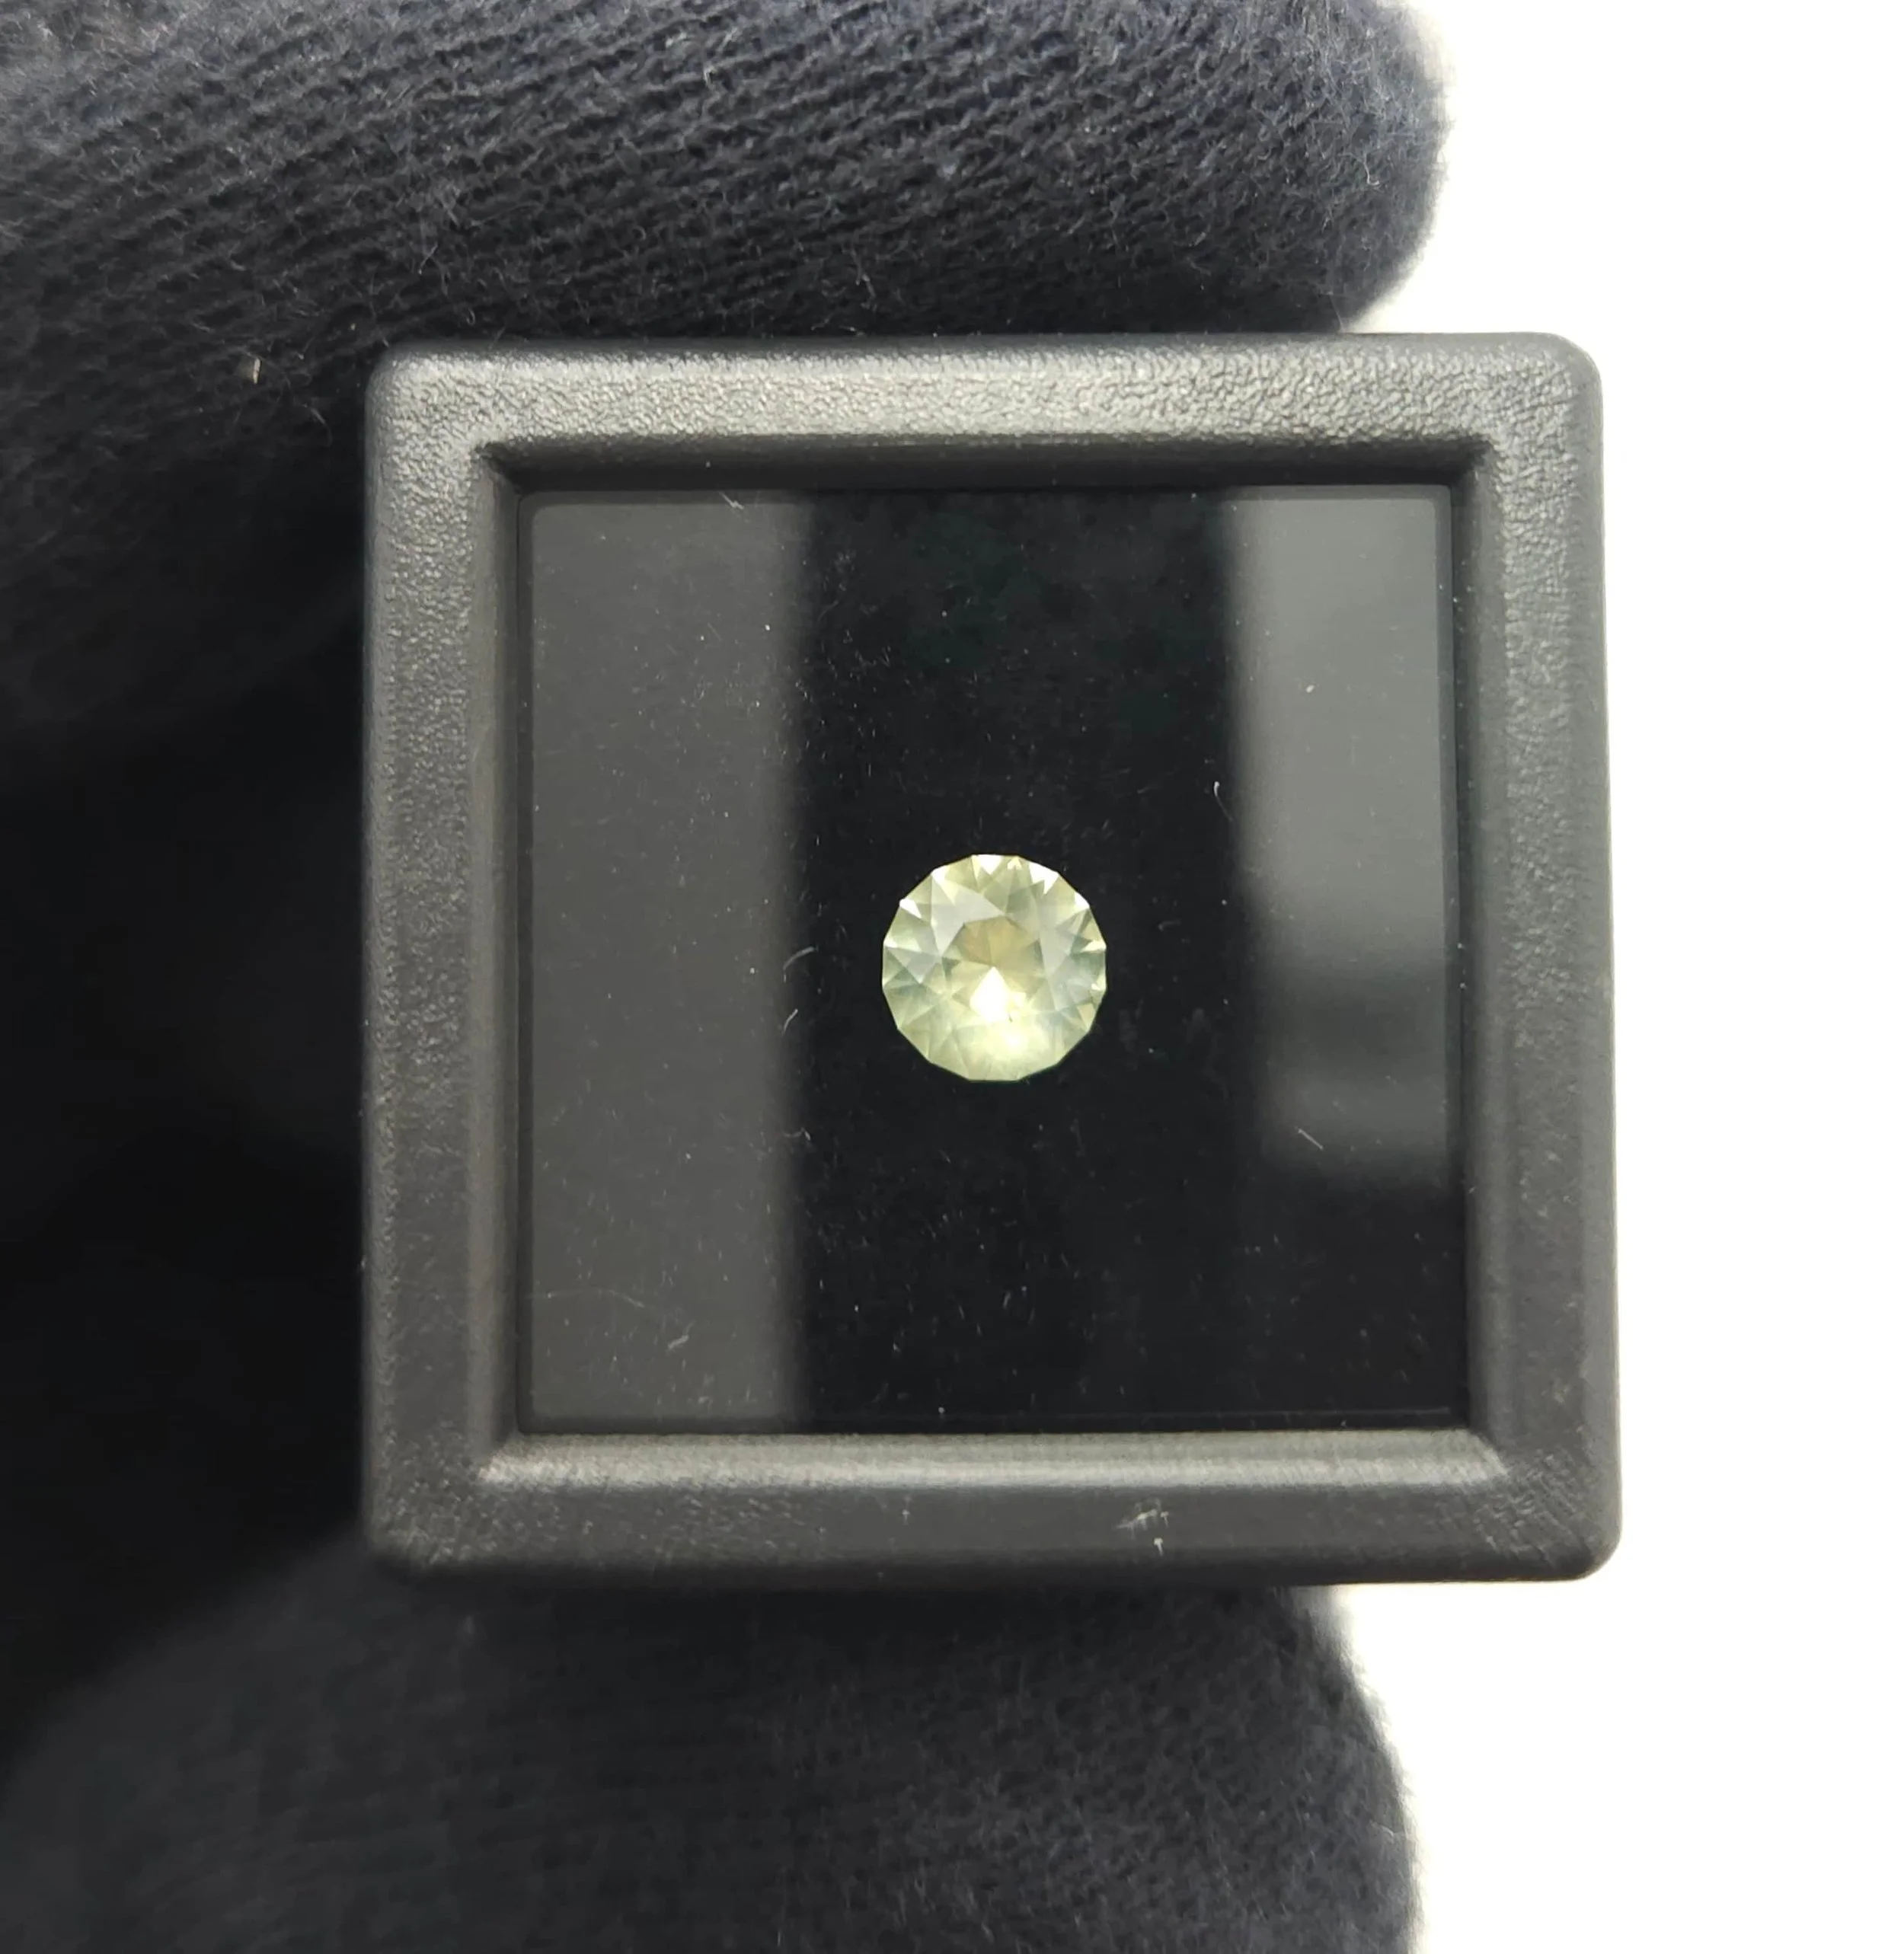
The completed gemstone, captured in high-definition from multiple profiles. At The Lapidary Office, I love celebrating a successful cut, but your privacy and proprietary designs come first. We always secure explicit client permission before sharing any photos or videos of a finished product publicly on our platforms. Once cleared, these showcases serve as a testament to the exact geometric standards and rich color return I bring to every custom project
Let’s Bring Your Vision to Life
Have a rough stone or a design idea in mind? Reach out today to discuss custom cutting options, material evaluation, and scheduling for your next project.